Configuring Apple apps
To take full advantage of the new features, be sure to install a version supported by BlueMind. To find out which versions are supported, see the dedicated page: Compatibility.
Screens and icons may vary slightly from one version to another.
Add an account
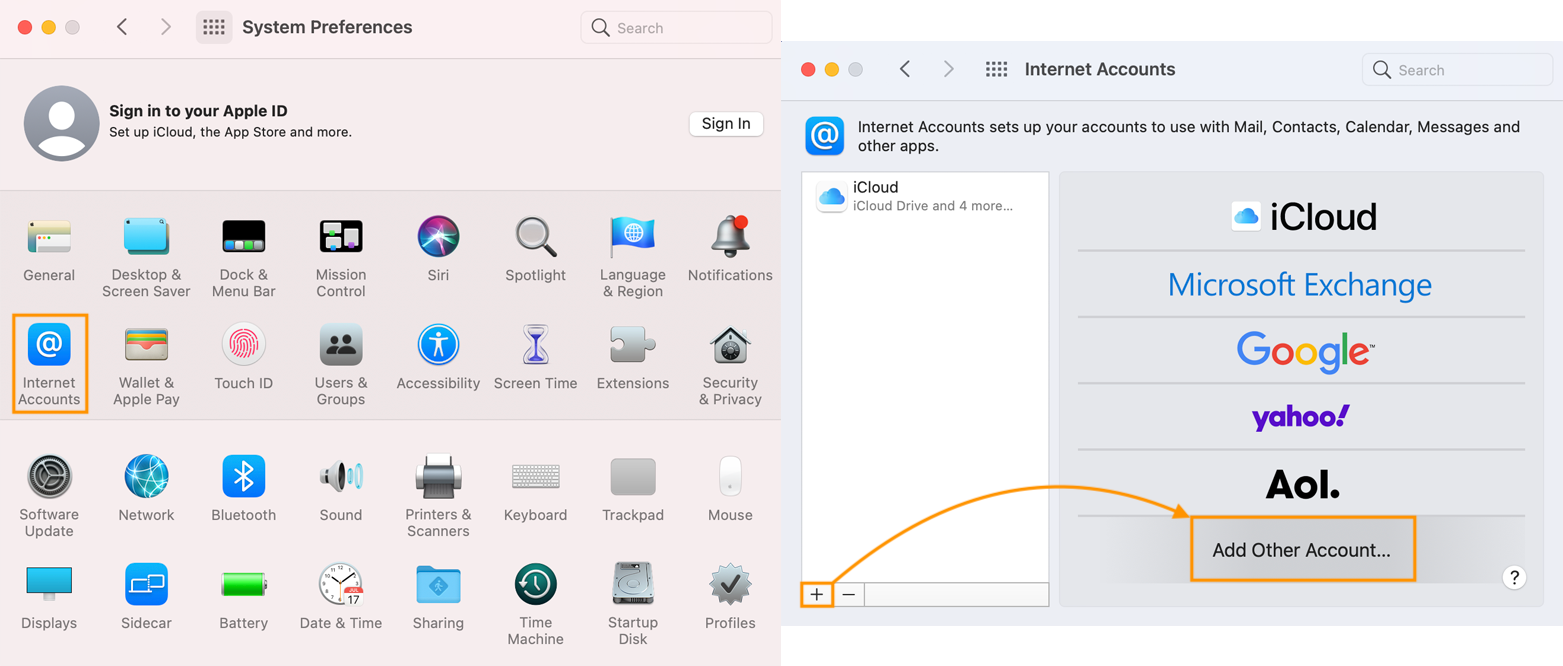
To add an account, go to System Preferences :
- Open System Preferences and click on "Internet Accounts".
- Click "+" then "Add another account":
You need to create an account for each application. You need to create an account for each application. To use all BlueMind applications, you need to create 3 accounts: Mail, Calendar and Contacts
Setting up a Mail account
- Follow the procedure to add an account
- Choose "Mail account":
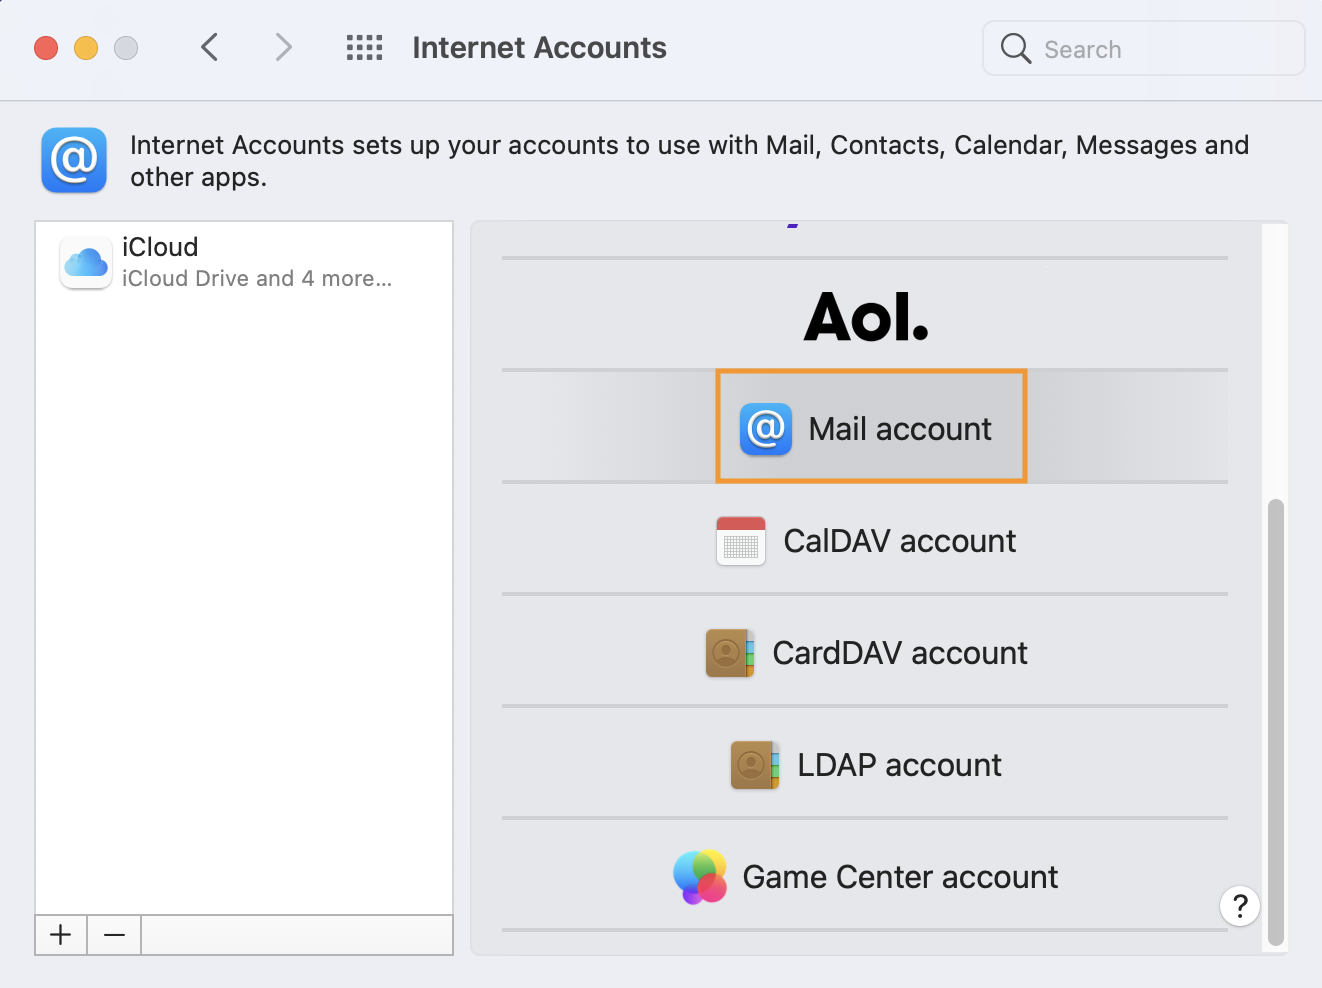
- Enter the requested information, then click "Sign in"
- Check and correct, if necessary, the account login information, then click "Log in" again:

- E-mail address: e-mail provided by administrator
- Username: full username with domain
- Password: password supplied by the administrator to log in to BlueMind
- Account type: select IMAP
- Receiving server and Sending server: server address specified by the administrator, usually in the form server-name.domain.com
⚠️
If the server refuses to connect, check with the administrator to ensure that a ban on connecting without double authentication has not been set up. For further information, see: Editing users > Password. - Choose "Mail" application:
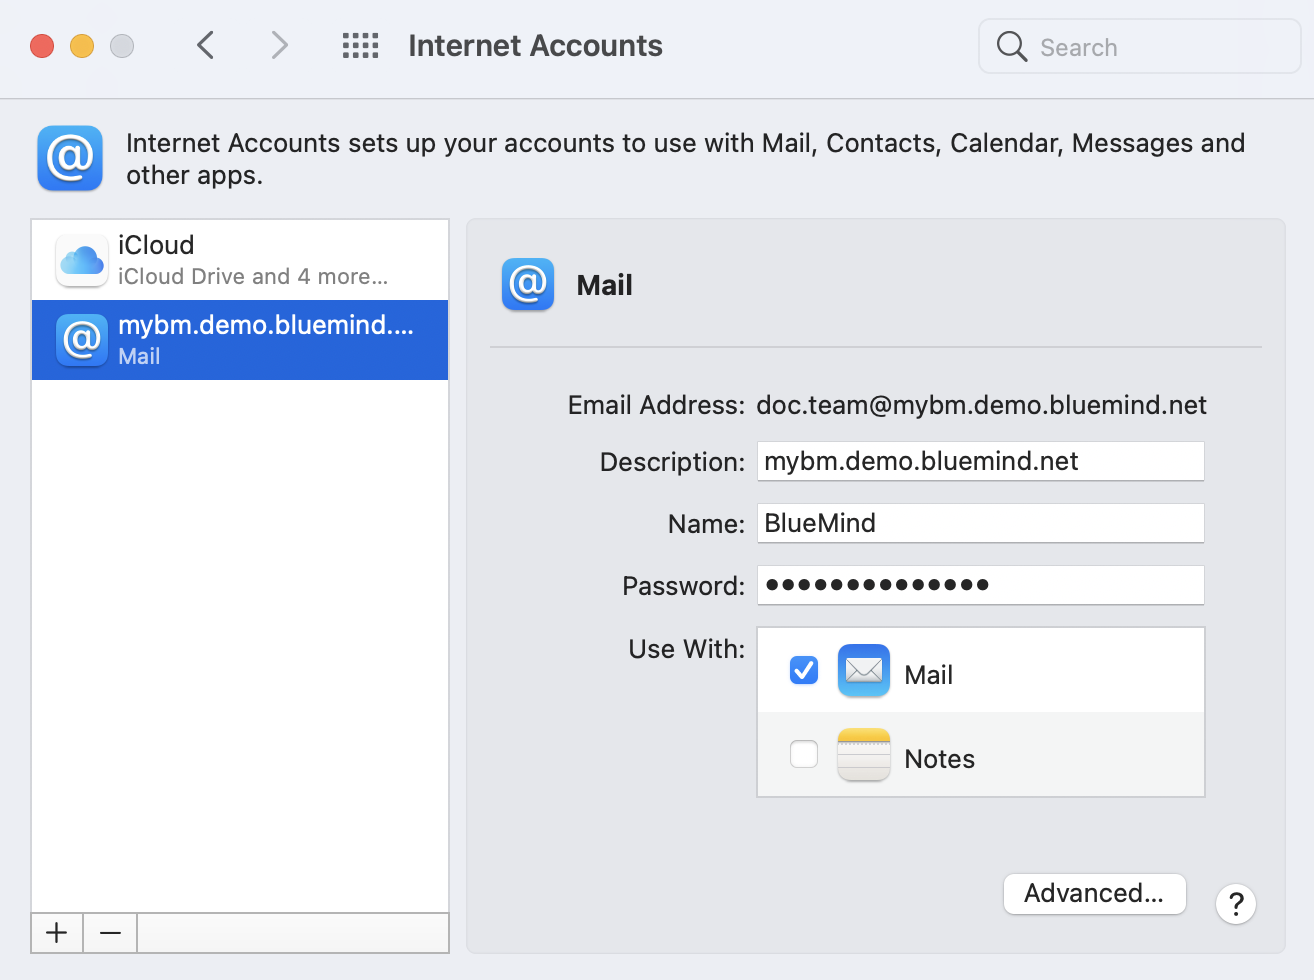
The Notes application is not offered by BlueMind, so there's no need to select it
Once the account has been added, open the Mail application
Setting up your Contacts account
- Follow the procedure to add an account
- Choose "Mail account
- Select "CardDAV account":
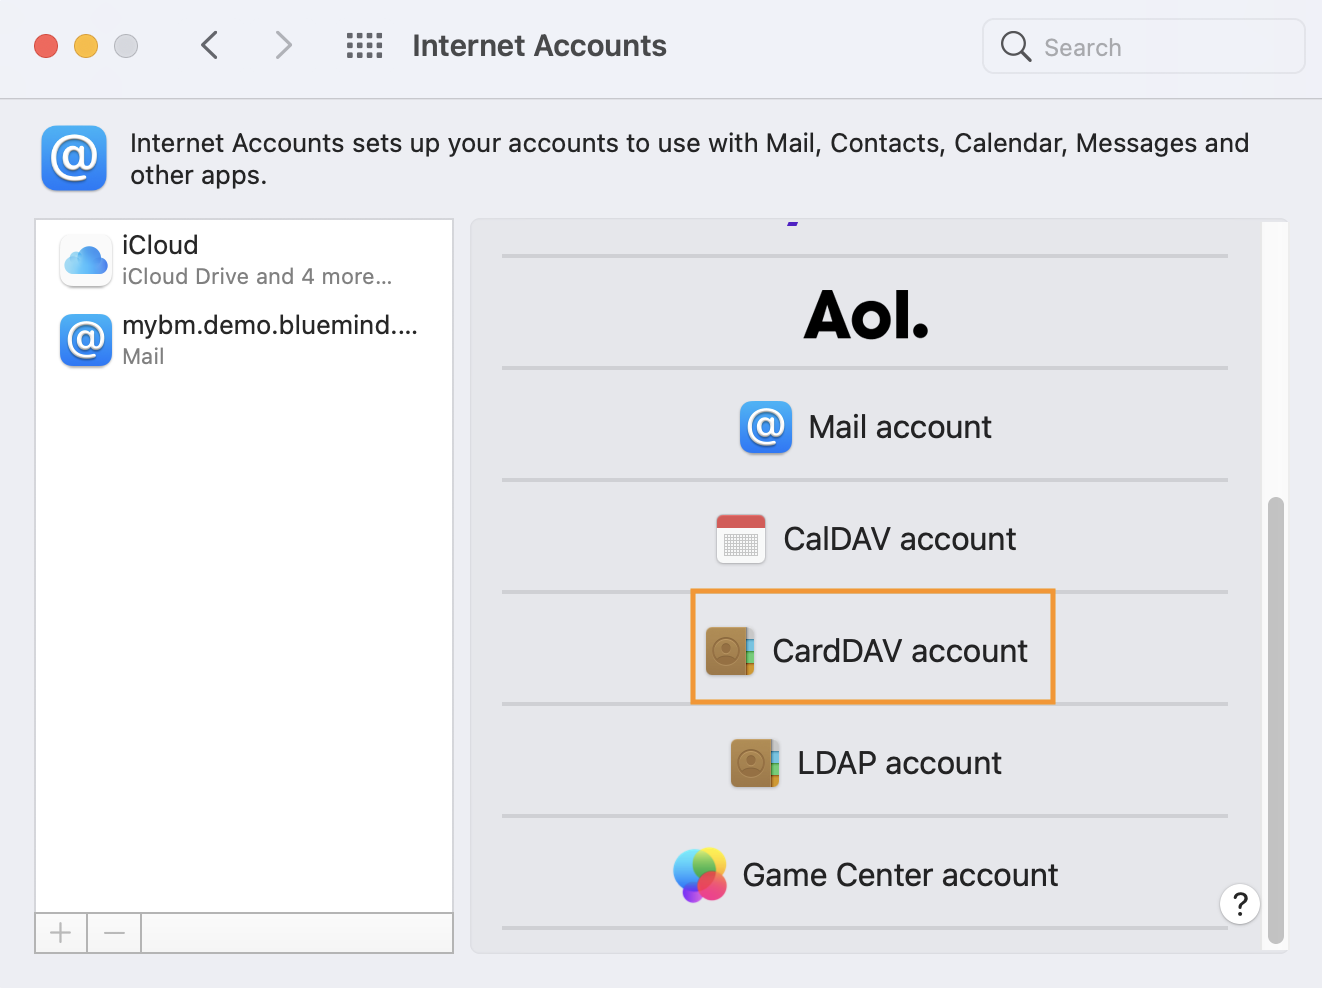
- Enter the requested information:

- Account type: choose "Manual"
- Username: full username with domain
- Password: password supplied by the administrator to log in to BlueMind
- Server address: server address specified by the administrator, usually in the form server-name.domain.com
Once the account has been added, open Contacts
Setting up the Calendar account
- Follow the procedure to add an account
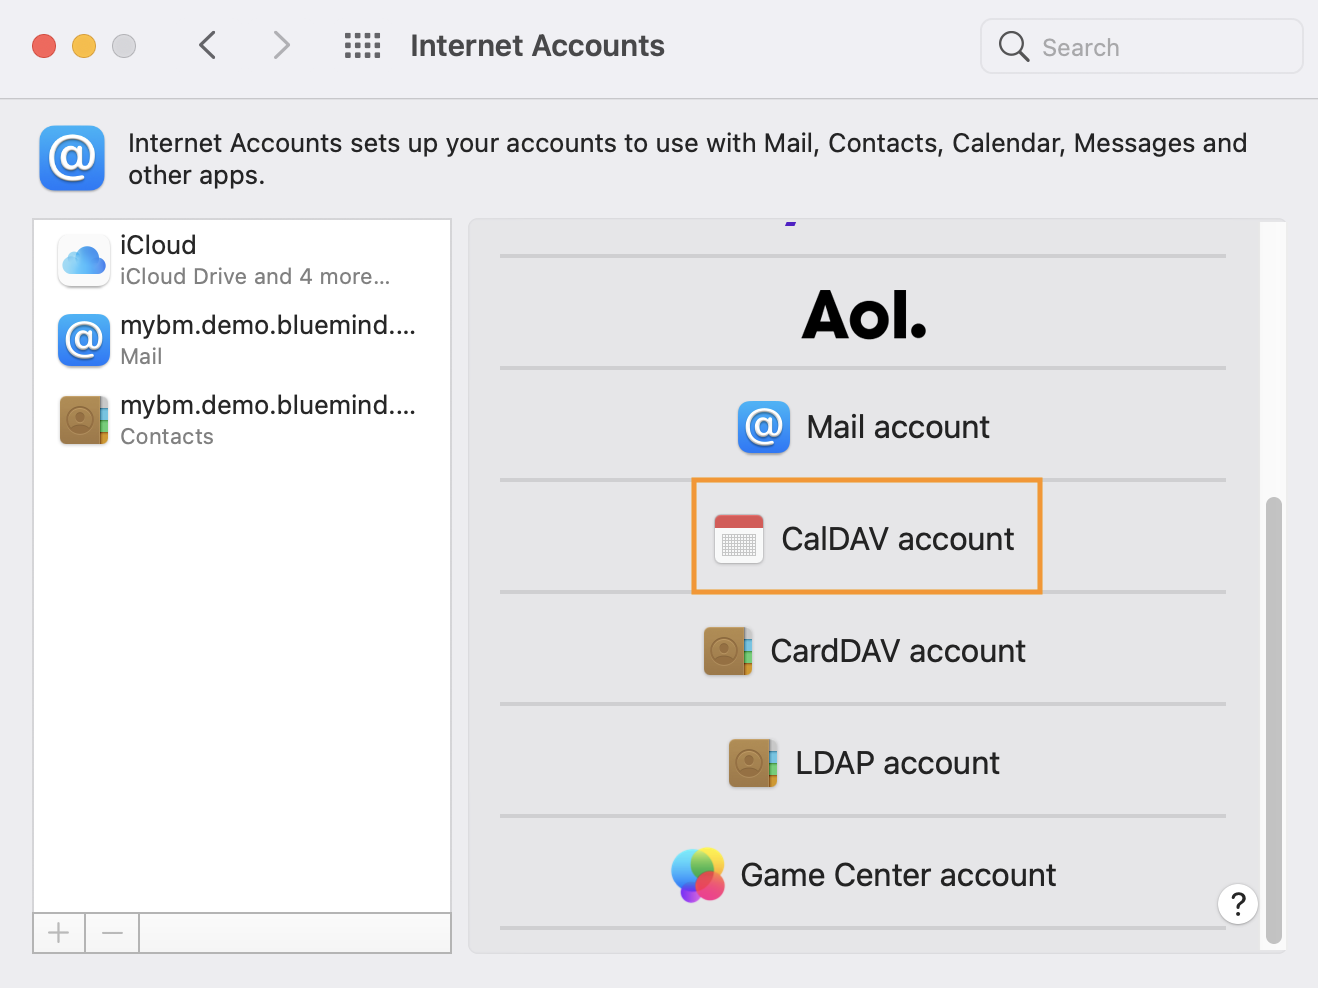
- Select "CaldDAV account":
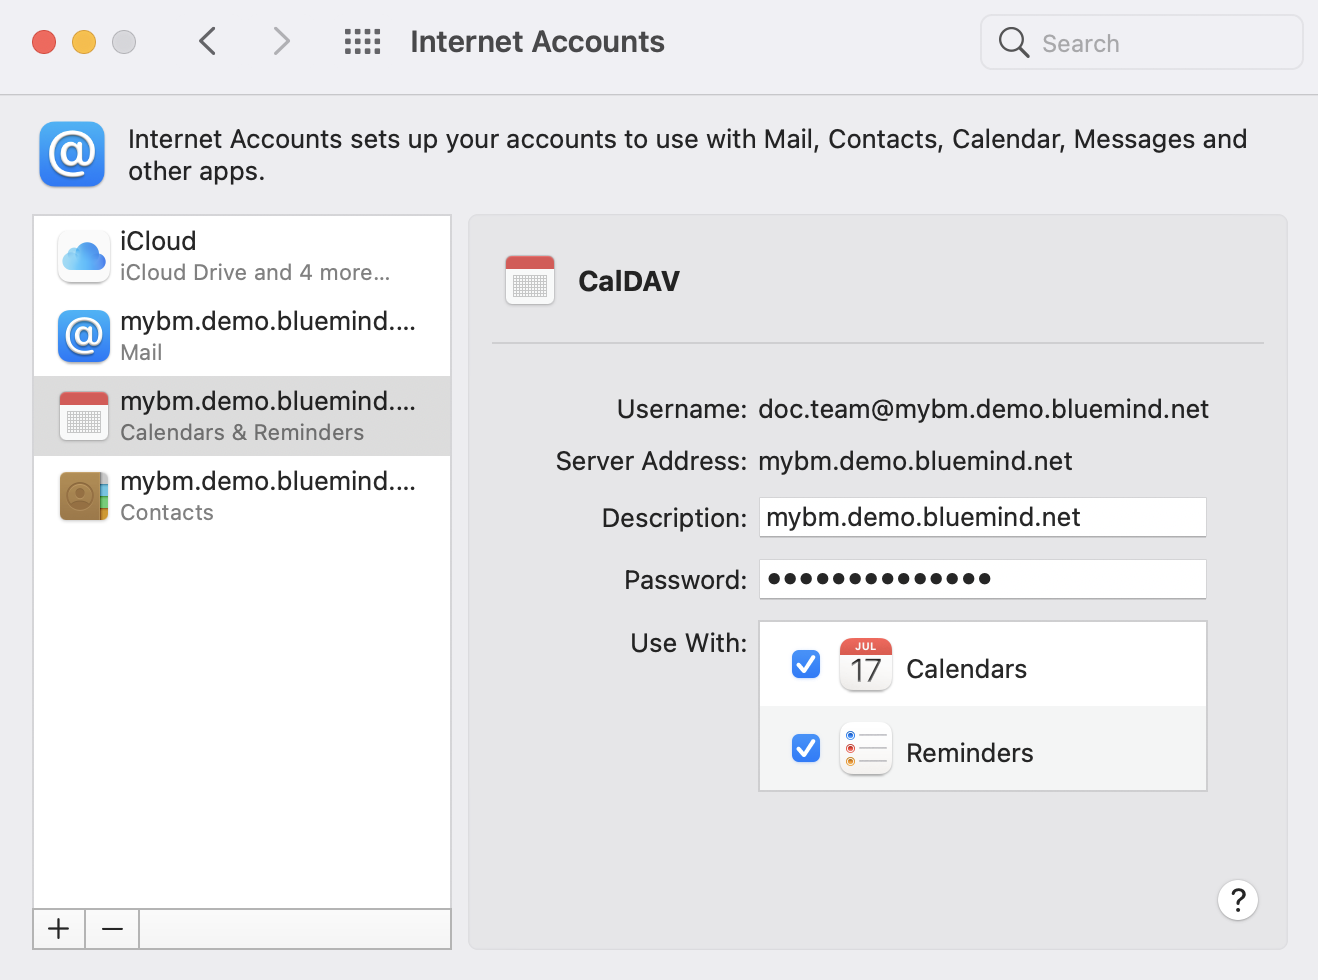
- Enter the requested information:

- Account type: choose "Manual"
- Username: full username with domain
- Password: password supplied by the administrator to log in to BlueMind
- Server address: server address specified by the administrator, usually in the form server-name.domain.com`
- Select the Calendars and Reminders applications for task management:
Once the account has been added, open the Calendar and Reminders applications