Editing Groups
Groups make it easier to manage users by avoiding tedious individual management.
BlueMind automatically offers two default groups to define the status of each user at the time of creation:
user: automatically assigns access to the Messaging, Contacts, and Calendar applications to usersadmin: automatically provides administrators with access to the administration console
Administrators can create additional user groups that can be used for:
- display the calendars of a group of people
- assign rights to a group of people on calendars, resources, shared mailboxes, private mailboxes, address books, etc.
- assign administration rights ;
- define other default groups ;
- set up other groups to include one or several groups
- send emails to a group of people (if the group has an email address): internal distribution list.
All groups, whether created automatically or by administrators, are fully configurable.
Creating
To create a new group:
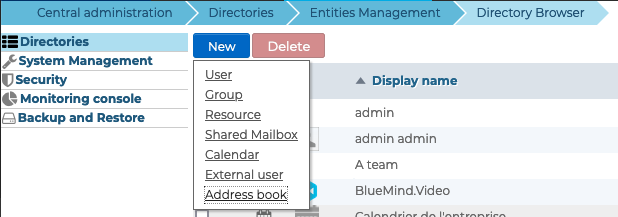
- From the home page of the directory management, click on "Create a group" or from the directory entries list, use the New > Group button:
- Enter the group name, a description (optional):
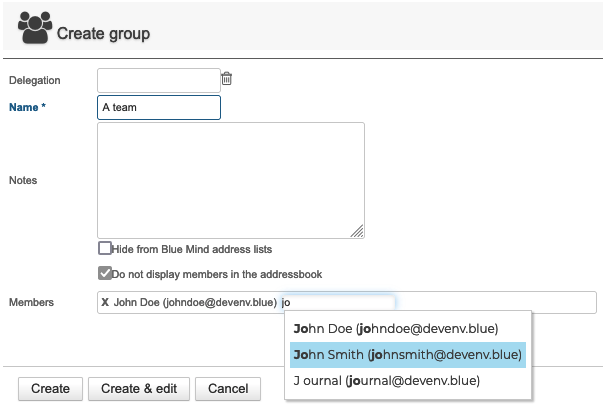
- Check the desired options:
- Hide from BlueMind address lists: the group exists but is not visible (neither in autocomplete, nor in contact lists from the directory or groups it belongs to). This group can be used by administrators or those who know its address.
- Do not display members in the address book: even if the group is visible in the directory, users cannot see its individual members.
When a group contains more than 511 members, they are not displayed in the address book even if the option is not activated.
- Add members (optional, members can be added later). Autocomplete lets you find members as soon as you start typing
- Click "Create" to quickly create a group or click "Create & edit" to create a group and open configuration options.
The group can then be added to and modified via the administration interface. As for users, groups can be created quickly by clicking "Create".
It then has the information entered in the popup and the following default properties:
- no e-mail address
- archiving is disabled
The group can then be added to and modified via the administration interface.
Editing and managing groups
In the Directories >> Entities Management page and select the group you want to edit from the list.
To make it easier to search the list of entities, use sorting arrows and filters
General
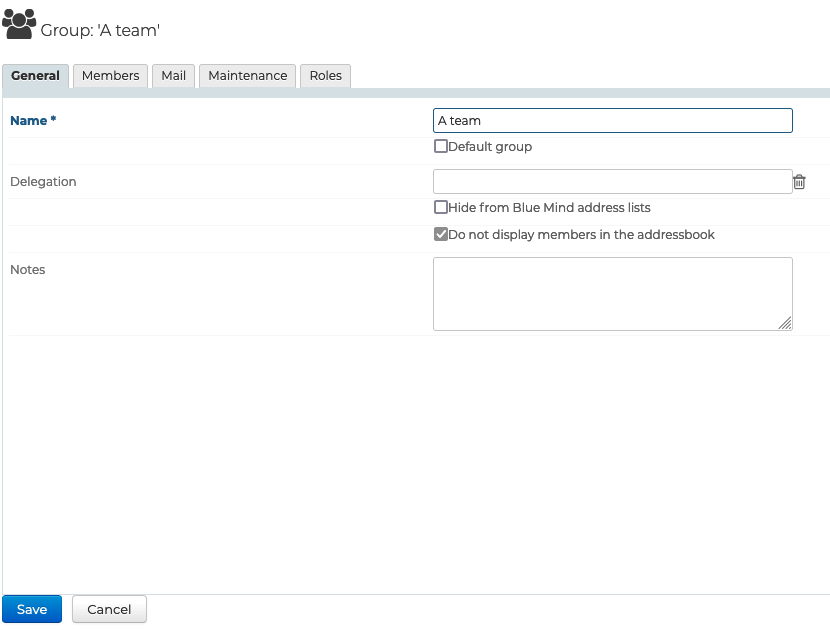
The "General" tab shows basic group information: name, delegation and visibility options for the group and for his members (see chapter Creating groups for more details on these options).
:::tip default group
Check the "Default group" option to add the group to the list of default groups available when creating a user.
:::
Members
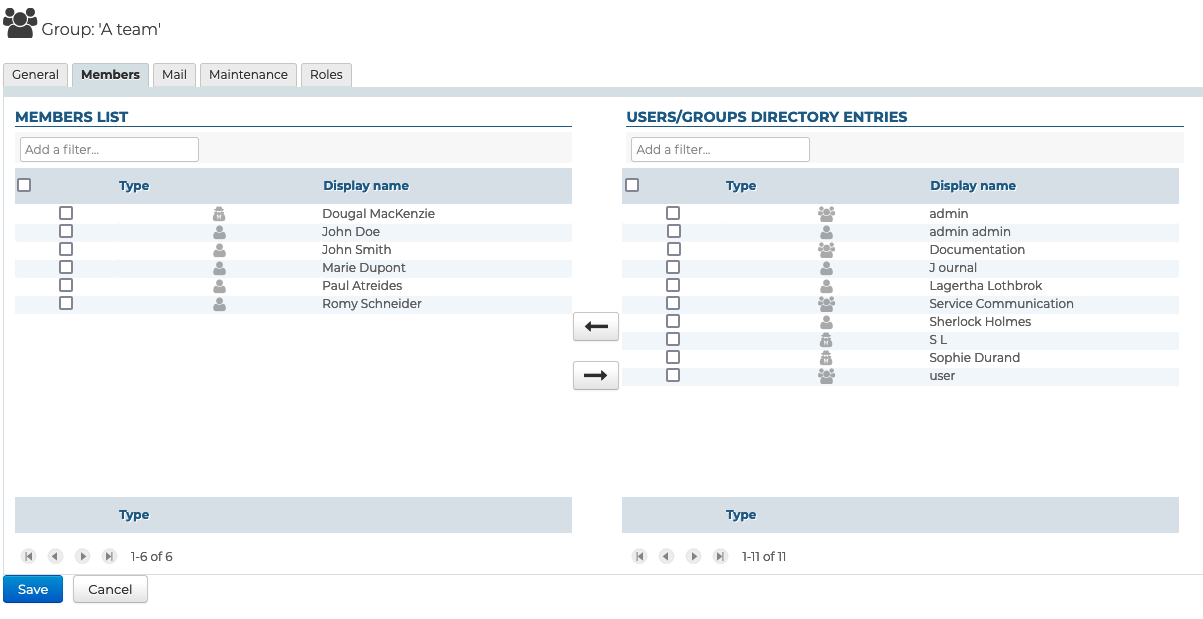
The "Members" tab displays group member management in 2 columns: in the left-hand column, members already present in the group; in the right-hand column, other users and groups present in the directory.
Select a user or group in either column and use the arrows in the middle to add them or remove them from the group.
:::info Groups within groups
Groups can be included within groups, however, only groups with an email address will be taken into account – if a group included in another group doesn't have an email address, its members will not receive the messages sent to the parent group.
:::
External users can be added to groups. For more information see: External Users
Mail
The Mail tab lets you set group addresses and aliases, as well as message retention: the group then has a shared mailbox in which it can consult received messages.
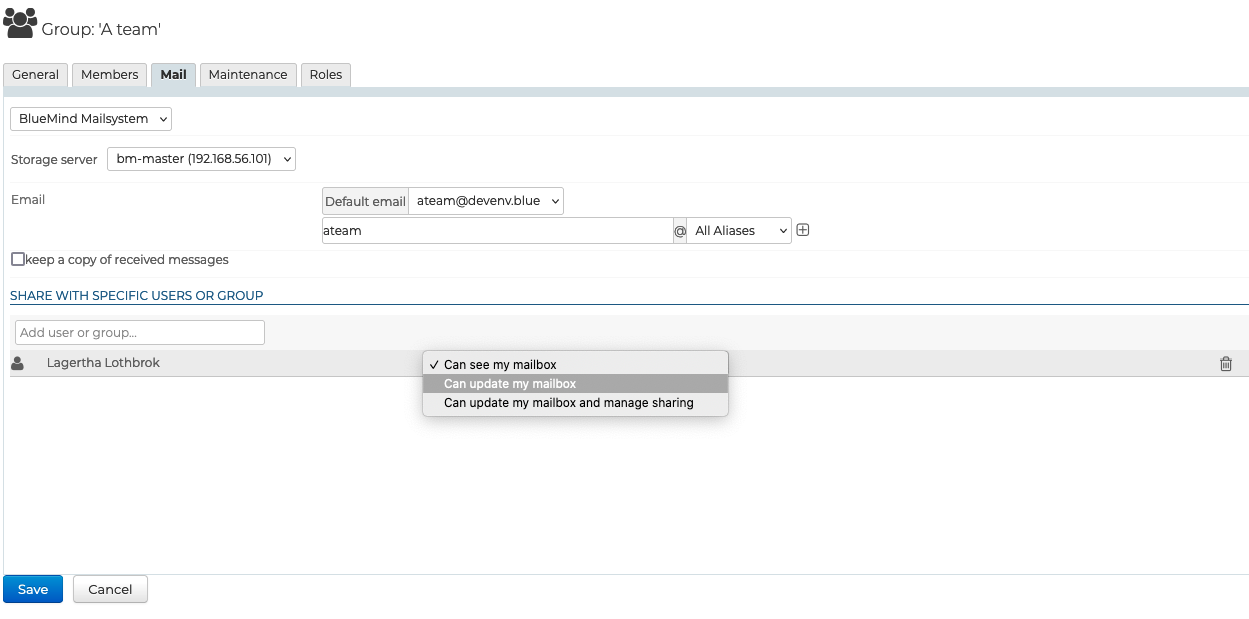
When the box "Keep a copy of received messages" is checked, messages are kept in a mailbox and they can be viewed.
When this box is unchecked, new messages are not kept.
When this option is disabled, the contents of the mailbox are not deleted.
If this option is enabled for a while before being disabled, the shared mailbox remains and contains the emails received during the time it was enabled.
The group mailbox can be shared regardless of group membership. The following rights are available:
- Can see my mailbox: users can read emails
- Can update my mailbox: users can edit (add, delete, move, etc.) emails e-mails
- Can update my mailbox and manage sharing: in addition to editing rights, users can manage share rights
For more information on using a group mailbox, see Using a group mailbox
Maintenance
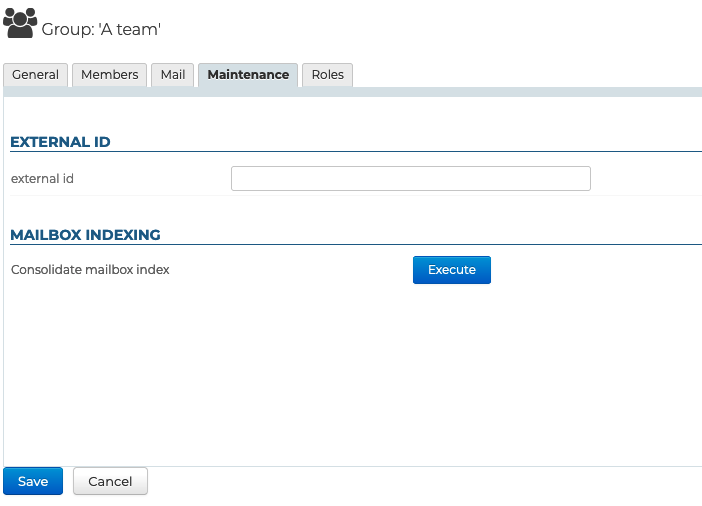
The Maintenance tab allows you to perform maintenance operations on the group's mailbox: consolidation and reconstruction.
Roles
The Roles tab allows you to select the applications group members have access to:
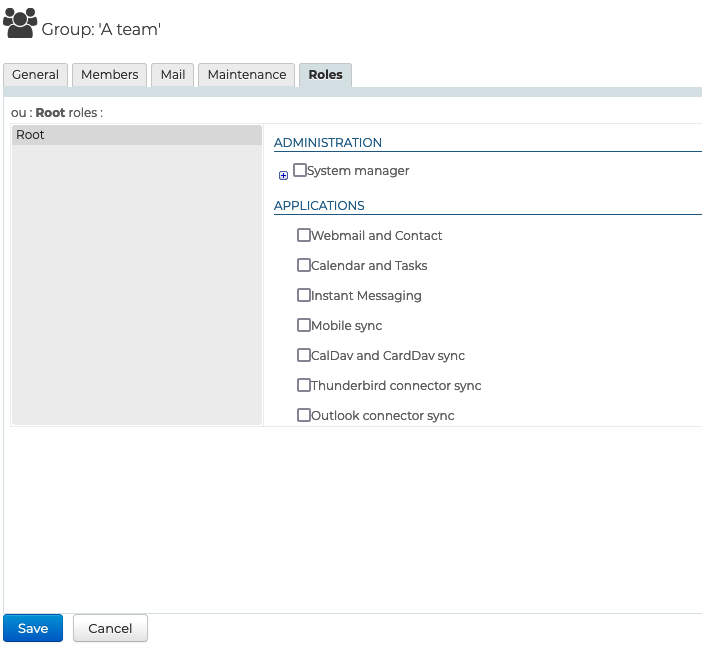
This means you can restrict access to certain functions to certain users, without the need for tedious individual management. Once roles are assigned to groups, you no longer have to worry about individual rights, simply add a user to a group for them to have access to the applications they need.
E.g., you can grant access to "Telephony" to the sales team only so that they can communicate outside the company or restrict the use of "Instant messaging" to technical teams so that they can communicate in writing more easily.
Delete
In the list of directory entries, check the box at the beginning of the row for the group you want to delete, then click "Delete" and confirm.
Deletion is immediate and definitive.