Configuring Thunderbird
Installing Thunderbird
Download and install Thunderbird from the provider's website: http://www.mozilla.org/thunderbird/
Setting up IMAP Mail Account
When you first open it, Thunderbird asks if you want a new email address and account. Choose "Skip this and use my existing email".
If Thunderbird is already installed and set up with a user account and email, just go to File > New > Existing Mail account.
-
Enter your name, email address, and the password required to log in to the BlueMind server, then click "Continue."
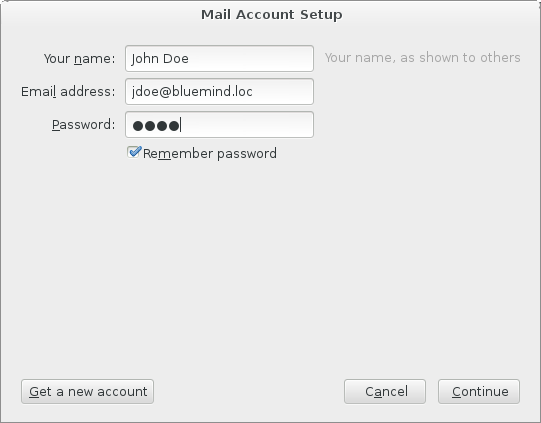
-
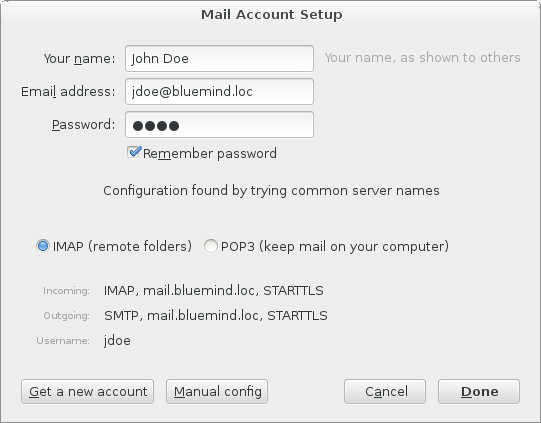
Thunderbird tries to connect to a server using this information and then displays the information tested and/or found:
-
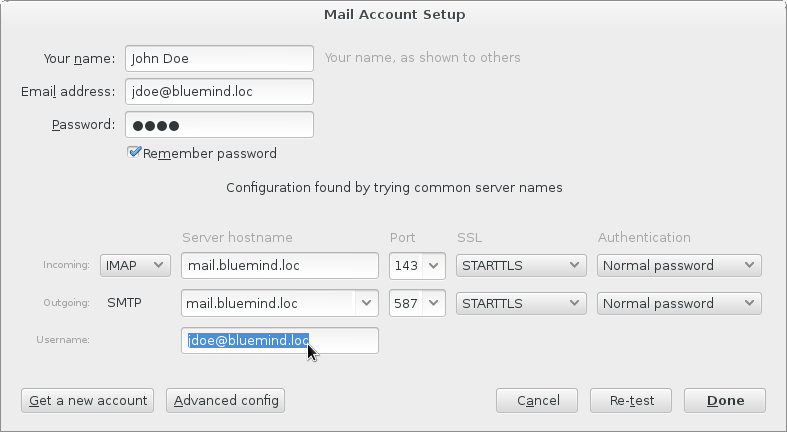
Thunderbird suggests an abbreviated username based on the first part of your email address. Thunderbird suggests an abbreviated username based on the first part of your email address. However, the BlueMind server expects the username to match your full email address. Go to "Advanced config" (at the bottom of the dialog box) to correct this:
 info
infoIf Thunderbird is unable to guess the incoming and outgoing server names, it automatically displays the advanced configuration dialog box and the "Done" button is grayed out. Enter the correct addresses as well as the username and click "Re-test" to validate the connections and complete the process.
info- The first and last names can be chosen freely; these are the names that will appear in emails sent by the user.
- The email address is the address configured by the BlueMind administrator.
- Incoming and outgoing server names must be given to you by your administrator. Typically, they are servername.domain.com.
- The username must be your full username including ** the domain name.
- The password is the password provided to you by the administrator to log into BlueMind.
-
Click Done.
-
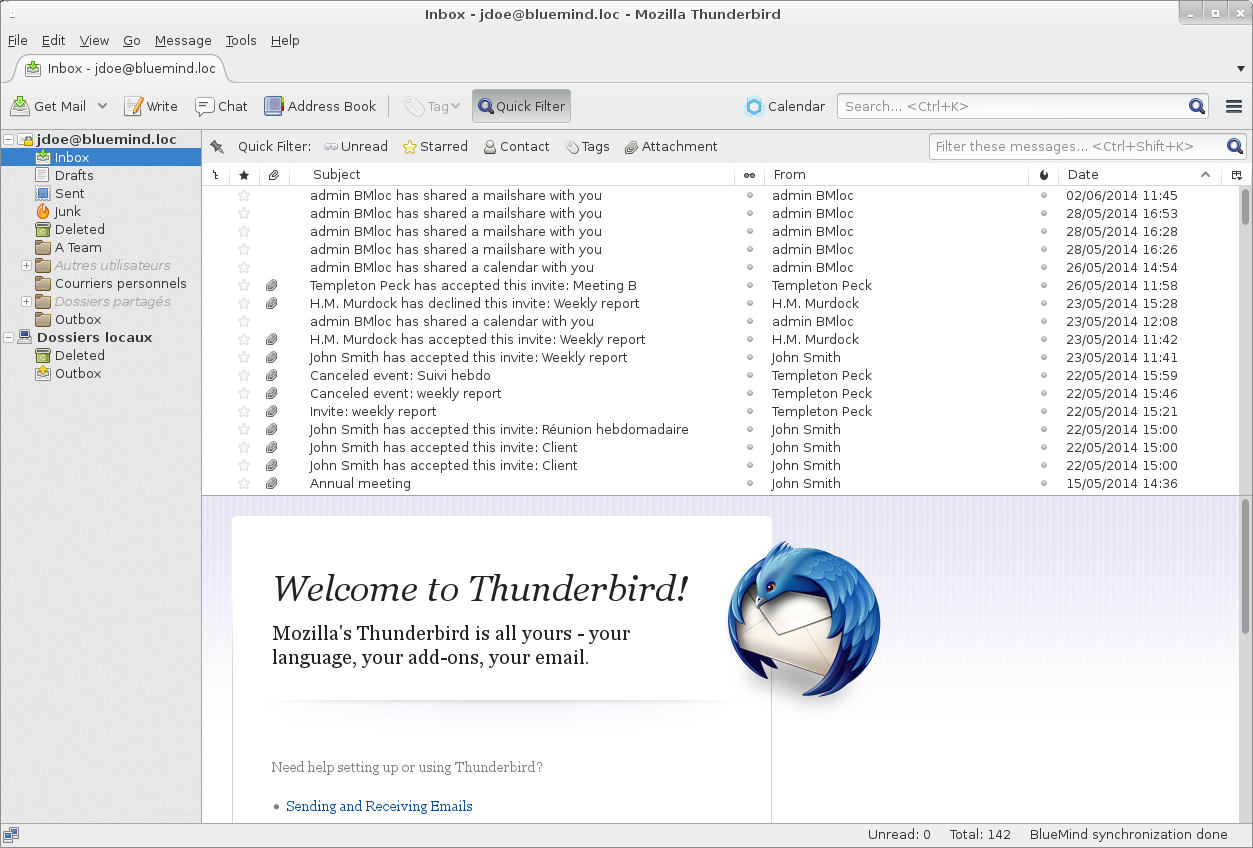
Thunderbird then opens the main window and retrieves messages from the account you have configured.
Connecting to a shared mailbox
To access a shared mailbox, you need to "subscribe" to it in Thunderbird.
To do this, right-click in the left-hand pane of the window and select "Subscribe" from the menu:
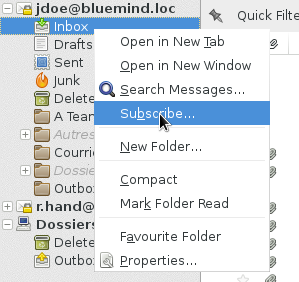
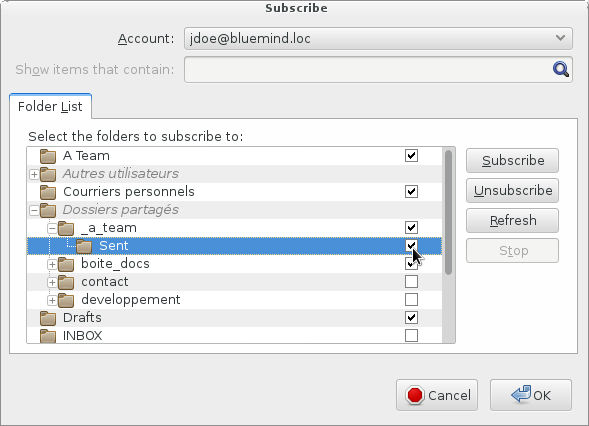
A window opens, showing the list of folders accessible to the user.
Open the greyed-out "Shared folders" menu (double-click on the name or single-click on the arrow at the beginning of the line) and tick the box(es) corresponding to the folder(s) you wish to share, then click on "OK":
The shared box then appears in the main window with the other folders in the account, in a sub-tree called "Shared folders" :
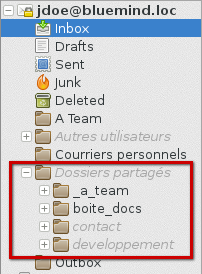
Thunderbird can also be configured to display all the user's shared folders without the user having to subscribe to them:
- go to Edit (or Tools) > Account settings
- go to Server settings for the account concerned
- click on the "Advanced" button
- uncheck "Show only subscribed folders"
Depending on the user's access rights to the shared mailbox, he or she can then view the messages it contains or copy/move messages to it from his or her own mailbox, from his or her "Incoming mail" folder for example.
Dragging a mail with the mouse to this box moves the mail, so that it disappears from the original box.
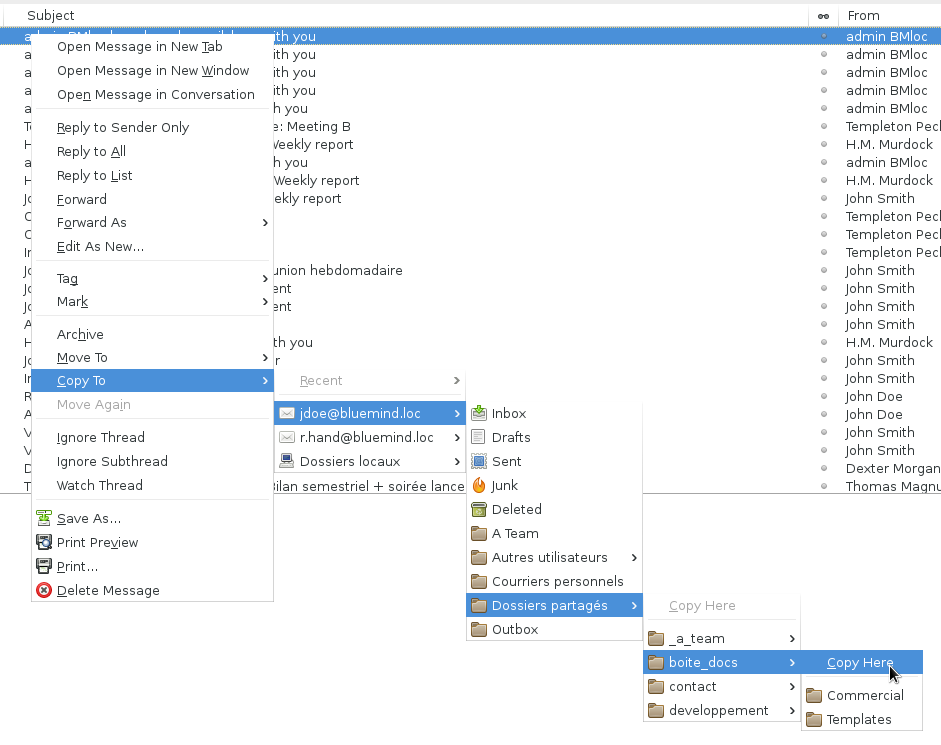
To copy an email, right-click on the message header on the right-hand side of the window and select Copy To > select the user's mailbox > Shared folders > select the desired shared mailbox, then choose the location using the "Copy here" option in the submenu corresponding to the desired folder:
The BlueMind connector
The connector provided by BlueMind synchronizes BlueMind's calendar and address books with Thunderbird. It also provides access to task management and detach large attachments when composing emails.
Installing the connector
To install the BlueMind connector:
-
Download the installation file from the Downloads menu in BlueMind settings.
infoIf the connector is not available in the downloads, please contact your system administrator to have it installed
-
In Thunderbird, go to Tools > Add-ons.
-
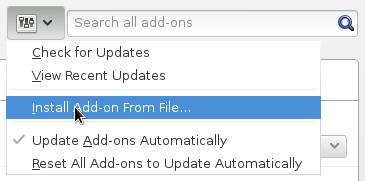
Drag the file from File Explorer into the Thunderbird main window, or choose to install a new add-on from the Add-ons menu:
-
Follow Thunderbird's installation instructions and restart Thunderbird.
-
Go to Tools > Module Options > BlueMind Connector and configure the server address:
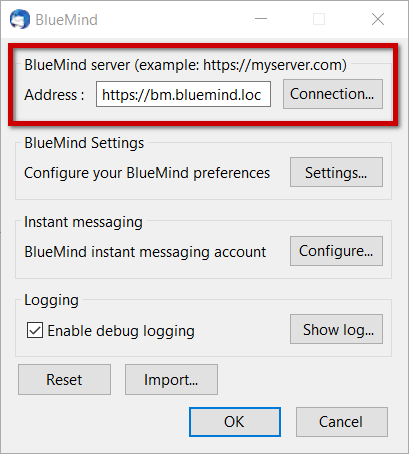
Note: Depending on your OS and Thunderbird version, there are several ways to access this:- Tools > Add-ons > "Options" button on the corresponding module
- Tools (or Preferences) > Options > BlueMind tab
-
Click OK to quit
-
The connector initiates a first connection and prompts for the user's username and password.
The Thunderbird Connector automatically synchronizes all elements every 2 minutes. Click on the "Synchronize" button or use the Tools menu > BlueMind > Synchronize.
Managing BlueMind Preferences
BlueMind gives Thunderbird users the ability to manage all their BlueMind preferences from within their software, without having to visit the BlueMind web application.
There are several ways to access preferences management:
- Tools > BlueMind > BlueMind Preferences
- From the connector window:Tools > Module options > BlueMind Connector > "Preferences button"
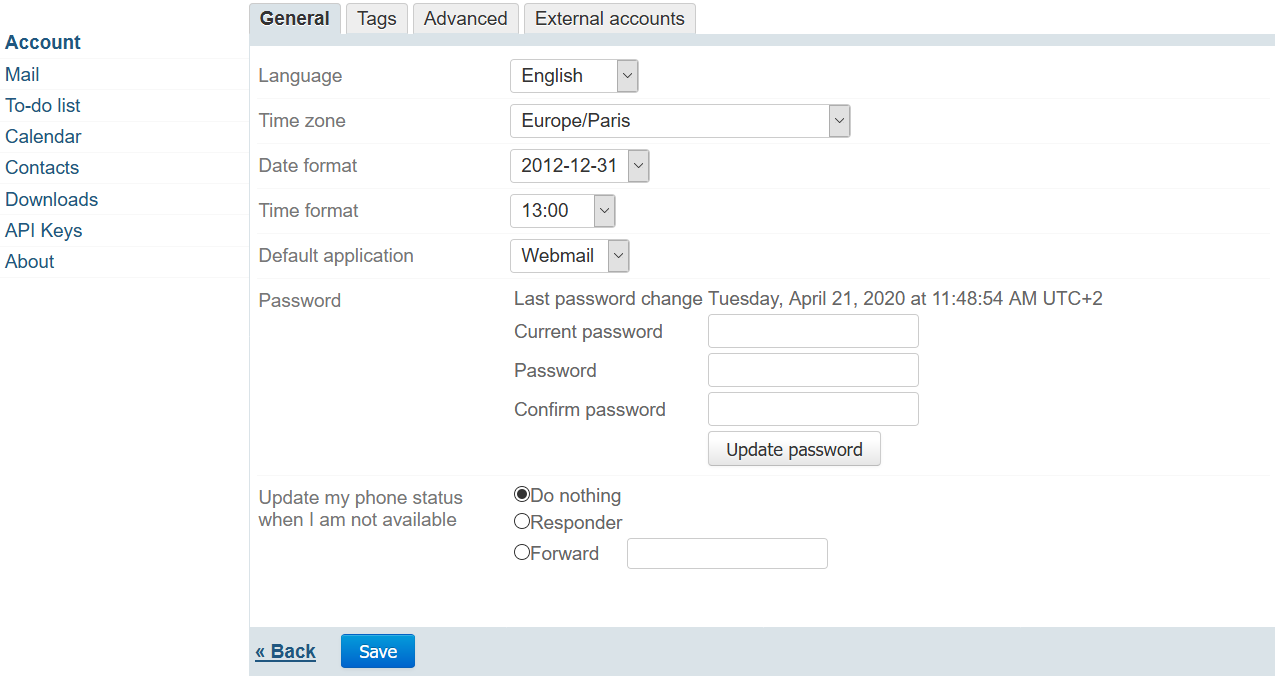
The interface appears and works in exactly the same way as the preference management in the BlueMind web application:
Linked attachments
Once the connector has been installed, the attachment detachment function can be accessed directly from the message window.
Working with linked attachments
Simply add your attachment in the usual way (using the dedicated button or drag & drop). If the size of the file exceeds the automatic detachment threshold set in BlueMind, Thunderbird offers to detach the :
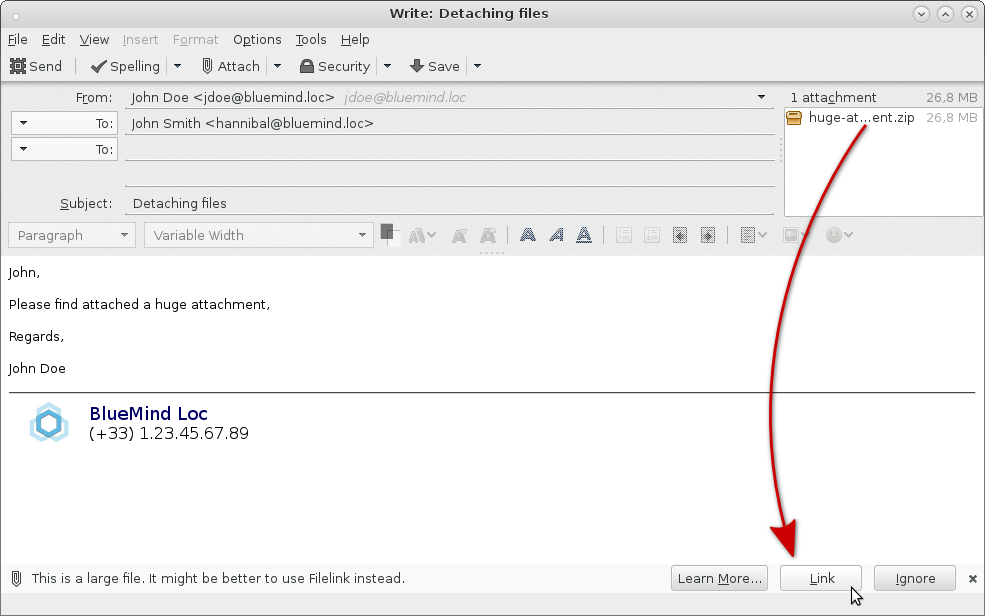
The file is then automatically sent to the server and linked to the message:
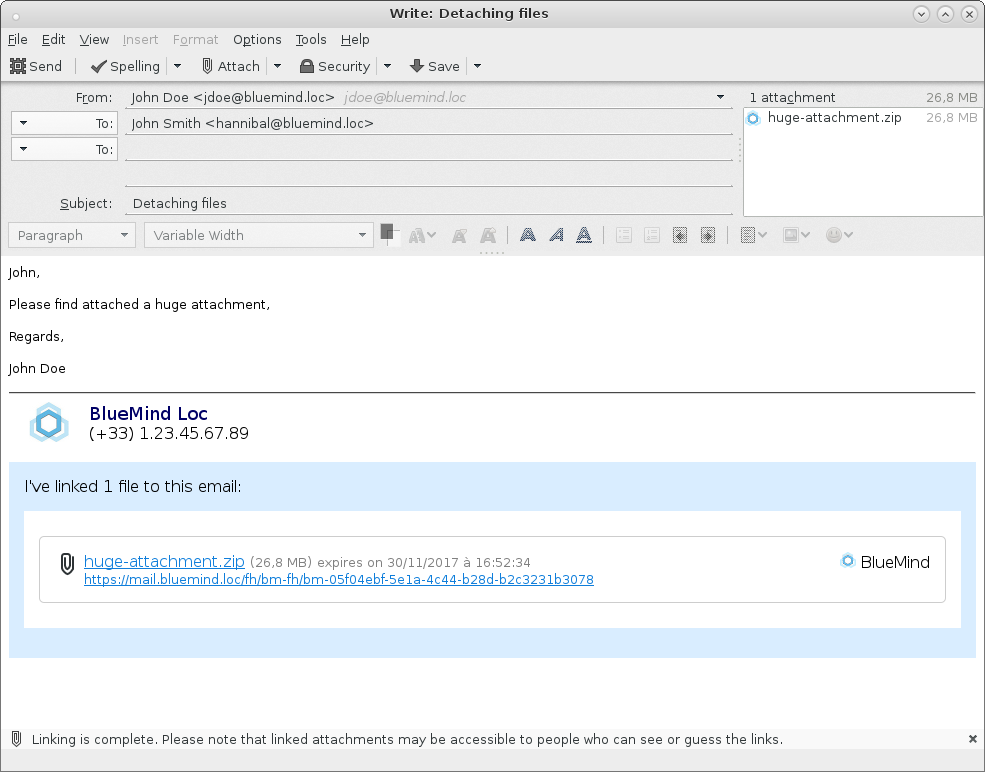
In the same way as when detaching from BlueMind webmail, the download block will be displayed as it is on the recipient's computer, whatever their e-mail client.
On 1st use, you are asked to choose the service to be used:
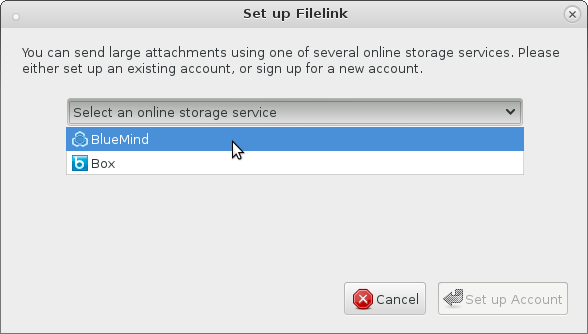
- Select BlueMind
- Click "Set up Account"
- A warning may pop up, in that case accept the certificate exception and click "Set up Account" again
- The popup closes and the file is attached to the message.
Forced detachment
To detach a file already attached to the message, right-click on the attachment name and select Convert to > BlueMind :
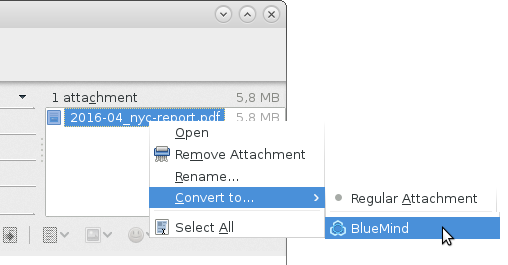
Conversely, to reintegrate a file that has been detached, choose Convert to > Normal attachment. The file is attached to the email and the download block is deleted.
A file can also be linked directly to the message when it is included. To do this, click on the "Attach" button to open the options menu and choose File Space > BlueMind
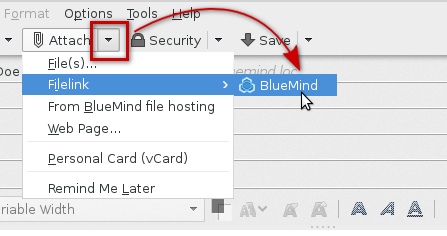
Your system's file selector opens, and once the file has been chosen, it is automatically and immediately sent to the server and linked to the message:
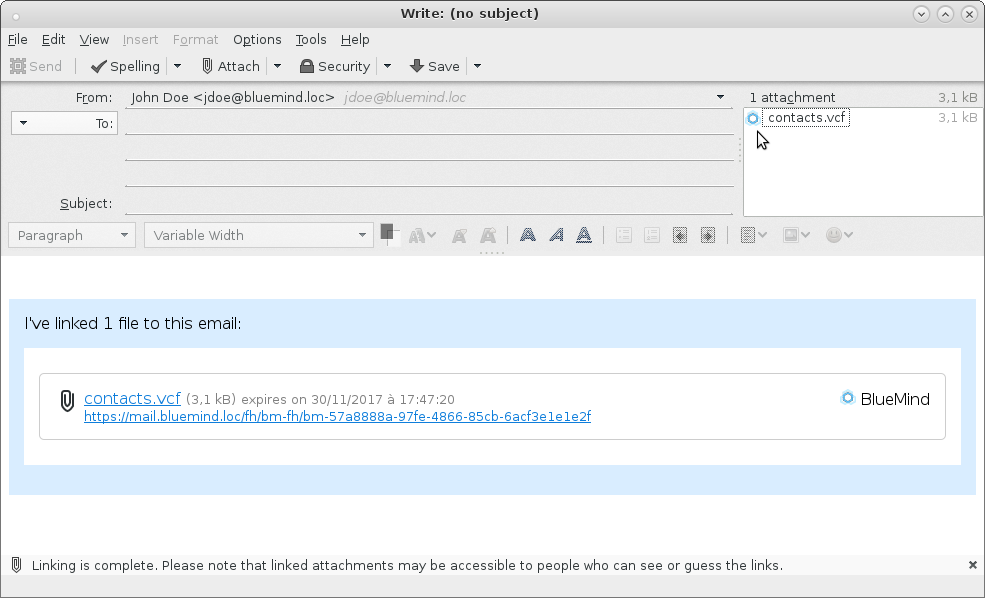
BlueMind file selector
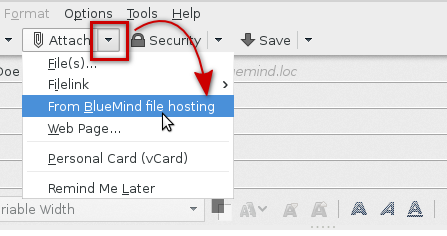
As with BlueMind webmail, you can access the file selector to send files already in your online space (files you've already sent and detached in previous messages).
To access it, click on the arrow on the "Attach" button to pull down the options menu and choose "From BlueMind file server" :
 .
.
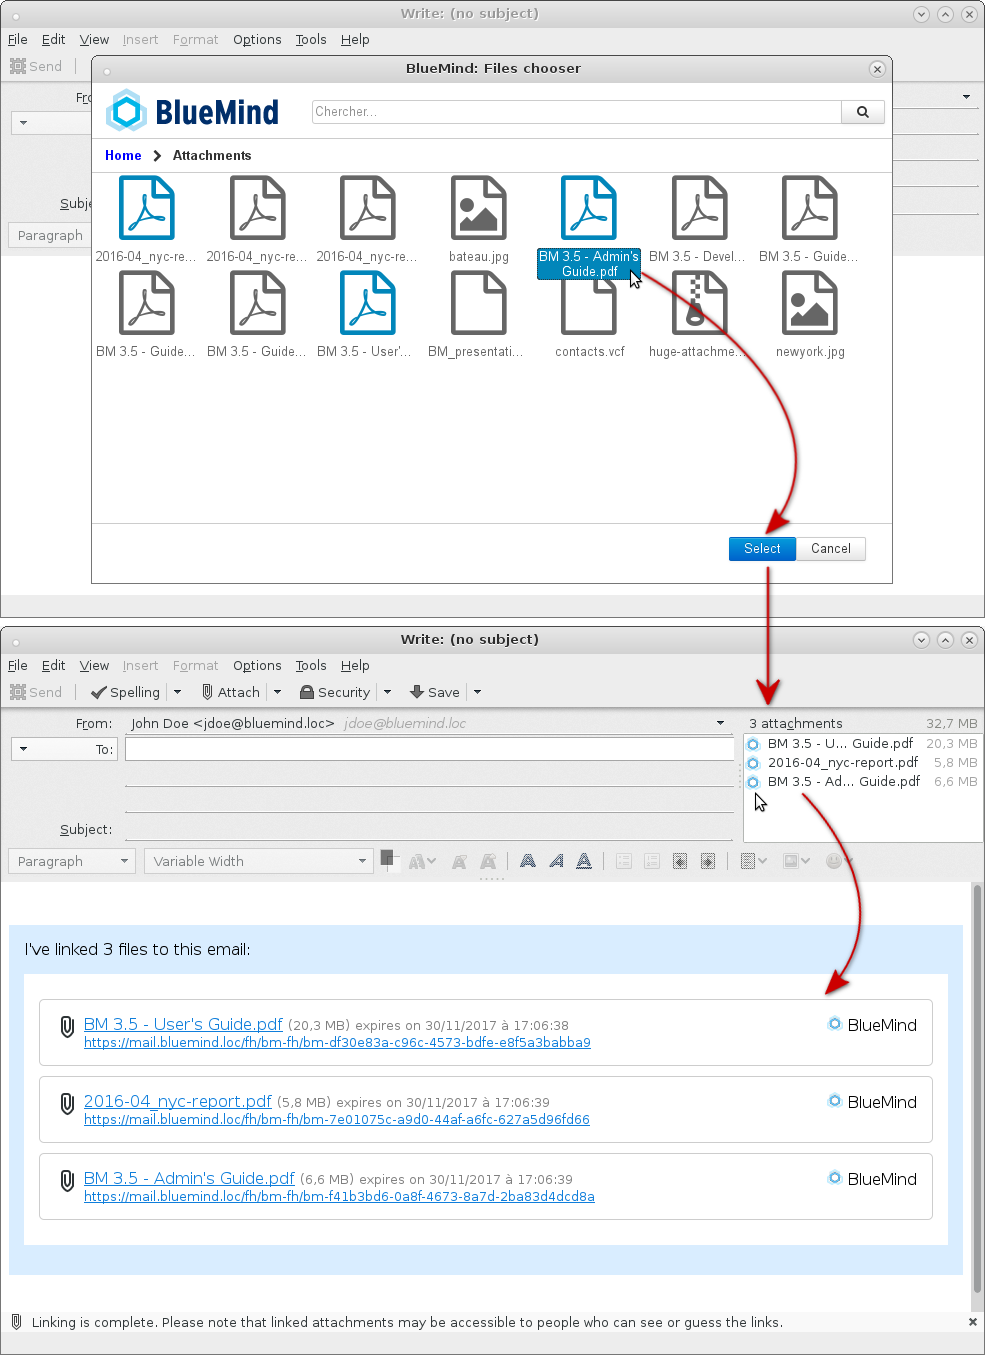
The BlueMind file selector opens, allowing you to select available files. Click on one or more files and then on the "Select" button to add them to the message:
Setting
In Thunderbird Preferences, Attachments tab, you can choose to disable the automatic detachment of attachments exceeding a certain threshold by checking or unchecking the appropriate box:
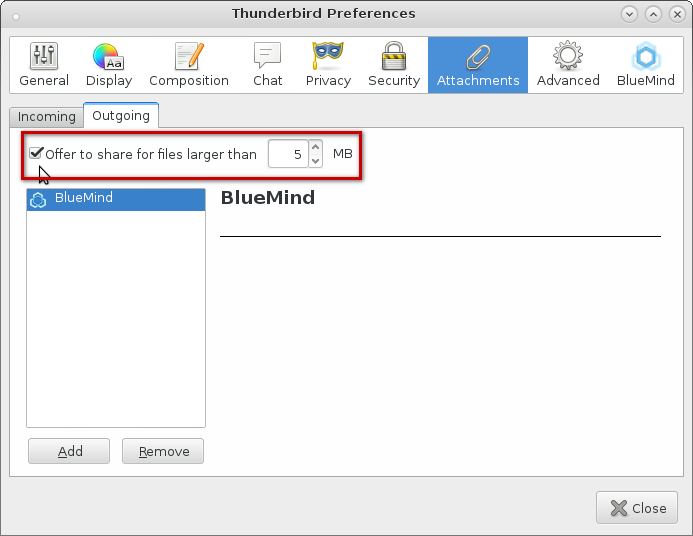
The threshold can be modified in this window, but it is synchronized with the BlueMind server each time Thunderbird is started, so the modified value will be overwritten the next time you start Thunderbird.
Calendar
Display
Once the connector has been installed and the connection established, the calendar can be accessed via the Tools menu > BlueMind > Calendar or via a new button on Thunderbird's main interface:

It has the same display features and functions as the online calendar:
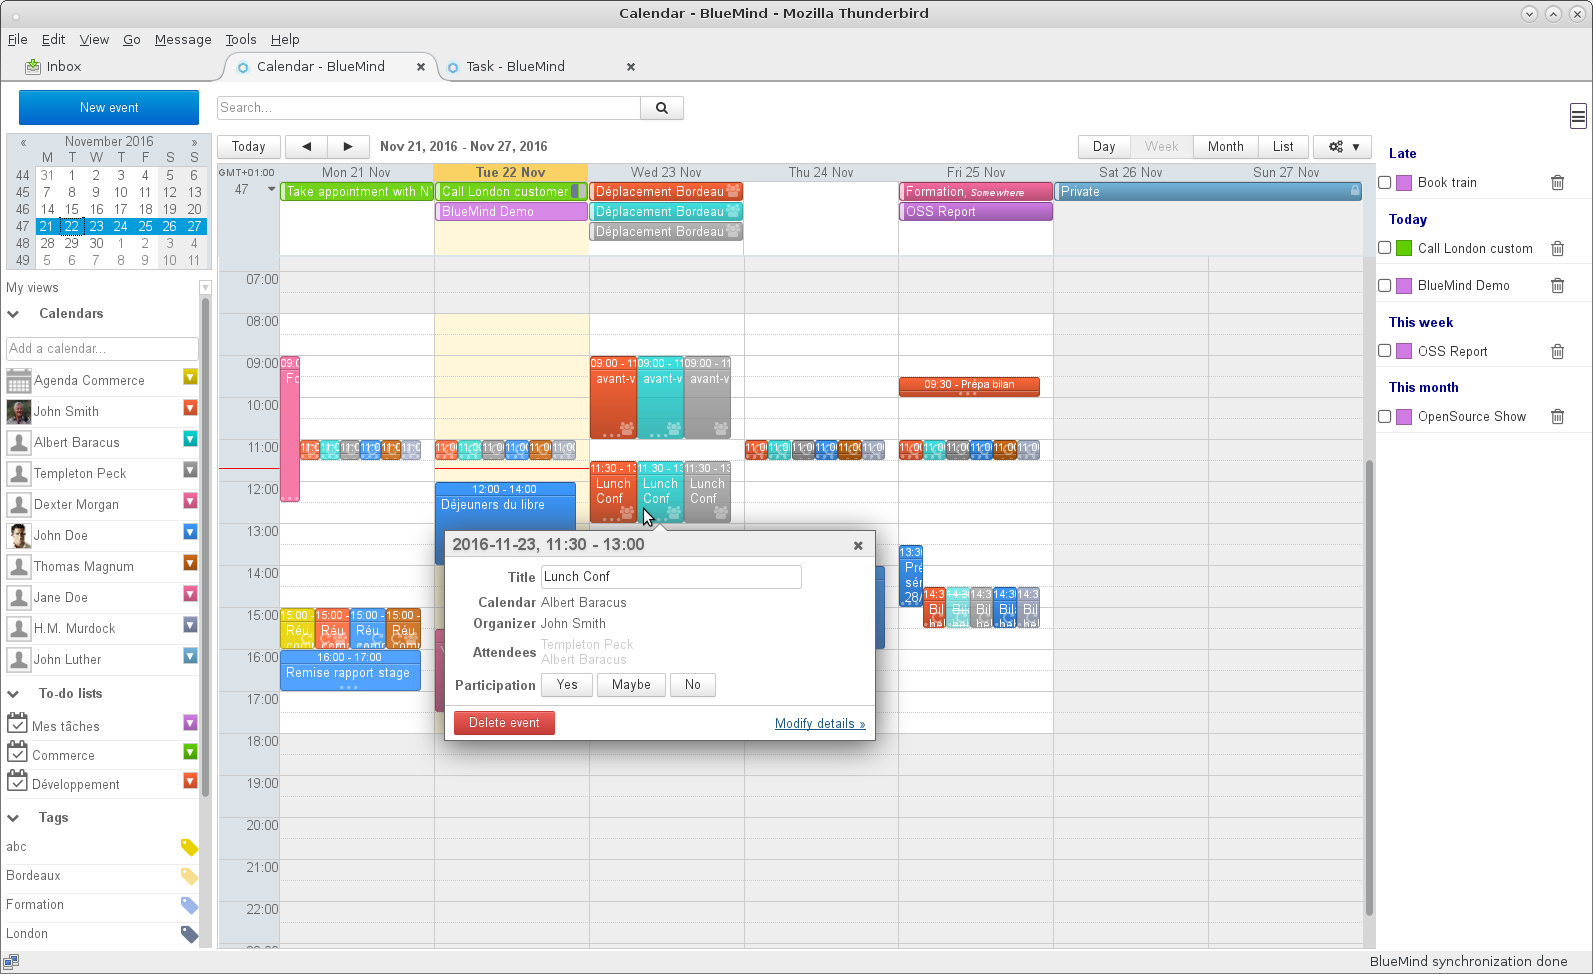
Preferences and calendars
You can manage the agendas displayed, create secondary agendas or assign sharing rights to other users in the preferences management (see above): Tools menu > BlueMind > BlueMind Preferences > Agenda section.
For more detailed information, please visit Calendar preferences
Tasks
Like the calendar, task management is accessible in its own tab and offers the same interface as BlueMind online:
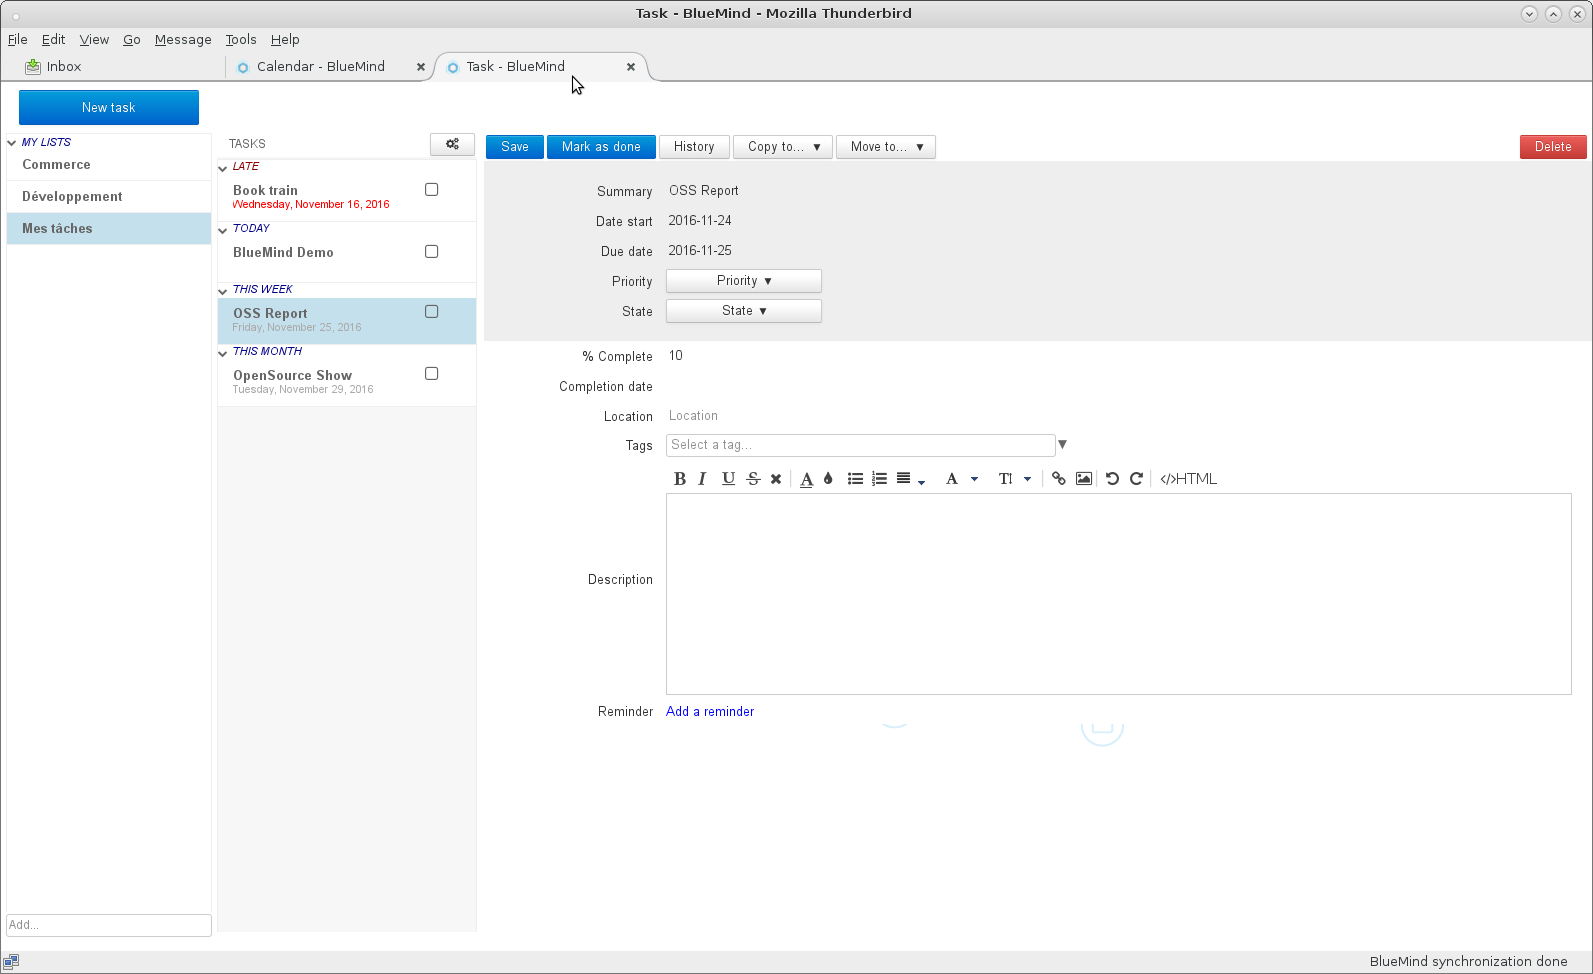
To find out more about how it works, please visit the dedicated page: Tasks
Contacts
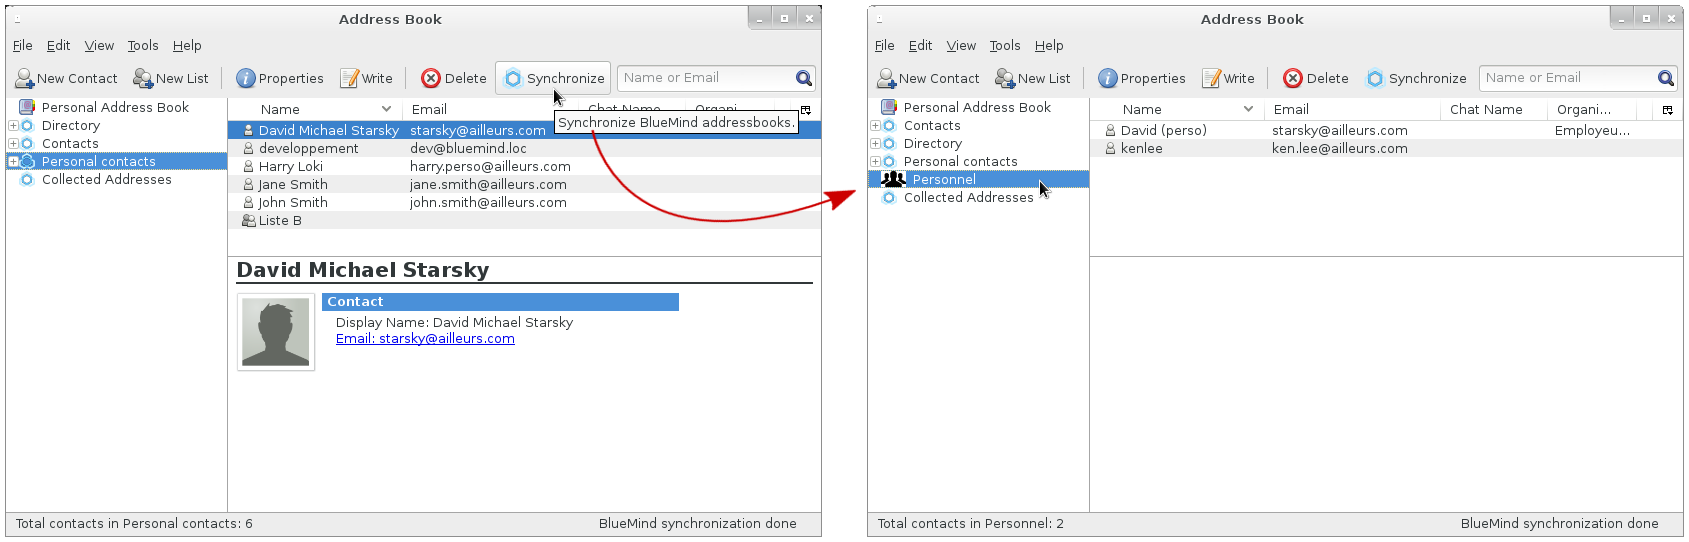
All the user's BlueMind address books can be synchronized with Thunderbird, and are accessible via the Address Book Manager (Tools menu > Address Book):
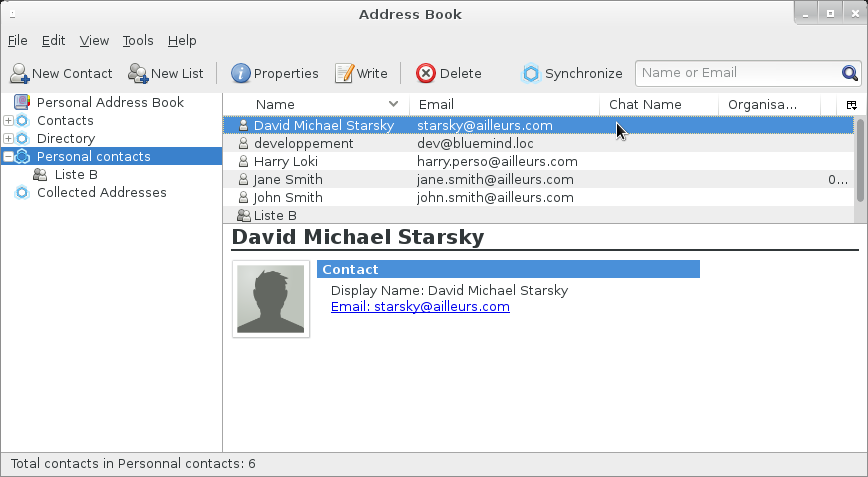
For an address book to be visible in Thunderbird, you must first subscribe to it in BlueMind, whether it's a personal address book or one shared by another user.
To add a subscription to a notebook:
-
Once sharing has been activated (by the user for a personal address book, or by the administrator for a domain address book), go to BlueMind preferences management: Tools > BlueMind > BlueMind preferences > Contacts section > Subscriptions tab
-
In the text box, start typing the name of the address book, and autocomplete will suggest it:
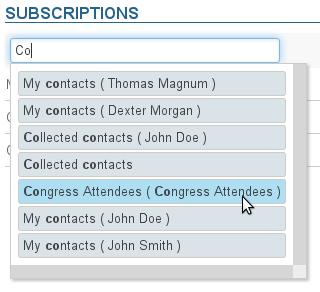
Note: the user's personal address books are automatically added when created
:::tip Subscription and synchronization
The "Synchronize" button is used to configure address book-specific synchronization.
- If synchronization is enabled: the address book you can see the address book and contact cards can be viewed and are available offline
- If synchronization is disabled: the address book is identified with a different icon from other address books and contact cards can be accessed via search (address book) and autocomplete (compose messages) only
:::
:::info Directory synchronization
To avoid issues with large numbers of domain users, the Directory address book is not synchronized by default.
For more information, please go to the page Using Shared Adress Book
:::
- Go back to the address book
- Synchronization can be forced manually at any time via the Tools menu > BlueMind > Synchronize The address book then appears:
Signature placement
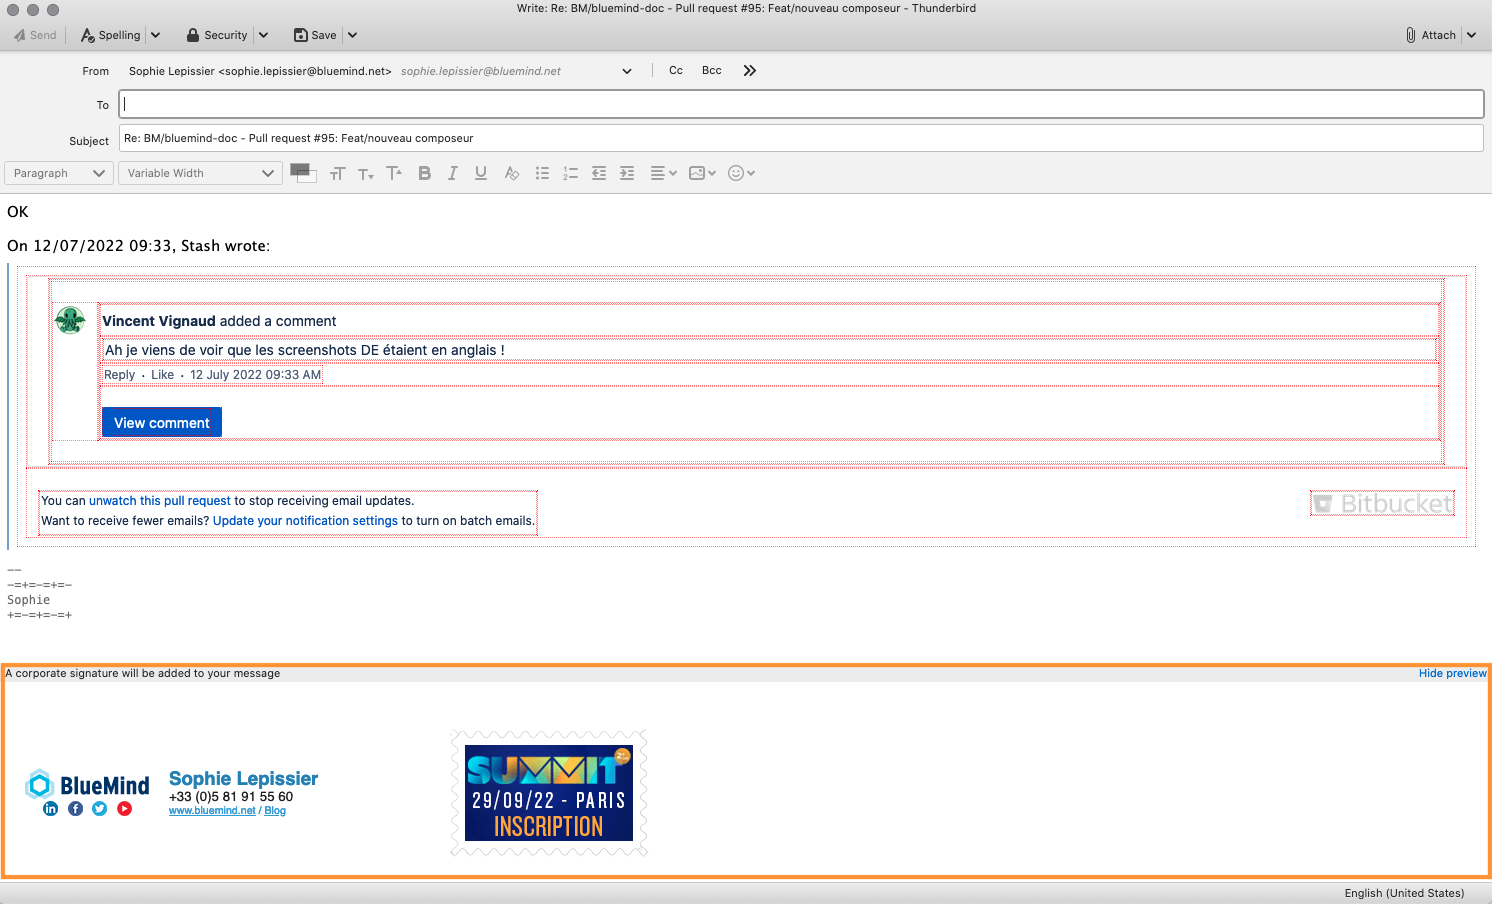
If a company signature is set, it will be automatically added to the end of the email by the server after it has been sent.
A preview is proposed in the editing window so that the user can see that a signature will be present, and if several signatures are set (internal, external, for a group, etc.):
If the administrator has chosen to activate the appropriate option, users can choose the placement of their signature.
To do this, you need to add the following character string (tag or placeholder) to the desired position in the email:
-=+=-=+=-
personal signature
+=-=+=-=+
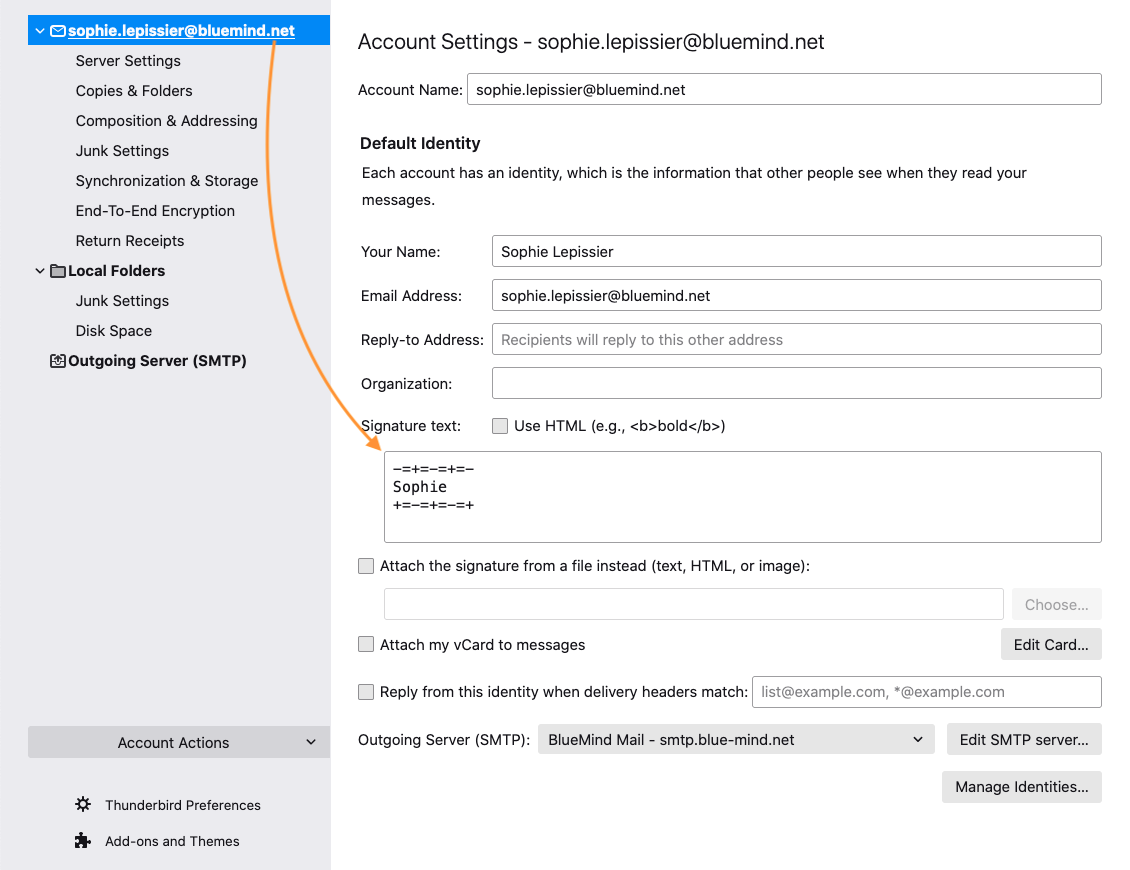
To facilitate this insertion, the user can set this string as the default signature in Thunderbird:
When writing or replying to an email, the tag is automatically placed in the message:
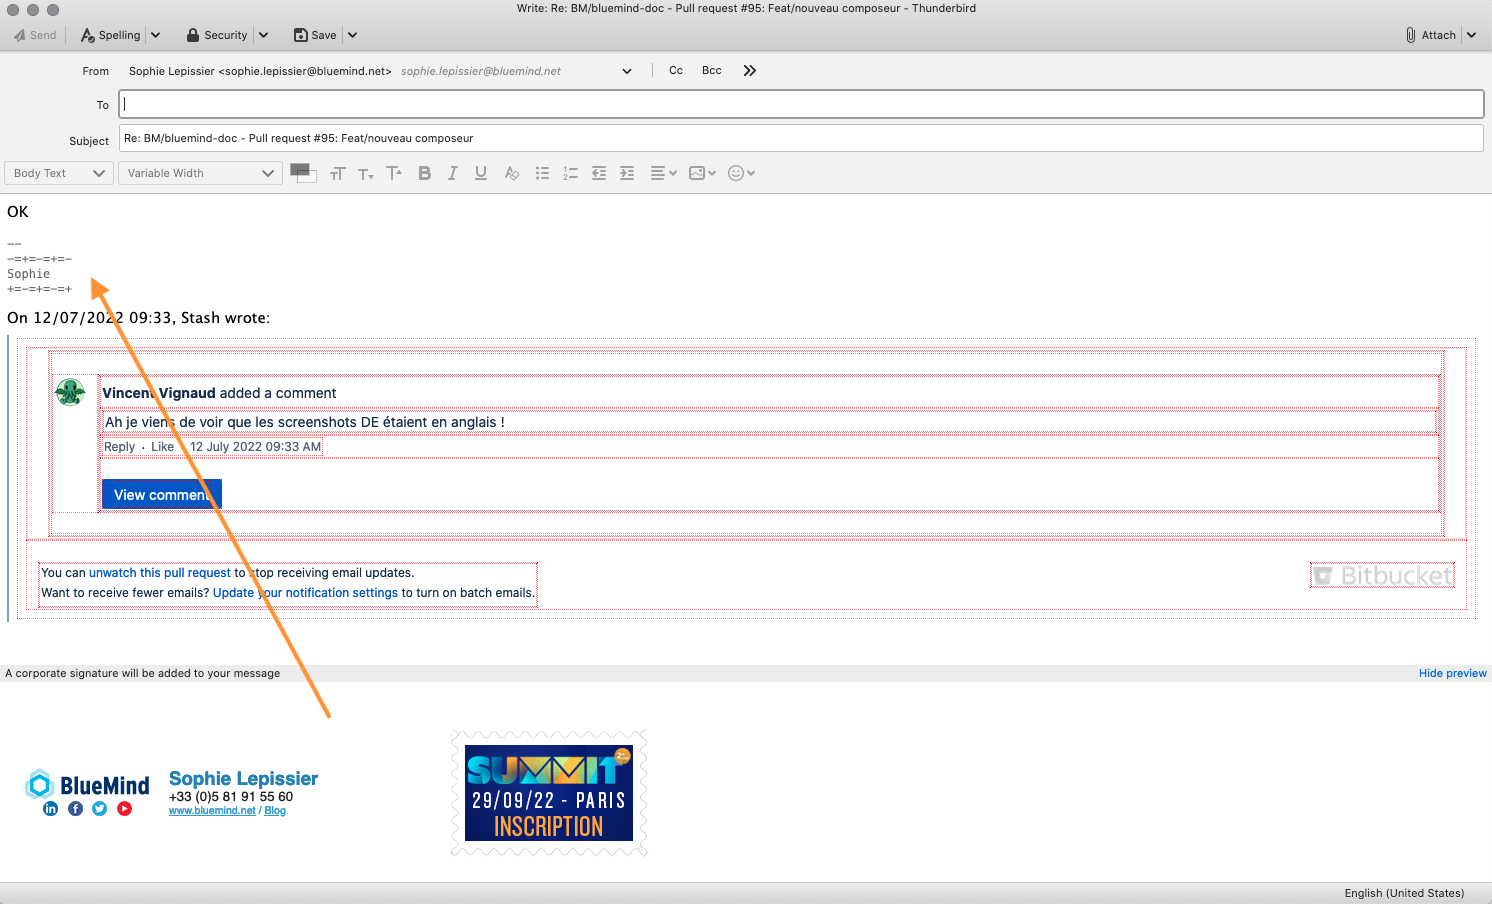
Even in the case of placement by Thunderbird, the tag can still be moved manually by the user if they wish to temporarily place the signature elsewhere.
The signature is then inserted by the server where the tag is located:

If the tag is missing or deleted, the signature will be placed at the very end of the message.
Using a personal signature
Thus, if a personal signature is used in Thunderbird, the corporate signature will be added to it . So if a personal signature is used in Thunderbird, the corporate signature will be added to the email.
It is therefore advisable not to use a personal signature when a corporate signature is present, unless it provides additional relevant and desired information, or to use the investment tag as a signature (see previous section).
Troubleshooting
Connector preferences can be accessed via the Tools menu > BlueMind > BlueMind Connector Preferences.
Resetting the connector
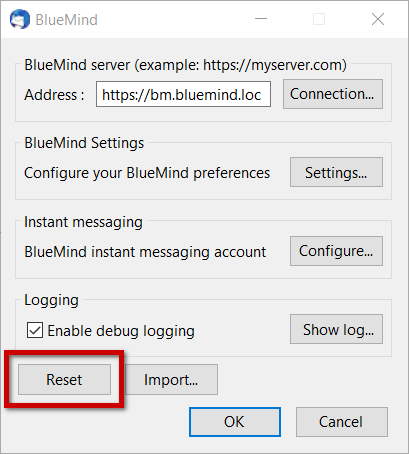
When malfunctions occur that cannot be resolved by simply restarting the software, the first step is to reset the connector: this operation resets synchronization and clears Thunderbird's browser cache.
It's as simple as this:
- Go to the connector's preferences
- click the "Reset" button:
- Exit by clicking on OK
Connector logs
Getting detailed logs
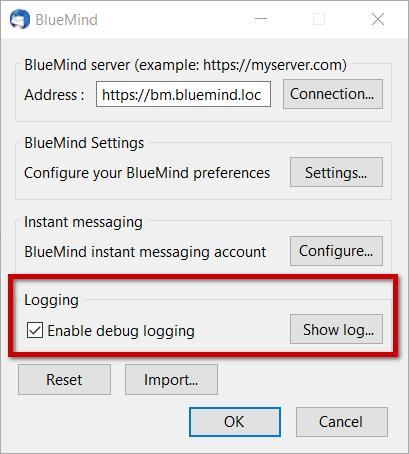
When problems arise for which there is no obvious cause, you need to activate detailed connector journaling, so that you can obtain complete logs providing information on the progress of connector synchronization.
To do this:
- Go to the connector's preferences
- check the "Enable debug logging" box:
- Confirm with the "OK" button
- Restart Thunderbird
Viewing logs
The log activation section (see above) lets you access the logs by clicking "View log..."
Known issues
The calendar tab opens a blank page
If resetting the connector (see above) is not enough to make the agenda reappear, 2 solutions must be implemented:
Clearing the built-in browser cache manually
You can manually reset the cache as follows:
- close Thunderbird's calendar tab
- go to Tools > Clear recent history
- Choose "Everything" in the drop-down menu and check all the boxes
- Click "Clear now"
- in Thunderbird, open the calendar tab
Forcing cache cleaning
In addition to resetting and manually emptying Thunderbird, you can also perform a forced cleanup of Thunderbird's caches:
-
Close Thunderbird
-
use the command line:
"C:\Program Files (x86)\Mozilla Thunderbird\thunderbird.exe" -purgecaches
For more information, visit https://developer.mozilla.org/fr/docs/Mozilla/Command_Line_Options
- Delete local storage folder:
C:\Users\John\AppData\Roaming\Thunderbird\Profiles\c05tkj52.default\storage\default\https+++bm.bluemind.loc
*Note: The path to the program may vary depending on the OS version*

4. Restart Thunderbird

If none of these methods restores the calendar, you will need to enable detailed journaling (see the previous paragraph) and send the resulting logs to your IT department or BlueMind support.