Sending messages
Creating a message
-
To send a new message, click
 at the top of the left column or in the composer.note
To create a message in a new window, click the "New message" button while pressing the "shift" key or click the "New message" button and then "Open in a new window".

-
To reply or forward a message: use the commands at the top right of the message

:::tip Transfer as attachment
To transfer a message as an attachment, use the "Other" menu in the top right-hand corner or the toolbar menu.
For further details, see Add attachments:::
-
To compose a new email from an existing email and resend or forward it:
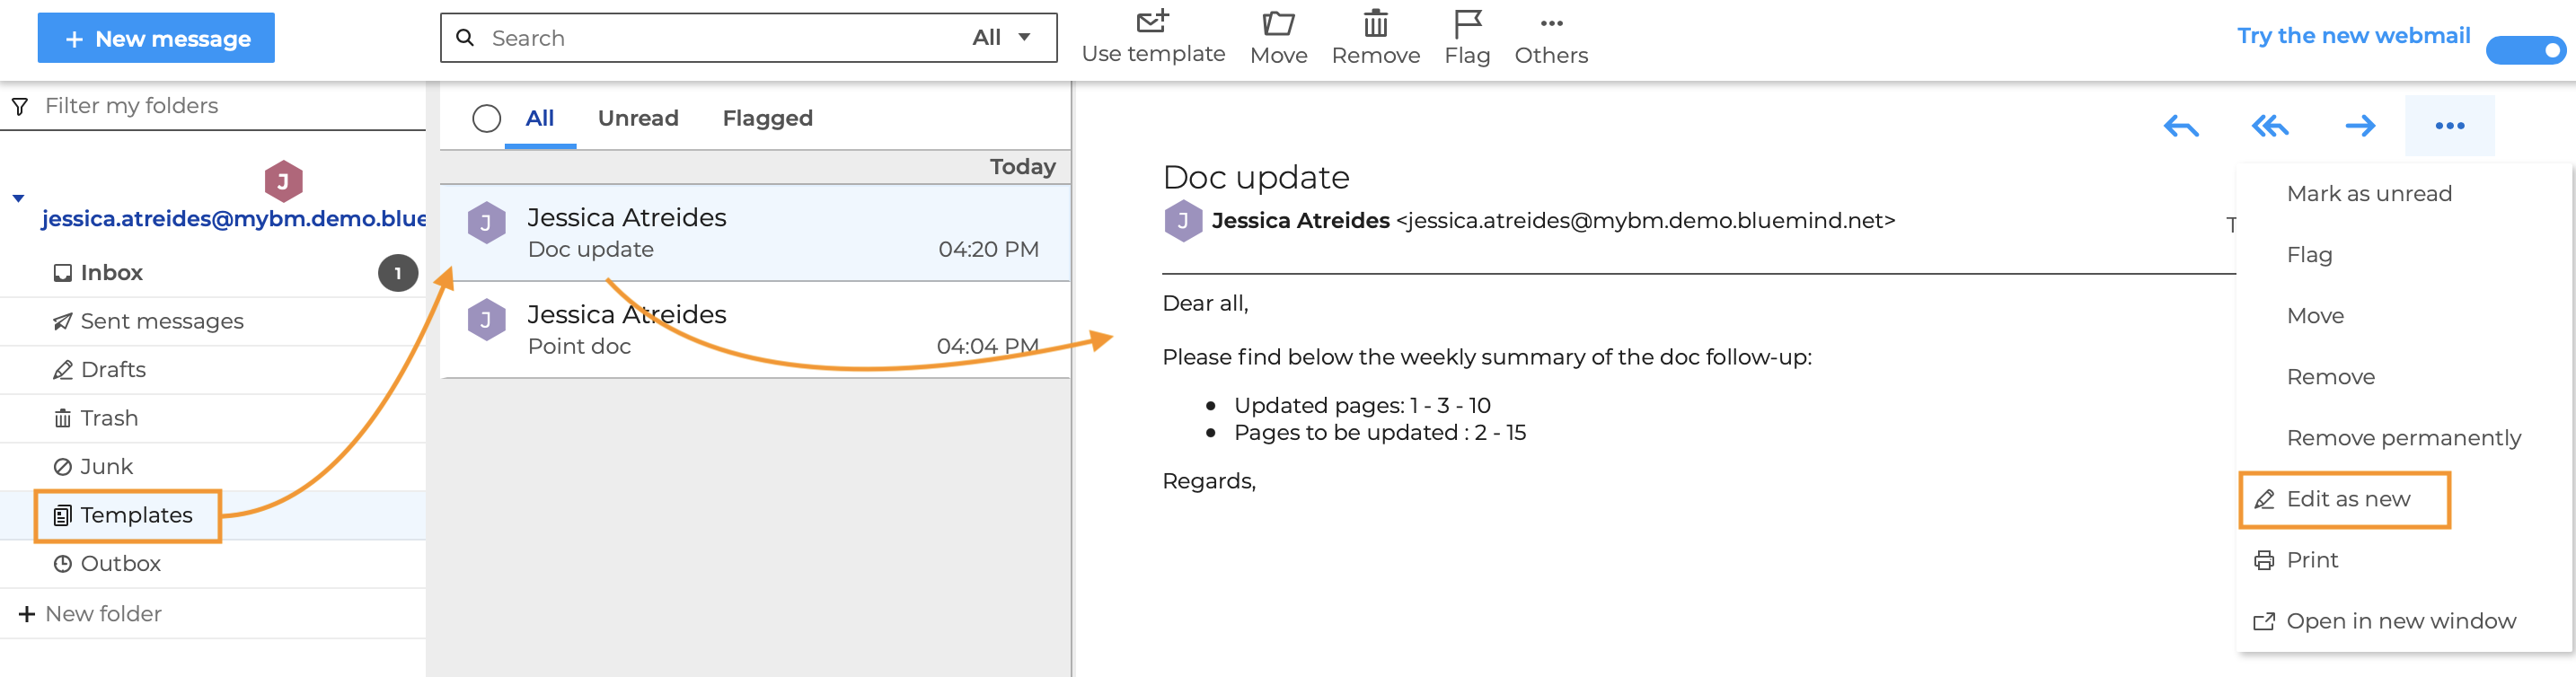
Open the email, go to the "More" menu above the email or in the controls at the top right, then select Edit as New Email:
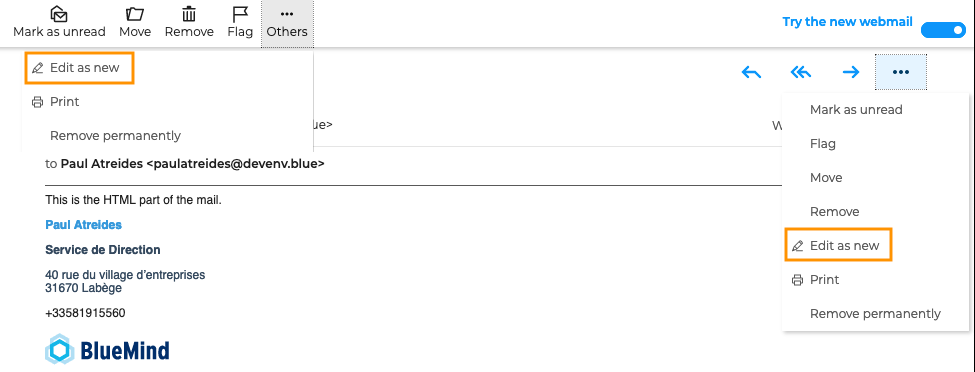
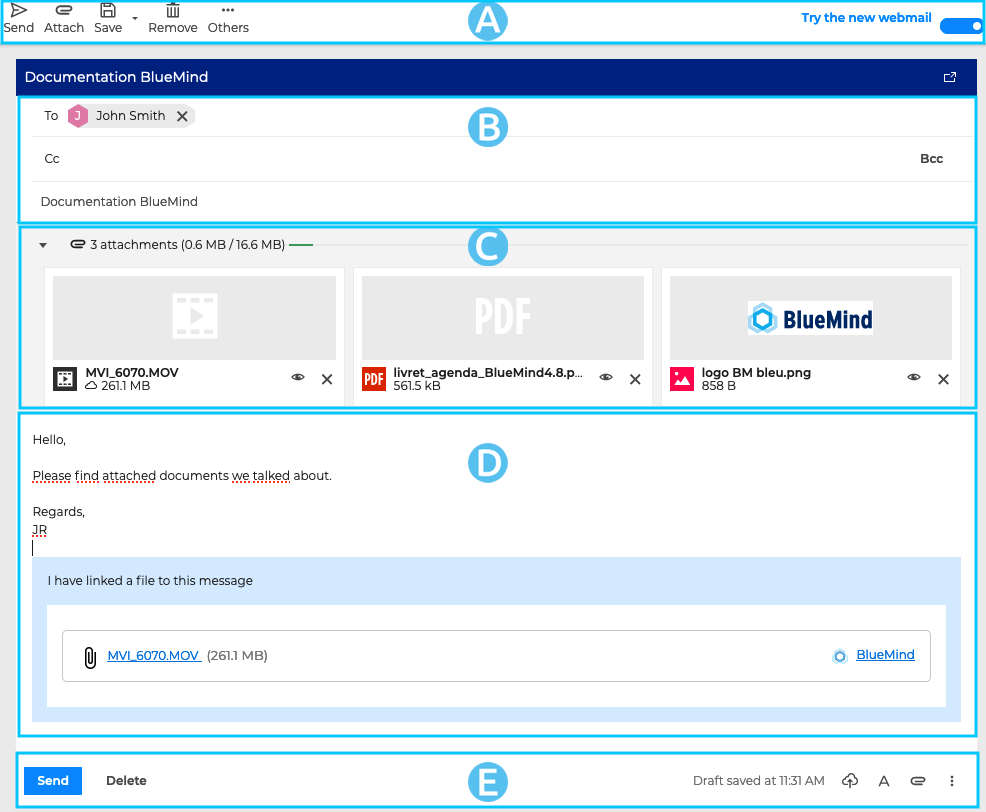
After selecting one of these actions, the BlueMind mail app composer opens on the right side of the interface:
-
 : the main toolbar shows the actions available for the current message - send, attach, save as draft, remove or display the "From" field
 -
 : this area shows the address fields (From, To, Cc, Bcc) as well as the subject fieldnote
The "To" box is for the main message recipient(s). The "Cc" ("Carbon copy") box is for adding other recipients as for reference The "Bcc" ("Blind carbon copy") box is for adding recipients whose address will be hidden from other recipients
-
 Attachments: this area displays attachments to messages. It can be collapsed or expanded to show more or less file information.
 -
 the message editing area
 -
 : In addition to the registration information, this area features a set of the main action buttons for intuitive and easy access: on the left are the buttons to send and delete the email; on the right, you’ll find options for formatting, adding attachments, and a menu for additional actions: add a signature, use a template, display the “From” field, and request read/delivery receipts.
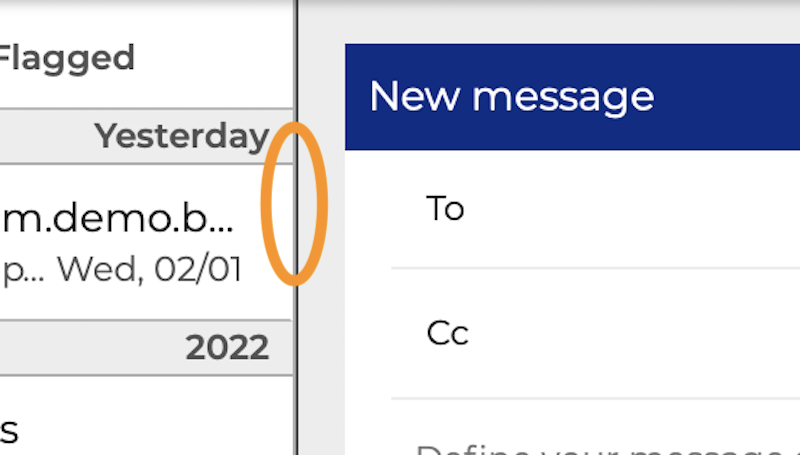
The width of the composer is adjustable by dragging the divider between the composer and the email list
Choosing recipients
The recipient(s) of the message are added to the To, Cc or Bccfields.

The "To" box is for the main message recipient(s). The "Cc" ("Carbon copy") box is for adding other recipients as for reference The "Bcc" ("Blind carbon copy") box is for adding recipients whose address will be hidden from other recipients
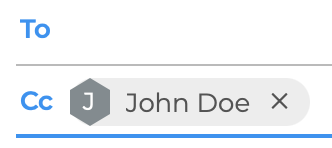
By default, the TO field is selected. Click on Cc or Cci to add recipients. The field is then displayed in blue.
Recipients can be added directly to the fields or selected from address books.
Adding recipients in To, Cc or Bcc fields
To add a recipient, enter the first few characters. The To, Cc, and Bcc fields offer suggestions from all contacts saved in the user's personal address books and in the Directory.
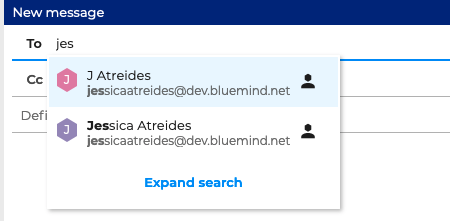
Suggestions are ordered based on a relevance score.
:::info The relevance score
A contact's relevance score depends on when the address was used. Thus, for two contacts to whom the same number of messages have been sent, the one most recently used appears first in the list of suggestions.
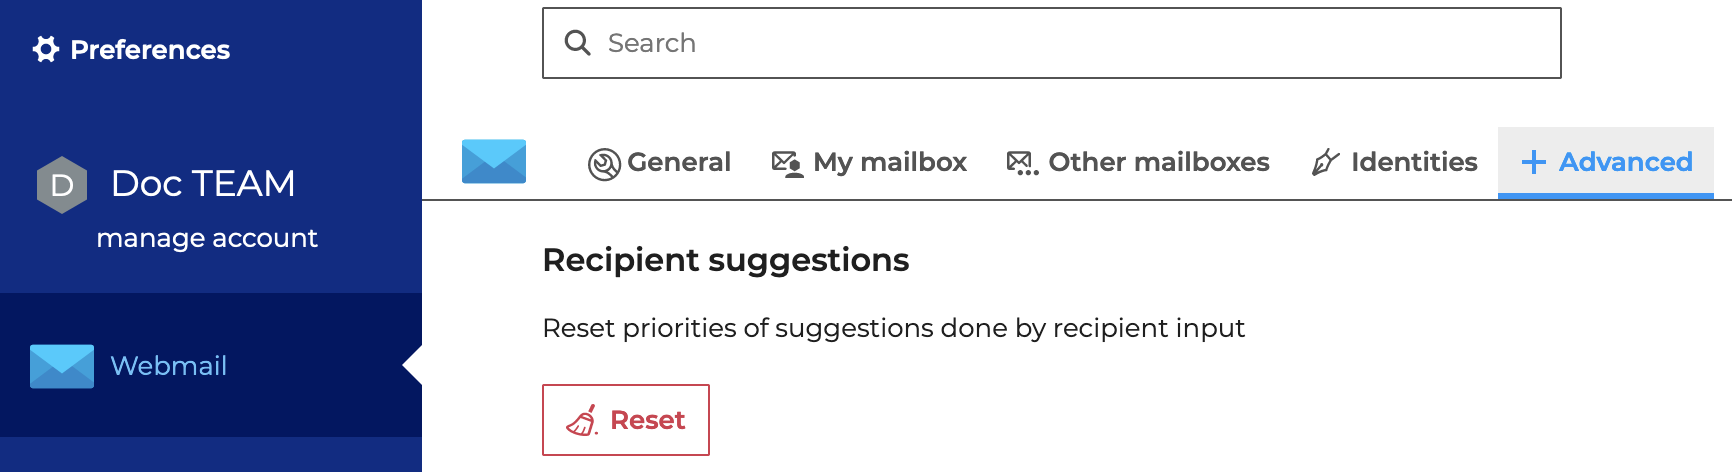
To reset the relevance system, go to the mail app settings: Preferences - Mail App - Advanced and click "Reset"
:::
→ Click on "x" to delete an address from the suggestion list. The address remains in the list but is no longer visible.
→ Click "Expand Search" to view the hidden addresses.
→ Click on the desired contact (or type Enter) to validate add recipient
To enter a new address, type (or copy/paste) the e-mail address and confirm with Enter or a separating character (space, comma, semicolon, etc.).
:::tip adding multiple email addresses
It is also possible to copy/paste several e-mail addresses at the same time. BlueMind automatically detects different addresses.
:::
As soon as an e-mail is sent to an unknown address, the contact is automatically added to the "Collected contacts" address book.
Search and select recipients
BlueMind also allows you to search and select one or more recipients in the user's address books without leaving the messaging system.
To do this, open the contact selector by clicking on the desired field To, Cc, or Bcc
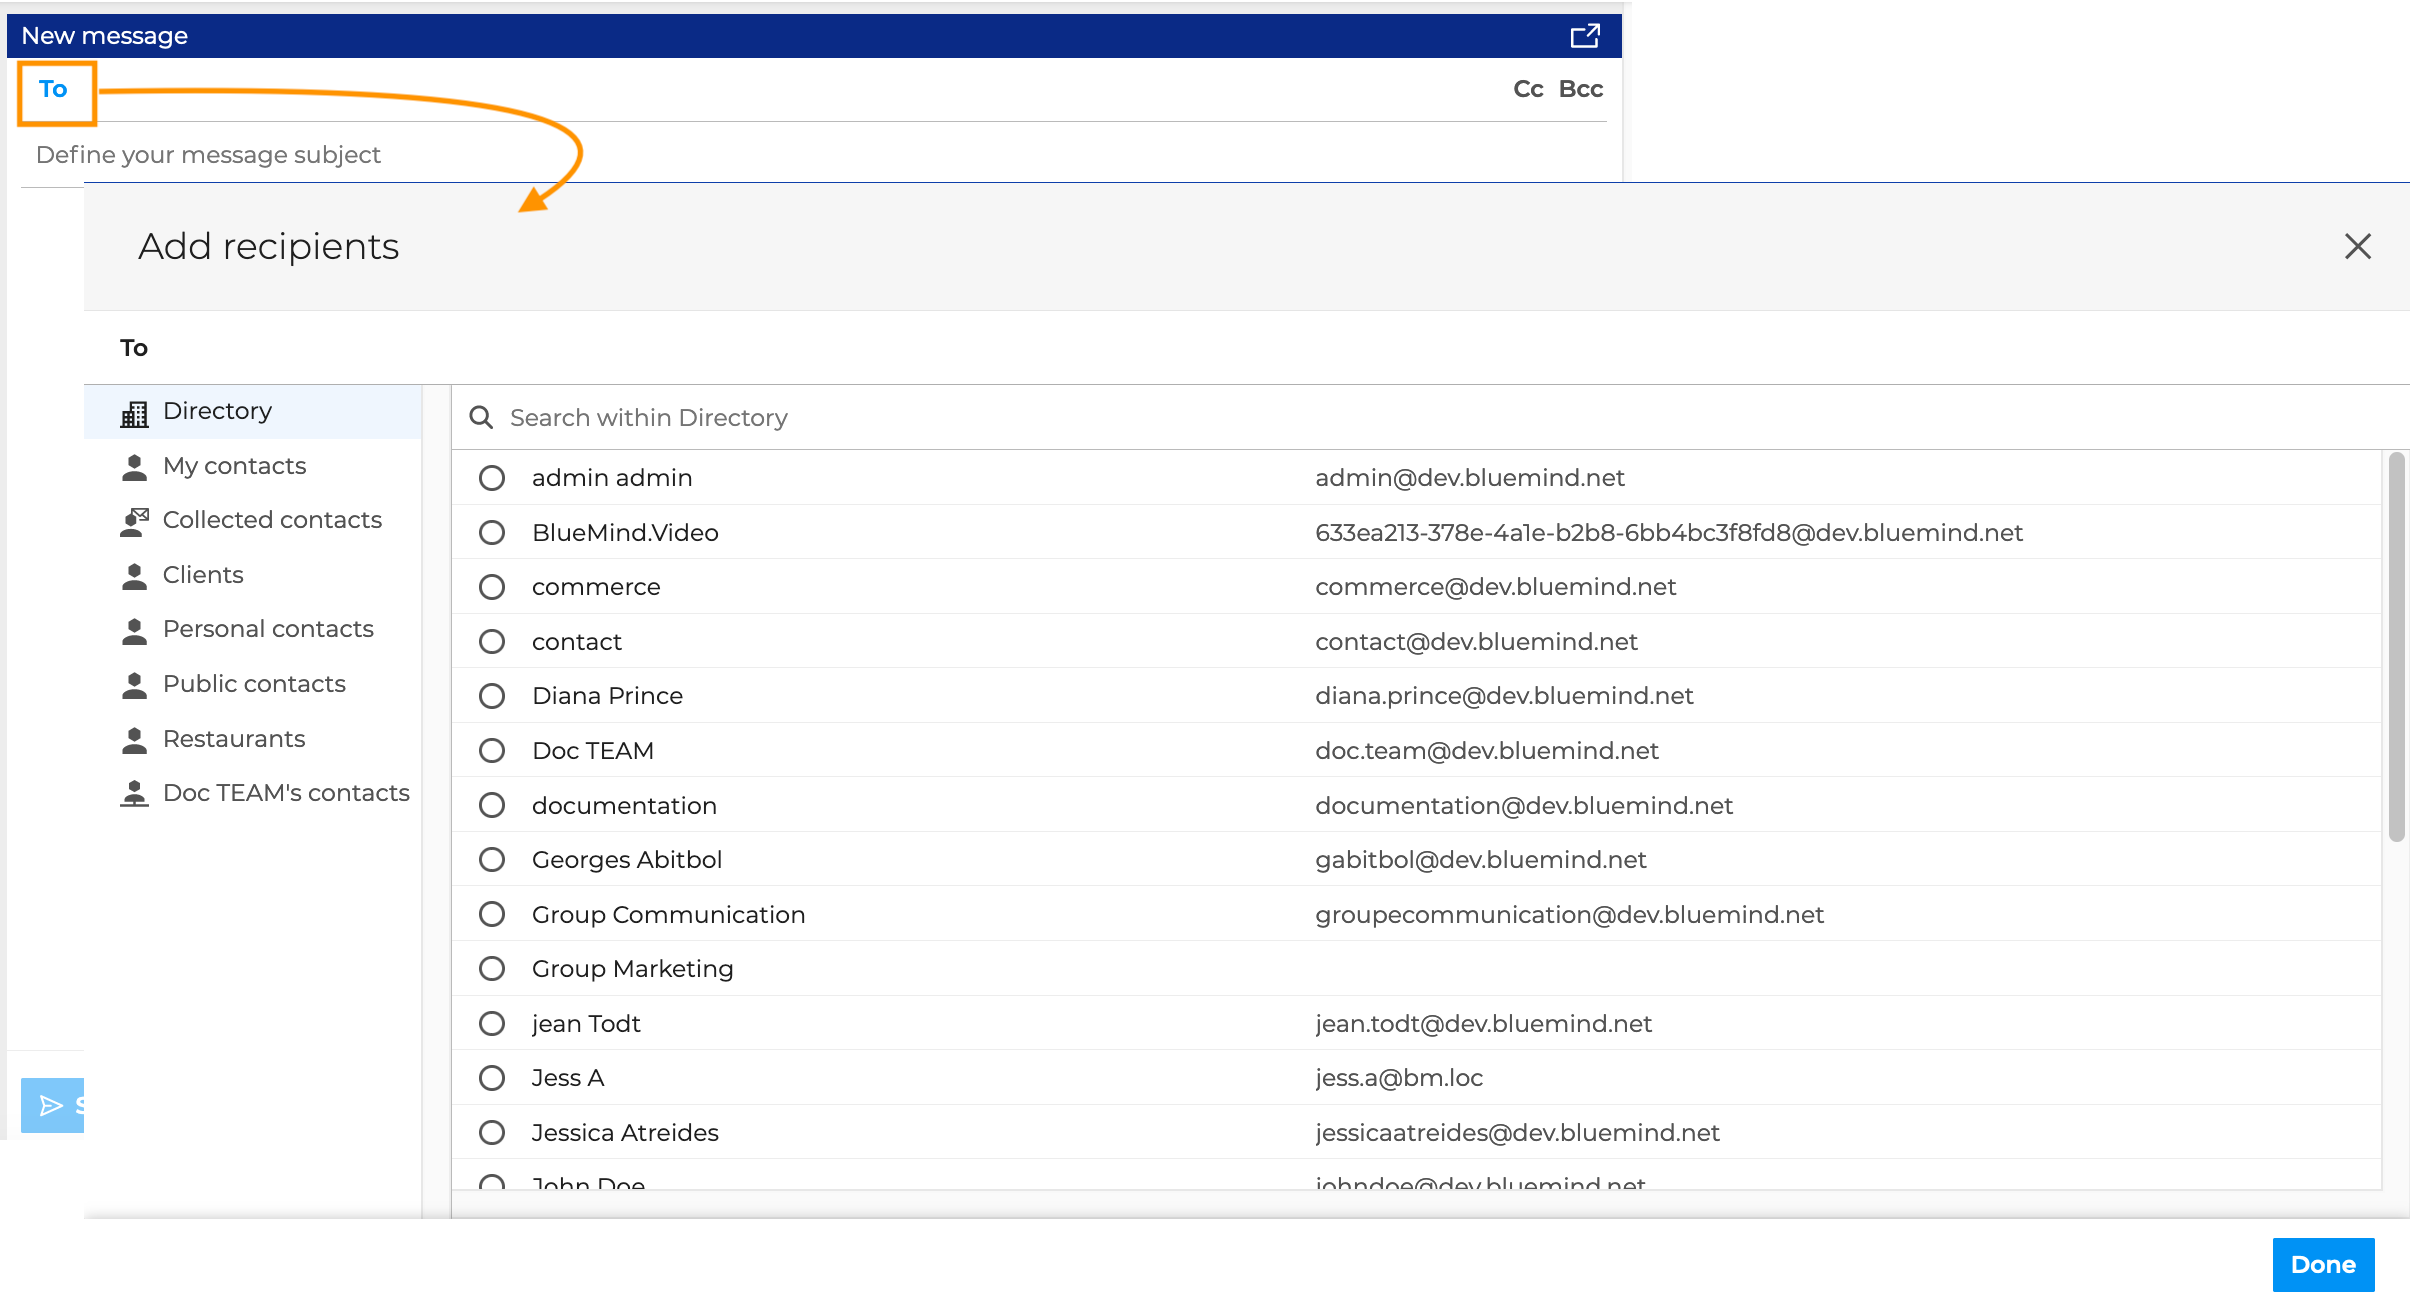
In the contact selector, select the address book, then check the desired contact(s)
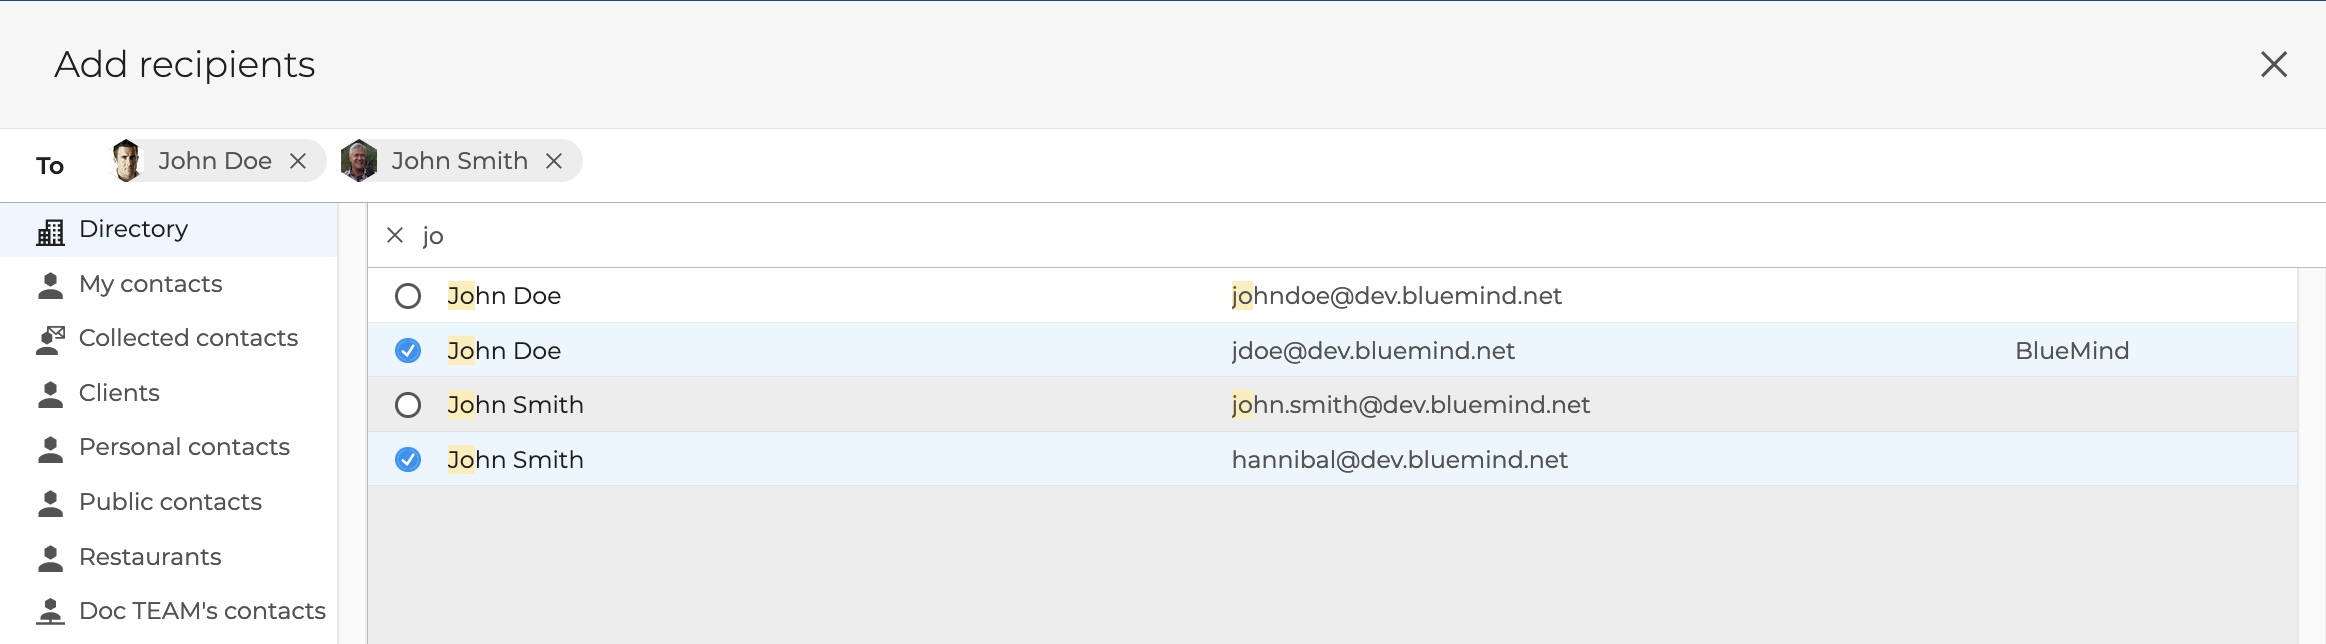
Note: Type the first few letters of a contact's name in the "Search" box to find it more quickly
It is also possible to select a group of contacts. To do this:
- check the first contact of the set
- hold the
Shiftkey - Click on the row of the last contact in the list (do not click on its checkbox, as that only allows a single selection)
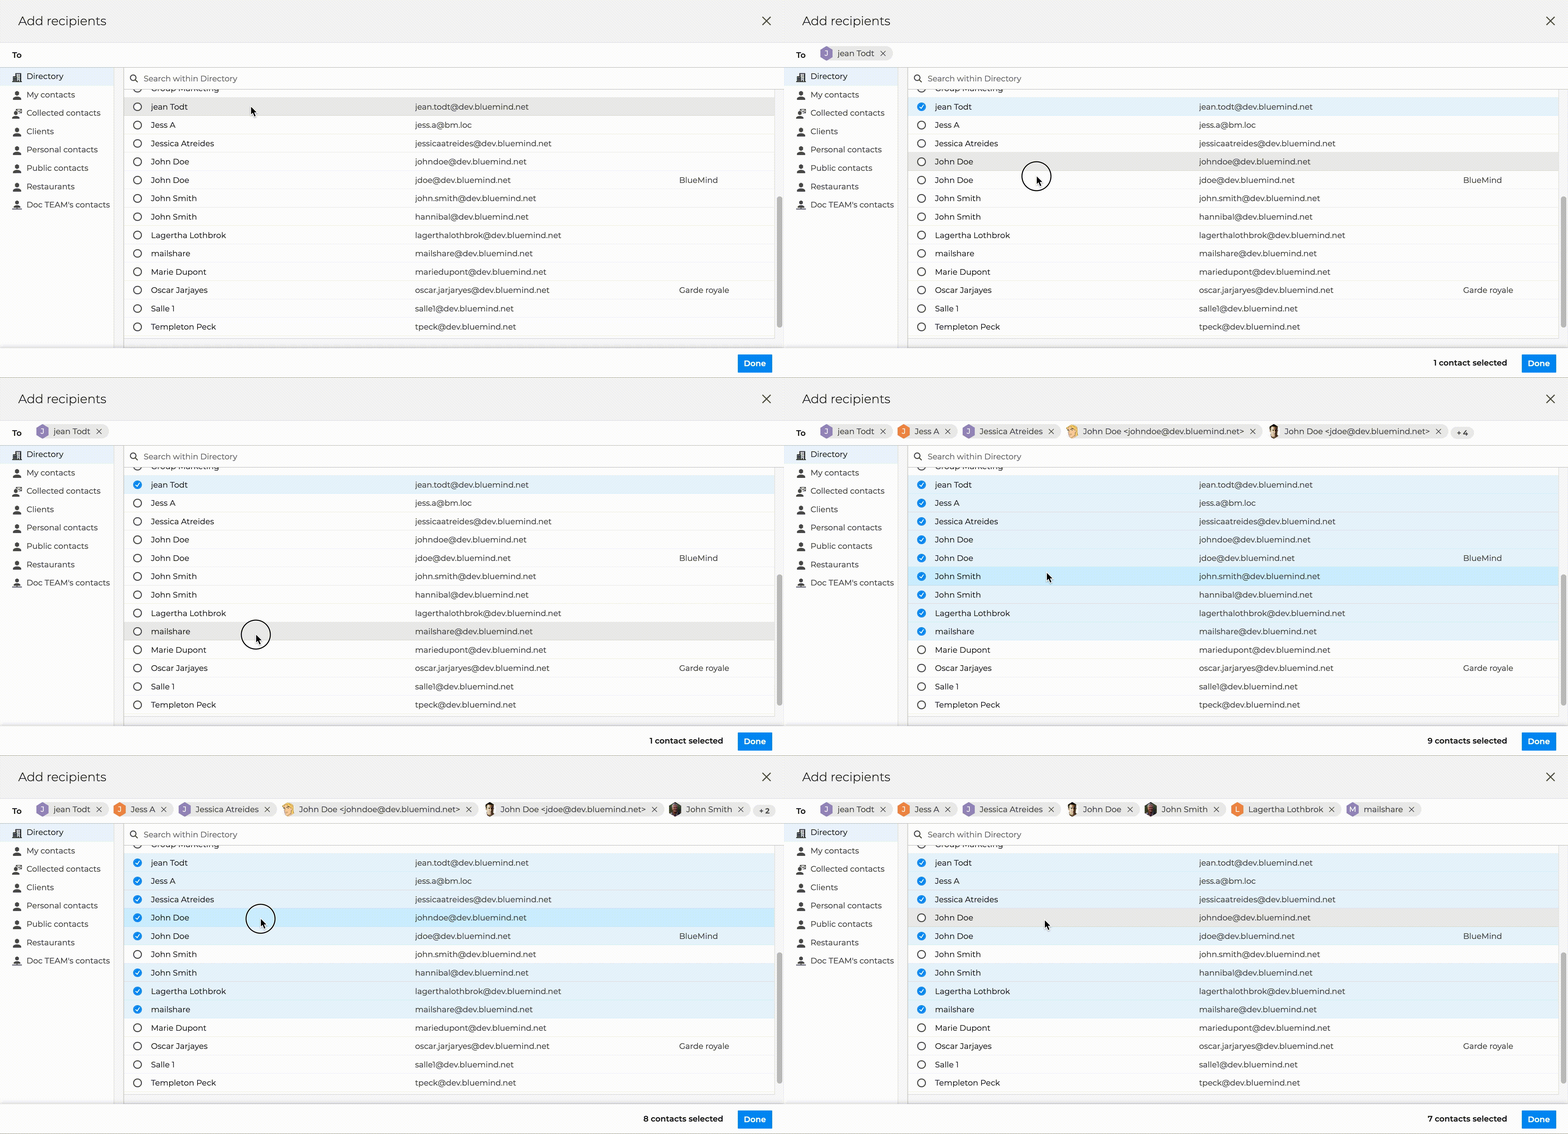
Note: To deselect a contact from the list, click on the row while holding down theCtrlkey.
Once the contacts are selected, click on Done.
The selected contacts then appear in the To, Cc or Bcc field.

Displaying contact details
Once you've added a recipient, you can view all their contact details by clicking on them. See View a Recipient's Contact Information for more information.
Adding a group contact
BlueMind allows you to send messages to a set of contacts using distribution lists, groups with or without email addresses, and shared mailboxes.
These types of contacts can be added to the list of recipients in the same way as any other contact, directly in the To, Cc, or Bcc fields or by searching for them in your address books. The shared mailbox, group or list is then displayed in the recipients list.

For shared mailboxes, the email is sent to the mailbox address
For distribution lists and groups without email addresses, the message is sent to all members of the list or group - including invisible members of the group.
For groups with an email address, the email is sent to the group's email address.
The + sign located in front of distribution lists and groups allows:
- on hovering, to see the number of members and the e-mail addresses of shared mailboxes and groups with an address
- by clicking on it, to replace the list or group with its members in the recipients. For example, this can be used to remove certain members.
NB: Attention, in this case, invisible members and the email address of groups do not receive the message.
When saving an email as a template or draft:
- distribution lists and groups without e-mail addresses are replaced by their members (visible only)
- mail addresses of shared mailboxes and groups with addresses are retained
- group members with an e-mail address are not saved
- in the case of a large number of recipients, only the first line is displayed, indicating the number of additional recipients. Click on the numbers to display all recipients

Deleting a recipient
To remove a recipient, click the delete icon next to their name:

Choosing the sender
BlueMind lets you send emails from different email addresses or with different signatures without switching user accounts. To do this, simply display the "sender" field to select the desired identity.
Select identity
To display the sender field, select the "Show 'From' Field" option from the "Other" menu:
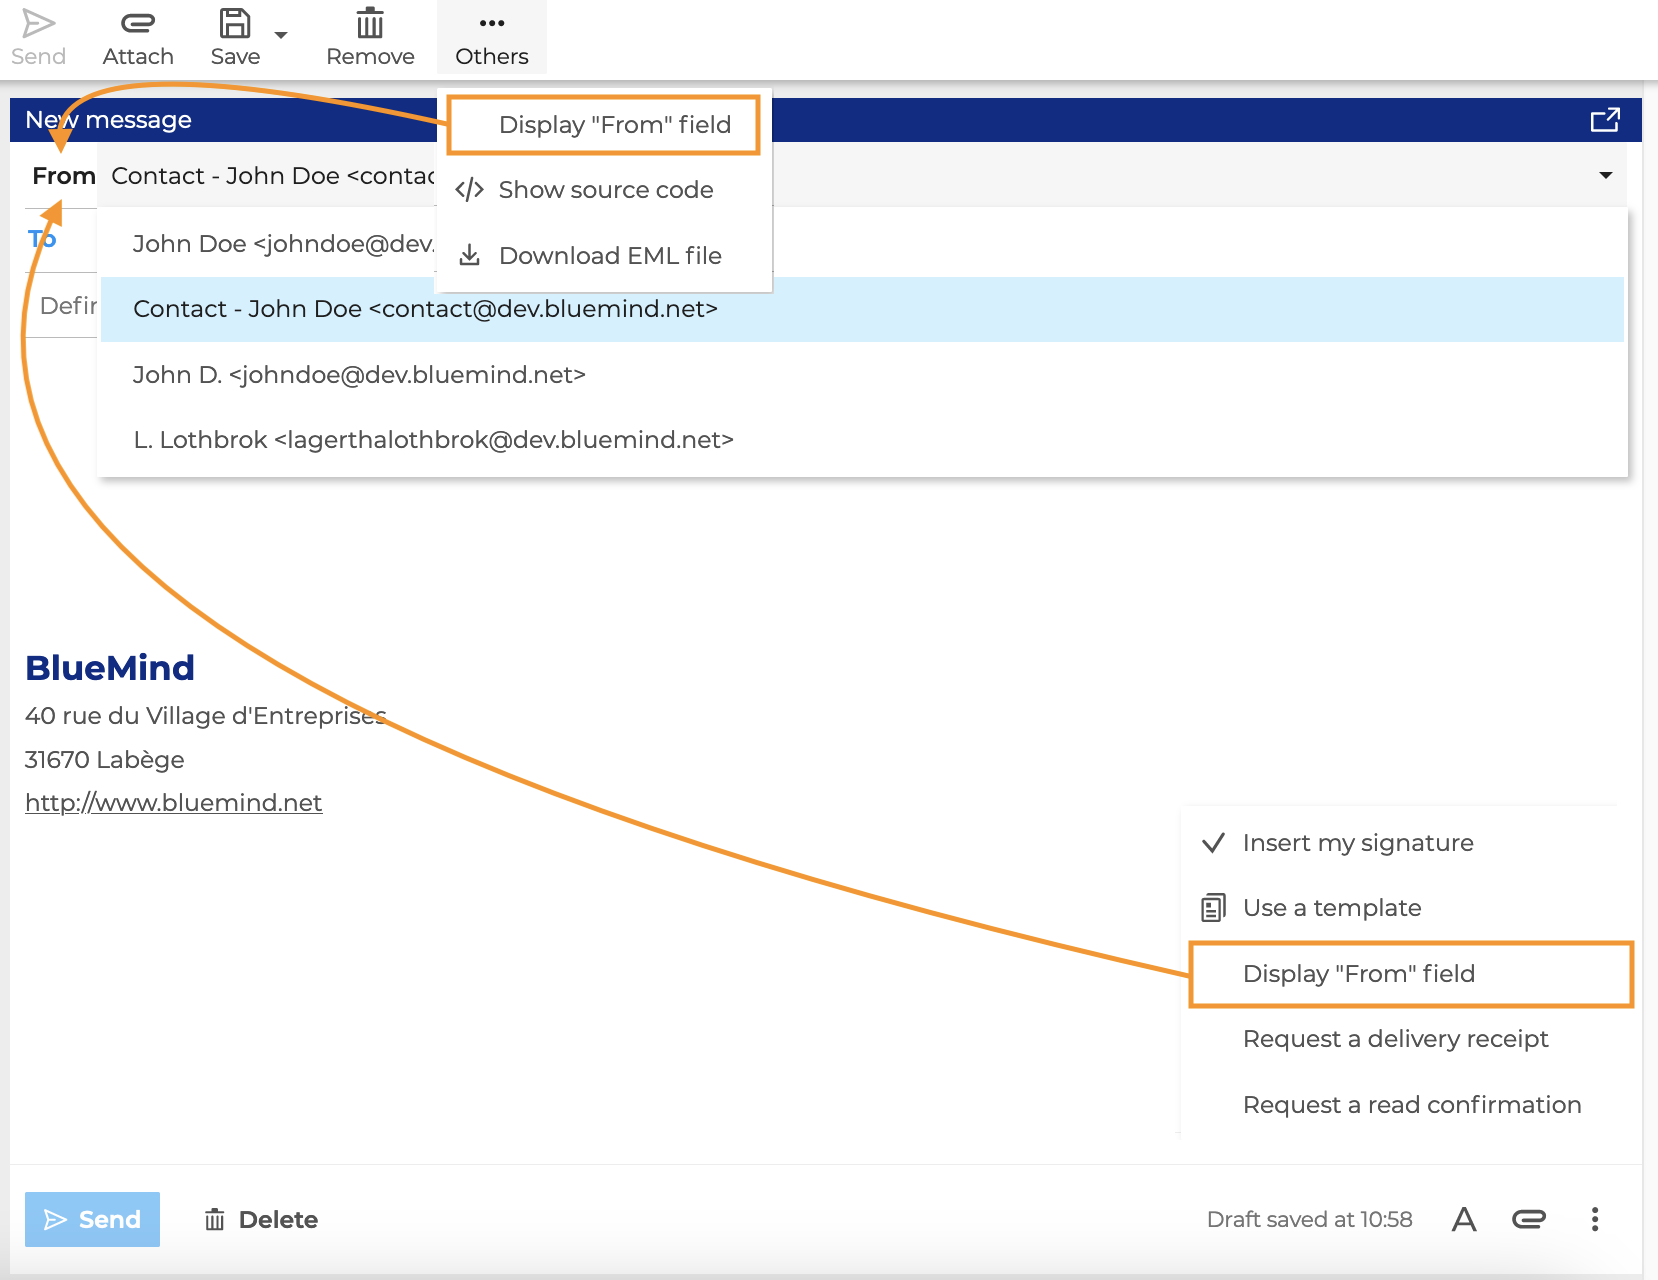
It is also possible to display the "From" field permanently. For more information, see the section on the page dedicated to Identity Management > Using an Identity.
Next, expand the list to select an identity from those created in the mail app preferences.
Write on behalf of a shared box
Necessary rights
To send a message with the email address of a shared mailbox, you need to :
- have write permissions on the shared mailbox
- Subscribe to the shared mailbox
- Create an account using the shared mailbox's email address
Consequences for messages
- The email sender matches the name listed in the identity.
- Sent emails can be stored in the user's "Sent Emails" folder or in the shared mailbox, depending on the option selected in the identity.
Writing to an external e-mail address
Necessary rights
To send a message with an external address (e.g. a personal address), you must :
- Have the role "External Identity"
- Create an account using the external email address
Consequences for messages
- The email sender matches the name listed in the identity.
- Sent messages are stored in the user's "Sent messages" folder.
Editing message contents
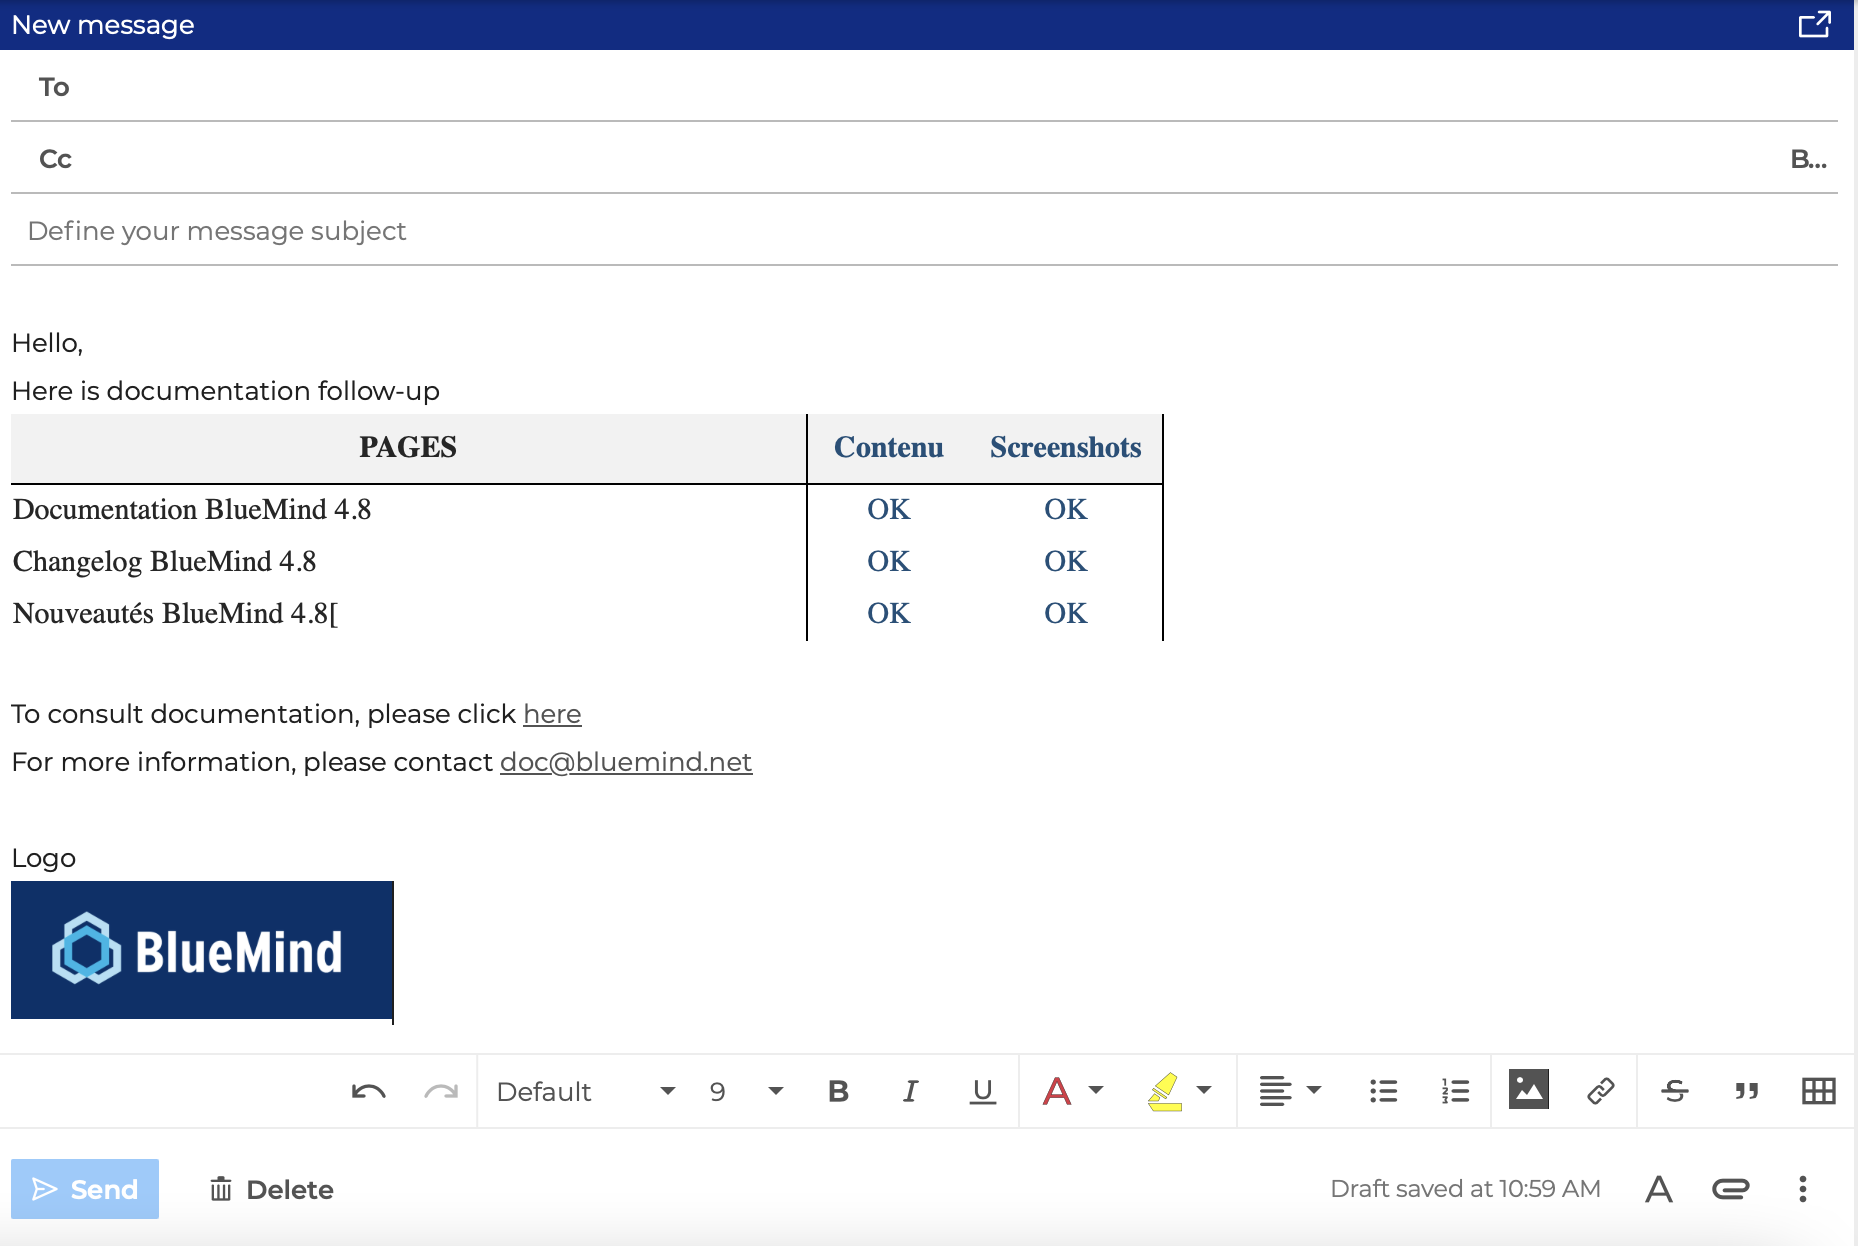
The BlueMind messaging composer makes it easy to create HTML messages with enriched text, images, tables and links.
Editing text
The  formatting button in the toolbar at the bottom of the composer is used to show all formatting actions available: change font, color, underline, bullet lists, etc.
For quick edits, select the text you want to edit and use the actions that appear automatically:

:::info Default font selection
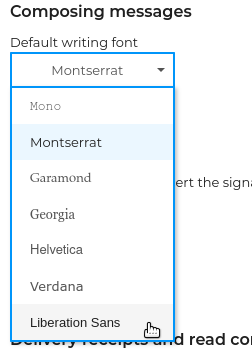
Each user can define the default font to be used when writing messages. To do this, go to the messaging settings: Preferences > Messaging > Writing messages and choose the desired font from the list:
:::
:::tip Additional font
Administrators can add a font to the domain to supplement the default fonts provided by BlueMind. The font will be made available to all users of the domain.
:::
Adding links
To add a link, select the text and click on  to open the pop-up window. Enter the link in the field 'Enter a link'. Once created, the link can be modified or deleted by clicking on 'Unlink'.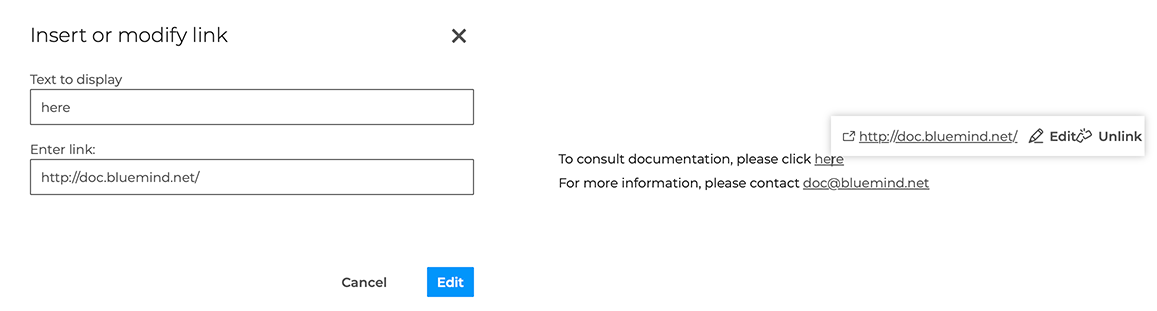
It is also possible to add a 'mailto' link to an e-mail address : in the field 'Enter a link' enter the syntax mailto:exemple@nomdedomaine.loc. It is also possible to specify the subject or add recipients directly in the link.
⇒ See the section on mailto links for more details on the mailto protocol and its support in BlueMind mail app.
Adding images
To add an image to the message, click  or use drag-and-drop to place the image directly into the message body. You can easily resize the image by clicking on it and dragging the blue corners with the mouse:

:::tip Attaching an image to the message
Please note that images can also be added as attachments. :::
Adding tables
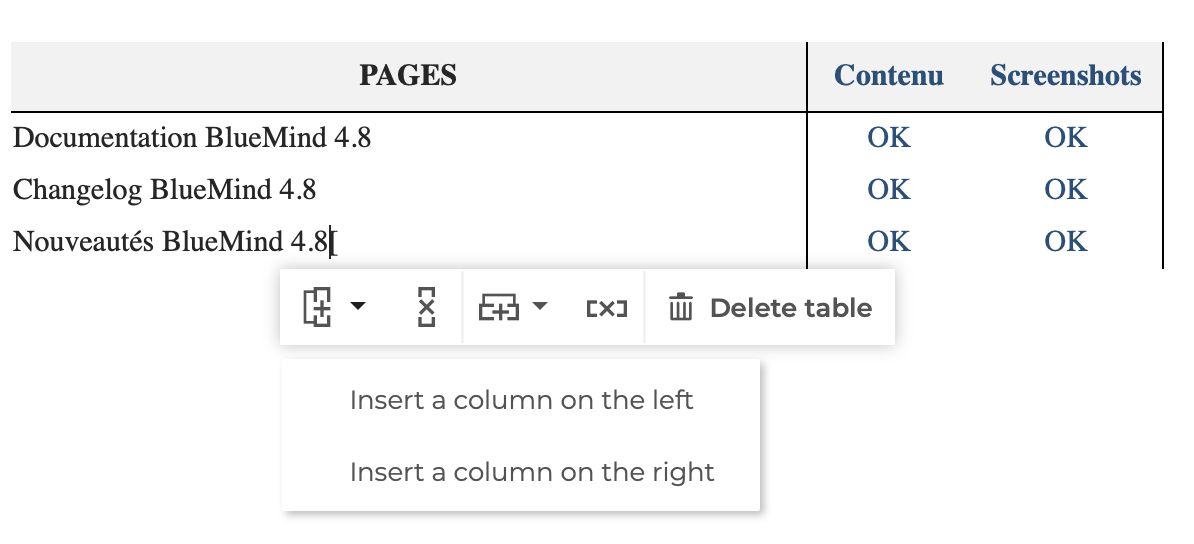
To insert a table, click on  or copy an Excel, OpenOffice or LibreOffice table directly into the message body. You can then add rows and columns by clicking the icons with a
 + and remove them by clicking the icons with an x:
:::info composer display
The state of the composer's width and the display of the formatting action bar will be preserved and displayed identically when reconnecting to the mailbox
:::
Editing a draft
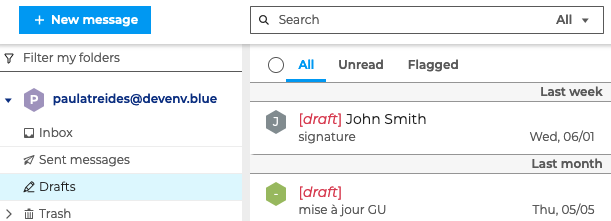
Messages being edited are automatically saved as drafts.
To find them and resume editing later, go to the Drafts folder in the folder list:
When conversation mode is enabled, the email list indicates that an email in the conversation is saved as a draft:
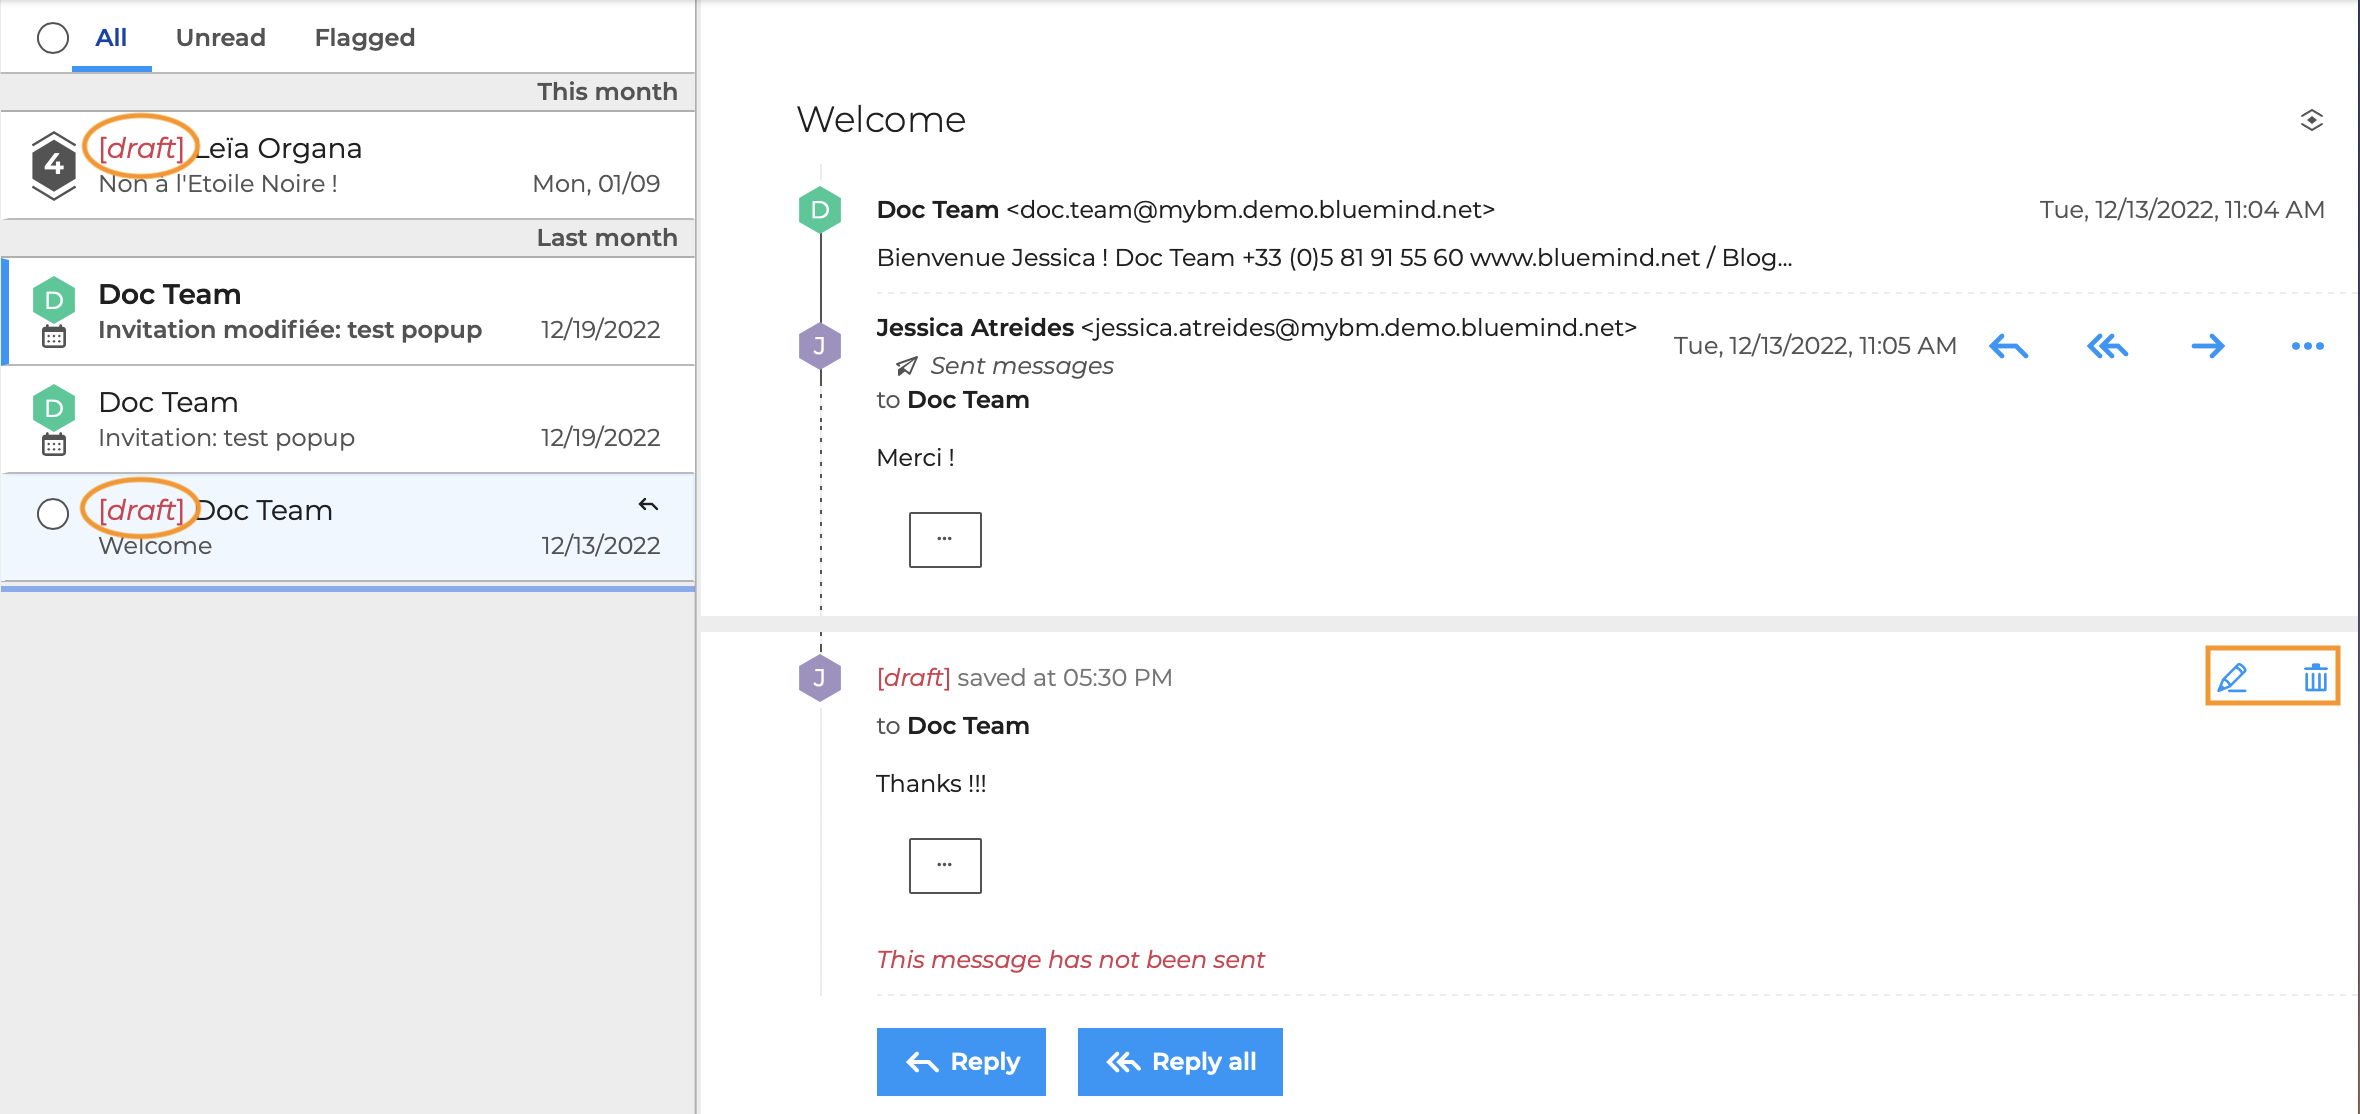
The draft is only shown in the message list if you reply to a message in the conversation. If the draft concerns a forwarded message, this is not shown, as it is not considered part of the conversation.
In any case, drafts are available in the "Drafts" folder.
To edit the draft from the conversation thread, click the icon  and then make the desired changes using the action bar.
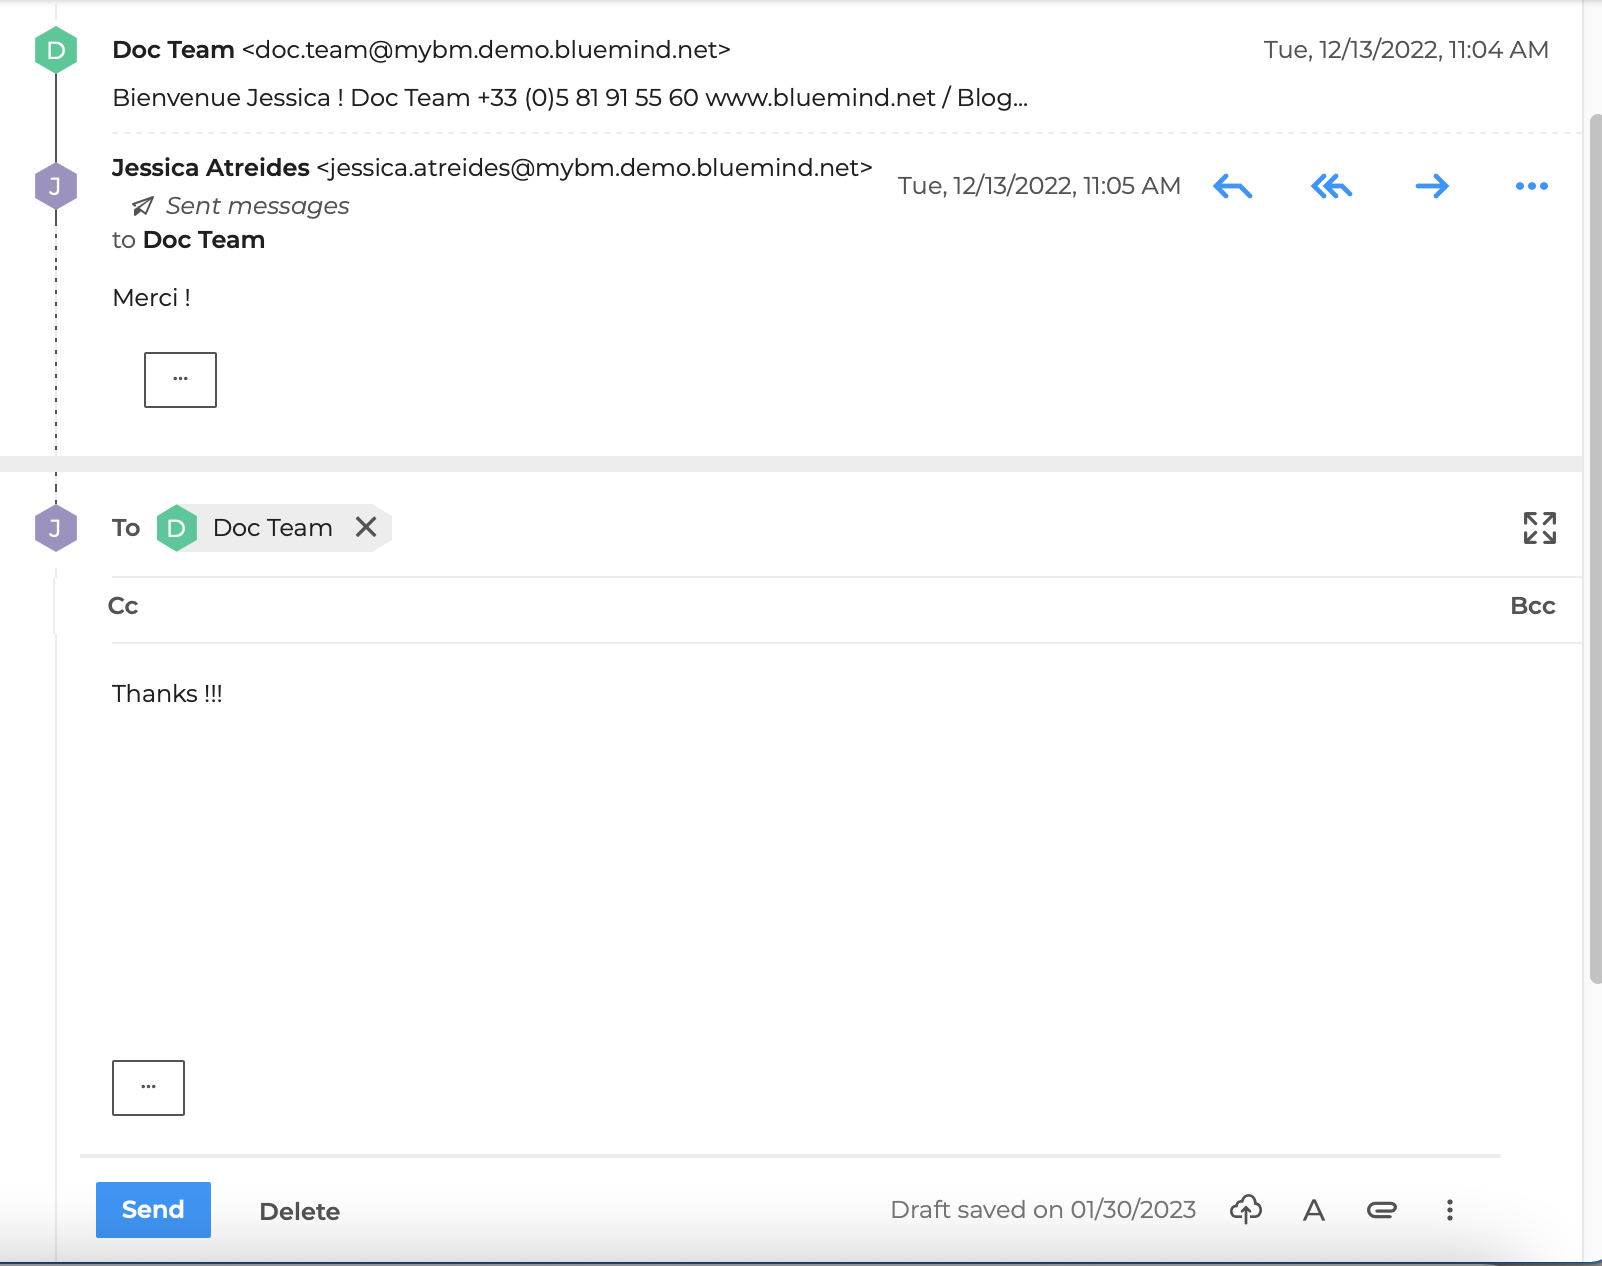
To edit the draft outside of conversation mode, click on  .
.
To delete the draft from the conversation thread, click on the icon 
Using templates
You can save a message as a template for future use, as often as you like.
The email will be saved in the Templates folder in the folder list:
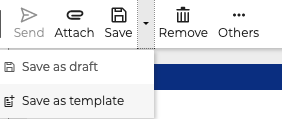
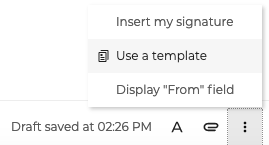
To write a message from a template, there are two possibilities:
- Create a new email, then use the "Use a Template" action in the action bar at the bottom right of the composer:
- Open the template in the Template folder, then click "Edit as a new email" in the "More" menu:
Once the new email has been sent, the template will still be available in the "Templates" folder.
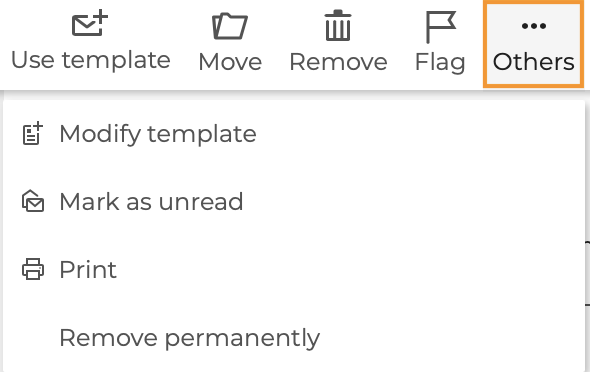
To edit or delete a template, go to the "More" menu in the action bar above the email and select the appropriate option:
Adding a signature
:::caution Signature placement
When a corporate signature is set and applied to the message, the personal signature will be deleted.
For more information, see the section below: Using a company signature.
:::
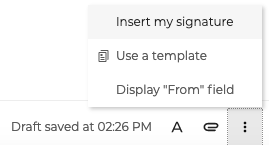
To add a signature to an email, use the "Insert My Signature" action in the action bar at the bottom right of the composer :
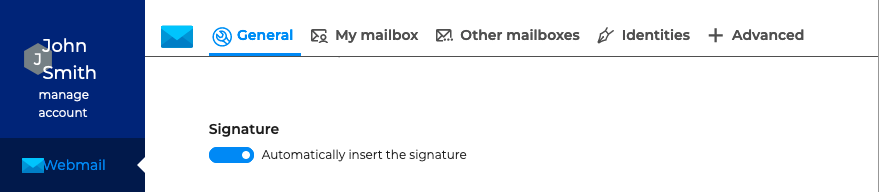
To automatically add a signature to emails, go to Settings: Preferences - Mail App - General - Signatures and check the "Add signature automatically" option:
:::info Signature Management
BlueMind lets you create multiple signatures, each associated with an identity.
For more information, see the Manage Account Identities page.
:::
Using corporate signatures
When a company signature is enabled by the administrator, the "Add my signature" option is not available. An alert telling you that an organization-wide signature has been added is displayed.

The company signature cannot be modified. However, the administrator can configure it so that users can move it within emails—as indicated when you hover over the signature.
To move the signature, simply drag-and-drop it: click the signature and slide it to the desired location in the message body.
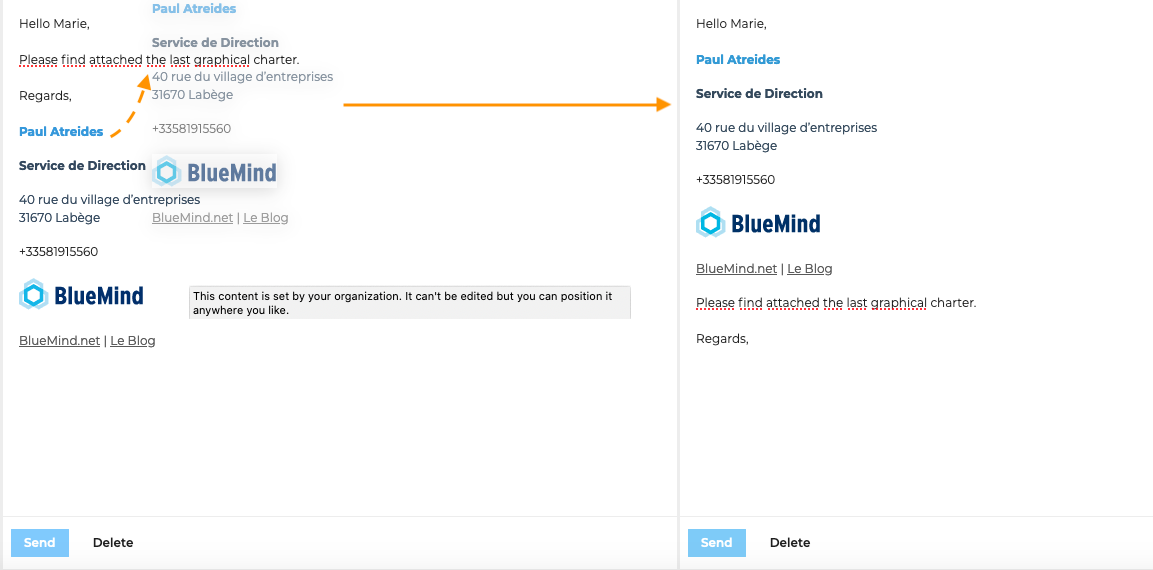
The administrator can also configure company signatures so that they automatically adapt to users' different identities.
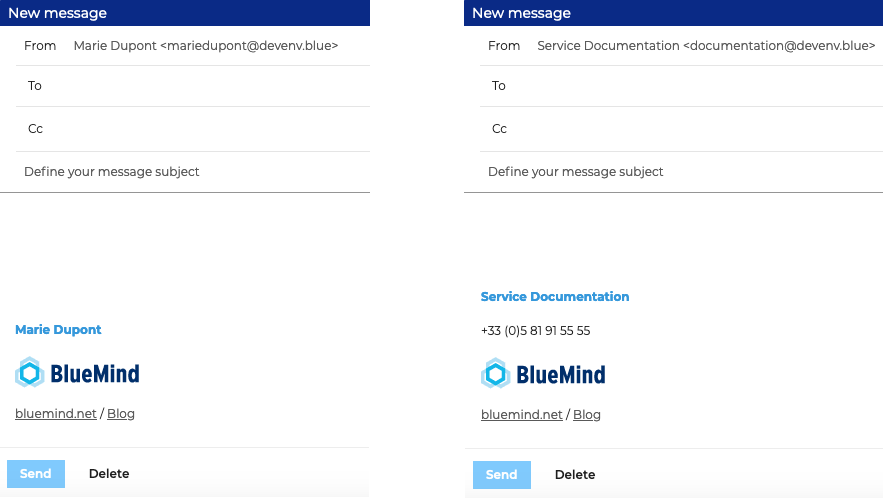
For example, here, the signatures differ depending on whether John Smith is writing on his own behalf or on behalf of the shared mailbox of the documentation department:
:::info Integration with Other Client Software
In the old BlueMind webmail as well as in third-party client software (Thunderbird, mobile apps, etc.), to move the company signature, add these markers to your personal signature:
+=-=+=-=+
my signature
+=-=+=-=+
If a moveable signature is applicable, these 2 markers will be replaced with the corporate signature.
:::
Requesting delivery receipts or reading confirmations
Types of Defendants
An acknowledgement of receipt is issued by the server receiving the message, certifying that the message has arrived on the server and has been deposited in the recipient's mailbox.
A read confirmation is sent by the recipient himself, attesting that the message has been opened, but not guaranteeing that he has read the message content.
Unlike acknowledgements of receipt, read confirmations are left to the discretion of the user: the recipient can choose to send read confirmations systematically and automatically through his client software, or choose to send them manually when a message is read. Therefore, the lack of a read receipt does not mean that the email has not been read.
Unitary Request
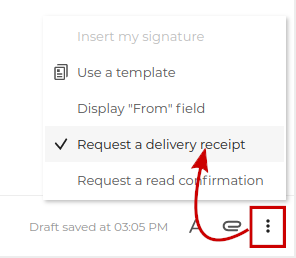
To request an acknowledgement of receipt or a read confirmation for a message in progress, use the menu at the bottom right of the dialer:
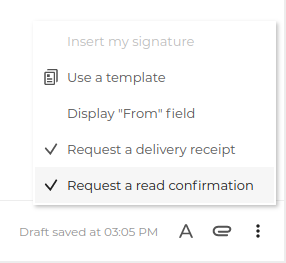
The 2 types of charge can be cumulated:
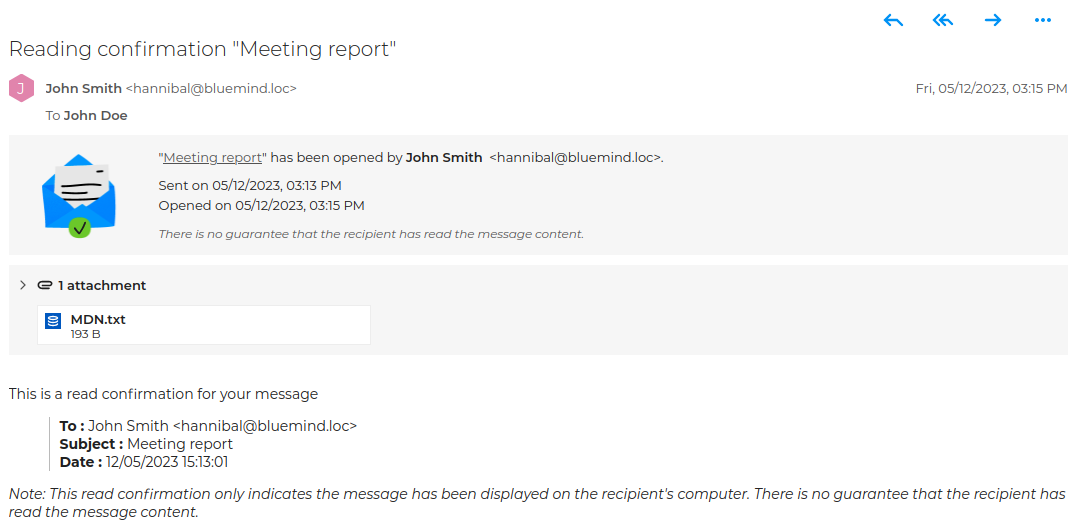
Delivery receipts and read confirmation requests received in this way are presented by BlueMind with an insert clearly indicating the status of the message, followed by the receipt message itself:
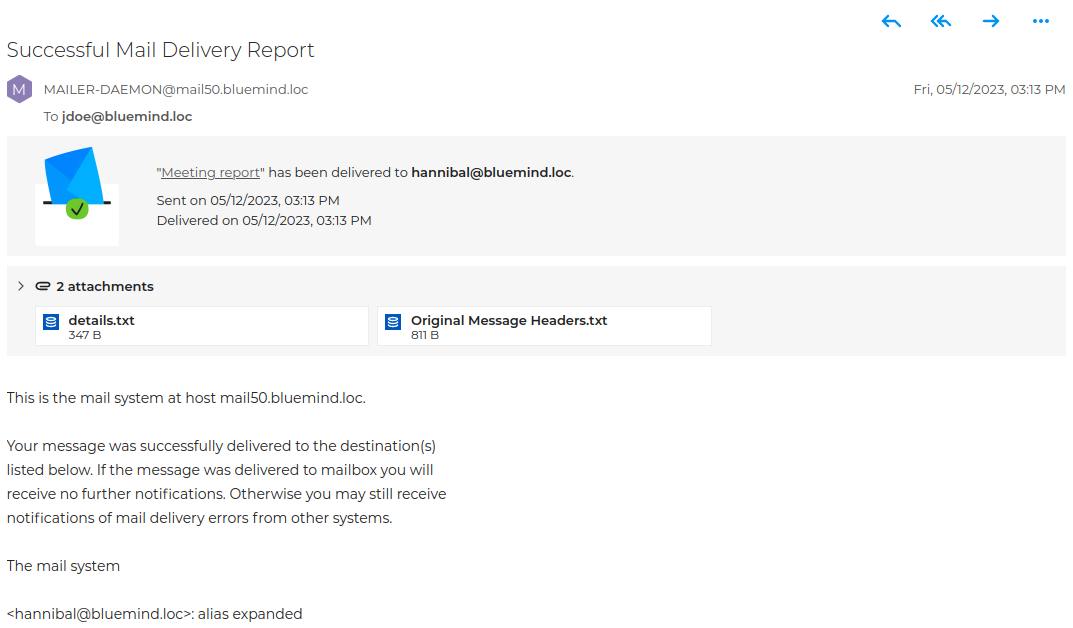 |  |
| Delivery Receipt | Read receipt |
Note that :
- attachments correspond to the standard header files for this type of message
- the acknowledgement message is sent by the interlocutor's server, so its presentation and content may vary from one recipient to another
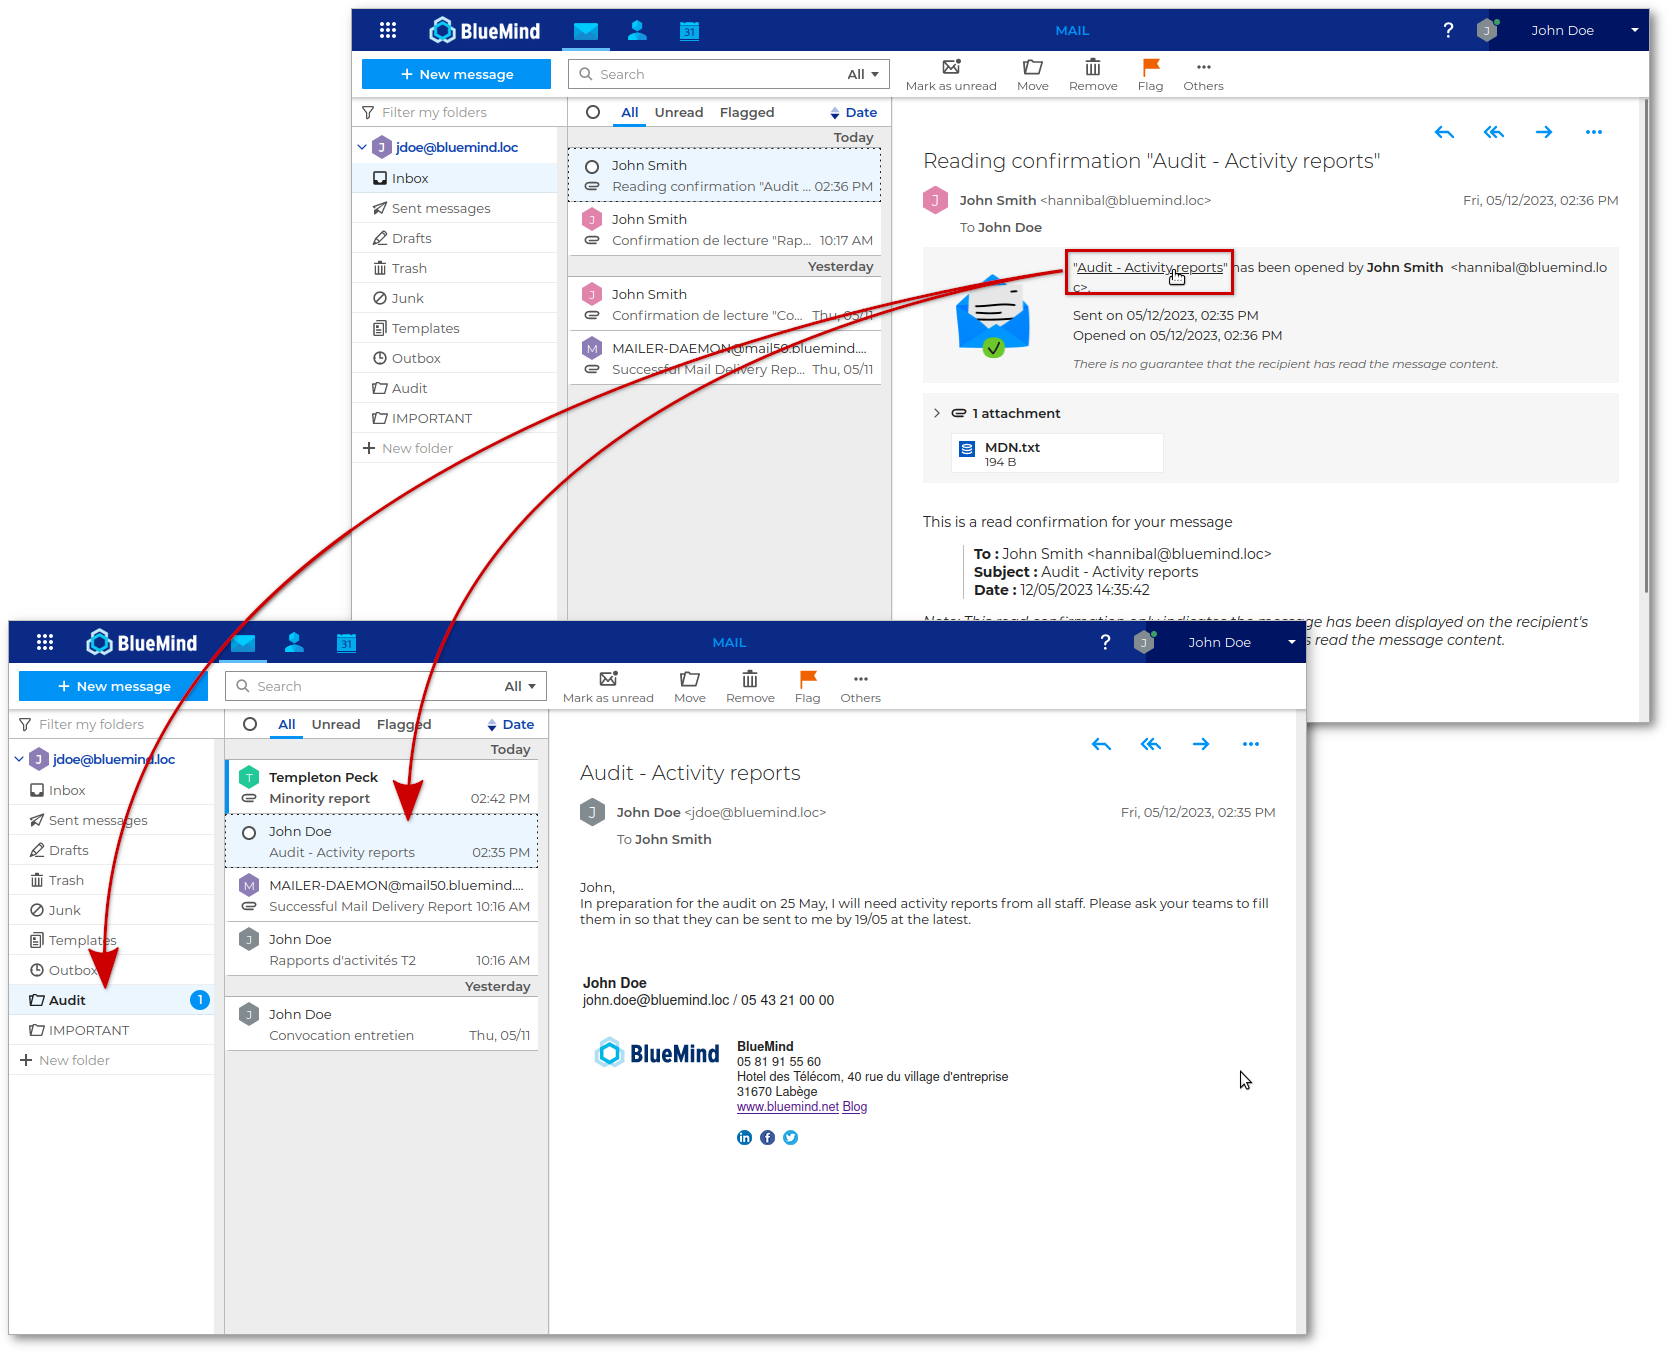
:::tip Find the original message
In the sidebar, clicking on the indicated item opens the original email:
:::
Systematic request
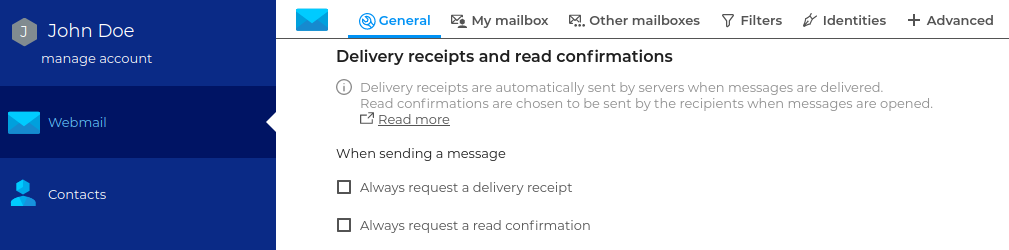
To enable automatic requests for delivery receipts or read receipts for all outgoing emails, go to Preferences > the "Mail App" section > the "Delivery Receipts and Read Receipts" section, and enable the desired type(s) of request:
:::info Save preference
Activation and deactivation are instantaneous and automatic, with no need to save preferences.
:::
To learn more about responding to requests for delivery receipts in BlueMind, visit the View Emails > Send Delivery Receipts page.
Enabling mailto links
A mailto link is a link added to an e-mail address. Clicking on the link opens a new message in the user's e-mail application, with certain fields pre-filled. For example:
- the link
mailto:exemple@nomdedomaine.comopens a new message with a pre-filled "To" field - the link
mailto:exemple@nomdedomaine.com?subject=Helloopens a new message with pre-filled "To" and "Subject" fields.
⇒ See mailto syntax for more details.
BlueMind's mail app lets you create mailto links in emails and can be used to send an email from any page in your browser:
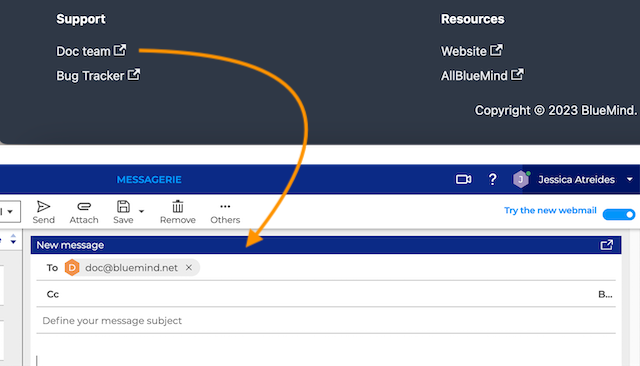
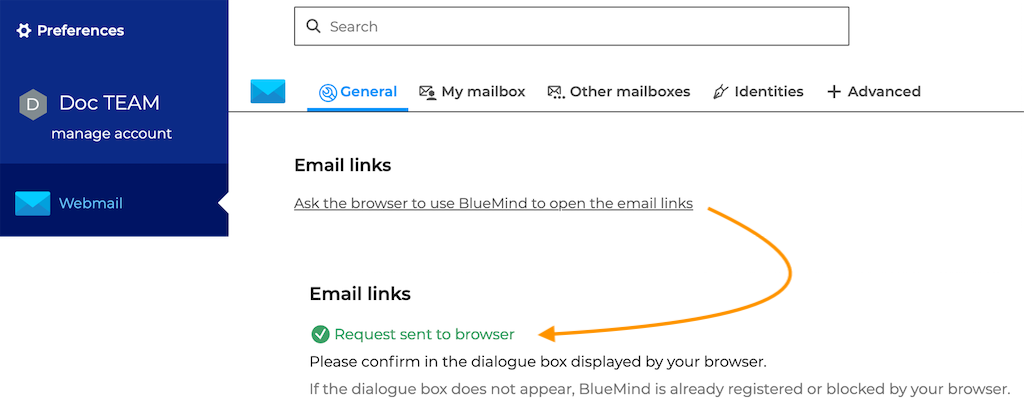
To do this, activate the option in your e-mail settings: Preferences - Mail - General - E-mail links
-
Click the link to enable the option:
-
Enable the BlueMind mail app in the browser settings of the browser you're using:
→ In Firefox, allow the app to be added in the banner that appears. Next, after clicking on an "mailto" link, select the BlueMind app to open it.
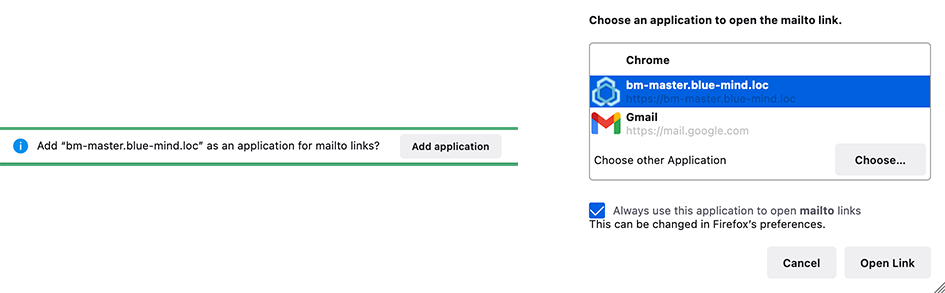
💡 By checking "Always use this app to open mailto links," BlueMind becomes the default mail app
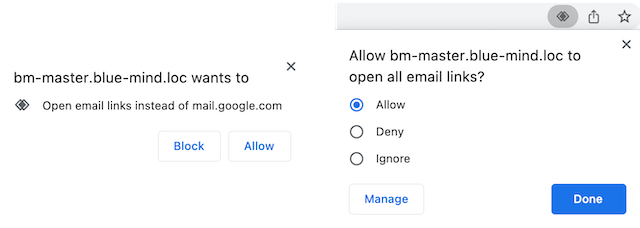
→ In Chrome, allow links to open in the pop-up window that appears. Then, in the BlueMind mail app address bar, click on
 and select "Allow," then confirm to set this as the default for all links:
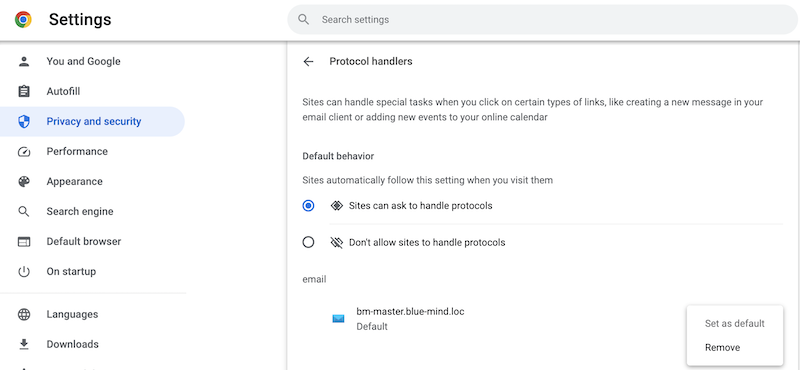
If the icon doesn't appear in the address bar, follow the procedure "Open Chrome links in Gmail" replacing Gmail with BlueMind messaging:
- go to the Chrome menu on the right of the address bar and open Settings
- go to Privacy & Security -> Site settings -> expand Additional permissions -> Protocol managers
- check the "Sites can request to manage protocols" option and verify that BlueMind is in the list of "e-mail" sites
- Go back to the BlueMind mail app tab, click on in the address bar, and then select "Allow."
→ Safari does not support mailto link management
Find out more
Related BlueMind documentation pages
- Adjusting your Account Settings
- Discovering Contacts
- Add attachments
- Manage Account Identities
- Corporate Signature Management
- Thunderbird Setup