Setting Up Xivo/Avencall
This document shows how to install and configure the BlueMind plugins that allow interconnection with Avencall's XiVO.
Configuring Xivo
- create a
Xucuser in Services > IPBX > Users - activate the customer Xivo and enter :
- login:
xuc - password:
0000
- login:
- Create a Web Services user in Configuration > Web Services Access with the following settings:
- Login:
xivows - Password:
xivows - Host: leave empty
- Login:
- Make sure Multiqueues call stats sharing is enabled in Services > Ipbx > Advanced configuration > Queues
Installing the XiVO plugin for BlueMind
Prerequisites
The XUC service must be installed on the Avencall server and set up on port 8090.
Create a file /etc/xuc/xuc.conf:
XivoWs {
    enabled=true
}

api {
    eventUrl = "http://<bluemind.srv.ip:9091/xivo/1.0/event/domain.tld/dropbox/"
}

xucami {
    enabled = false
}
Procedure
-
Install the required packages:
- Debian/Ubuntu
- RedHat/CentOS
aptitude install bm-plugin-core-cti-xivo bm-xivobridge bm-plugin-core-cti bm-plugin-webserver-ctiyum install bm-plugin-core-cti-xivo bm-xivobridge bm-plugin-core-cti bm-plugin-webserver-ctiIn the case of a distributed installation, the
bm-plugin-webserver-ctipackage must be installed on the server hosting thebm-webserverservice. -
Restart BlueMind after installation:
# bmctl restart -
Modify the file
/etc/bm/xivo.iniwith the following information:xuc.host=<xuc_host>:8090Note: XUC's default port is 8090 but it might be 9000 on old XUC server versions
BlueMind configuration
Domain configuration
- Log on to BlueMind as system administrator or domain administrator
- Go to the page System Management > Manage Domains
- Select the domain you want ton configure
- Click the "Telephony" tab
- Select the implementation to use here XiVO
- Enter the server's HTTPS address: XiVO:

- Save the changes
User configuration
- Log on to BlueMind as system administrator or domain administrator
- Go to the page Directories > Directory Browser
- Select the user or user group you want to configure
- Check the roles
- "Telephony" in the "App Access" tab
- "Manage External Accounts" in the "General" tab
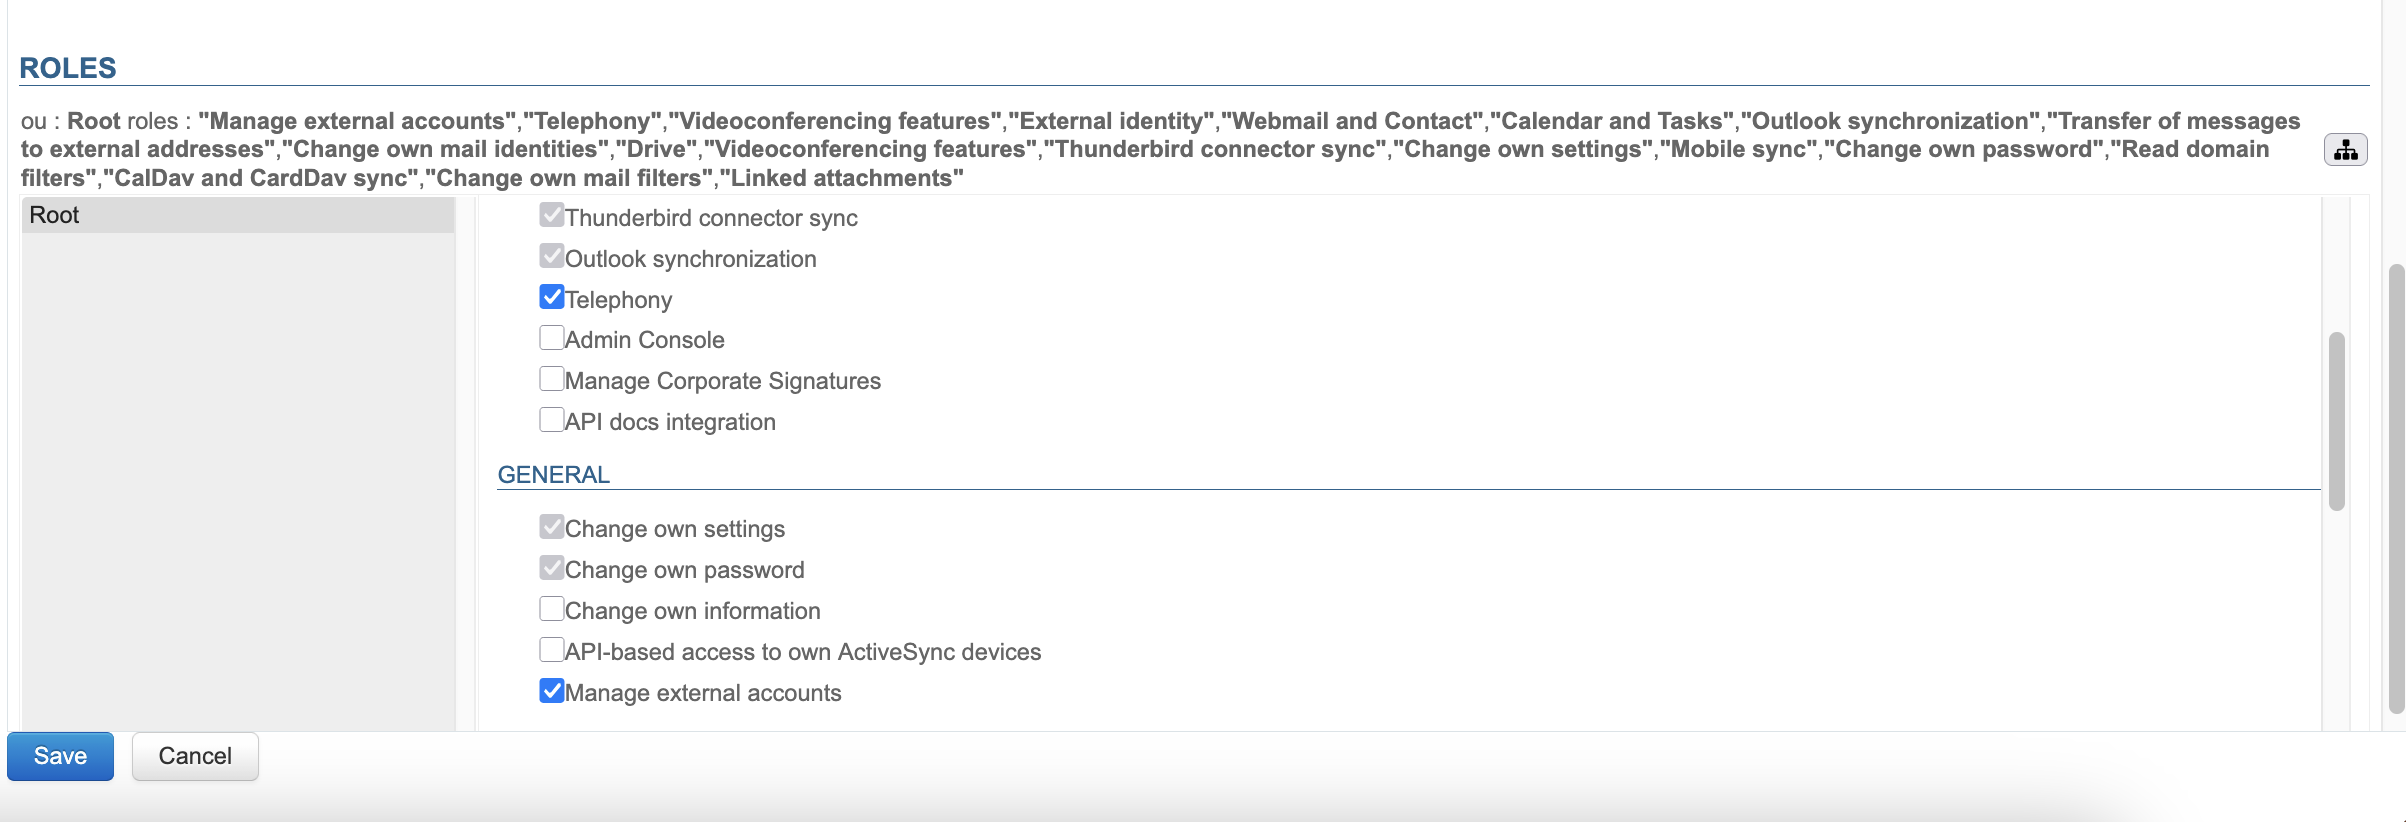
- Save the changes
Specific configuration
On peut tester le bon fonctionnement en simulant un événement XIVO via CURL :curl -X POST -H 'Content-Type: application/json' http://#BLUEMIND:9091/xivo/1.0/event/#DOMAIN/dropbox/ -d '{"username":"#LOGIN","status":#STATUS}'
-
#BLUEMIND : l'url de BlueMind-
#DOMAIN : le domaine concerné (par exemple blue-mind.net)-
#LOGIN : le login de l'utilisateur (sans le domaine)-
#STATUS : le statut téléphoniqueLes statuts supportés sont :
- 0 : disponible (vert)
- 2 : au téléphone (rouge)
- 8 : le téléphone sonne (rouge clignotant)