Setting up Apple applications
To take full advantage of the new features, be sure to install a version supported by BlueMind.
To find out which versions are supported, see the dedicated page: Compatibility.
Screens and icons may vary slightly from one version to another.
Add an account
You can add an account in System Preferences:
- Open System Preferences and click on ‘Internet Accounts’
- Tap ‘+’ then ‘Add another account’:
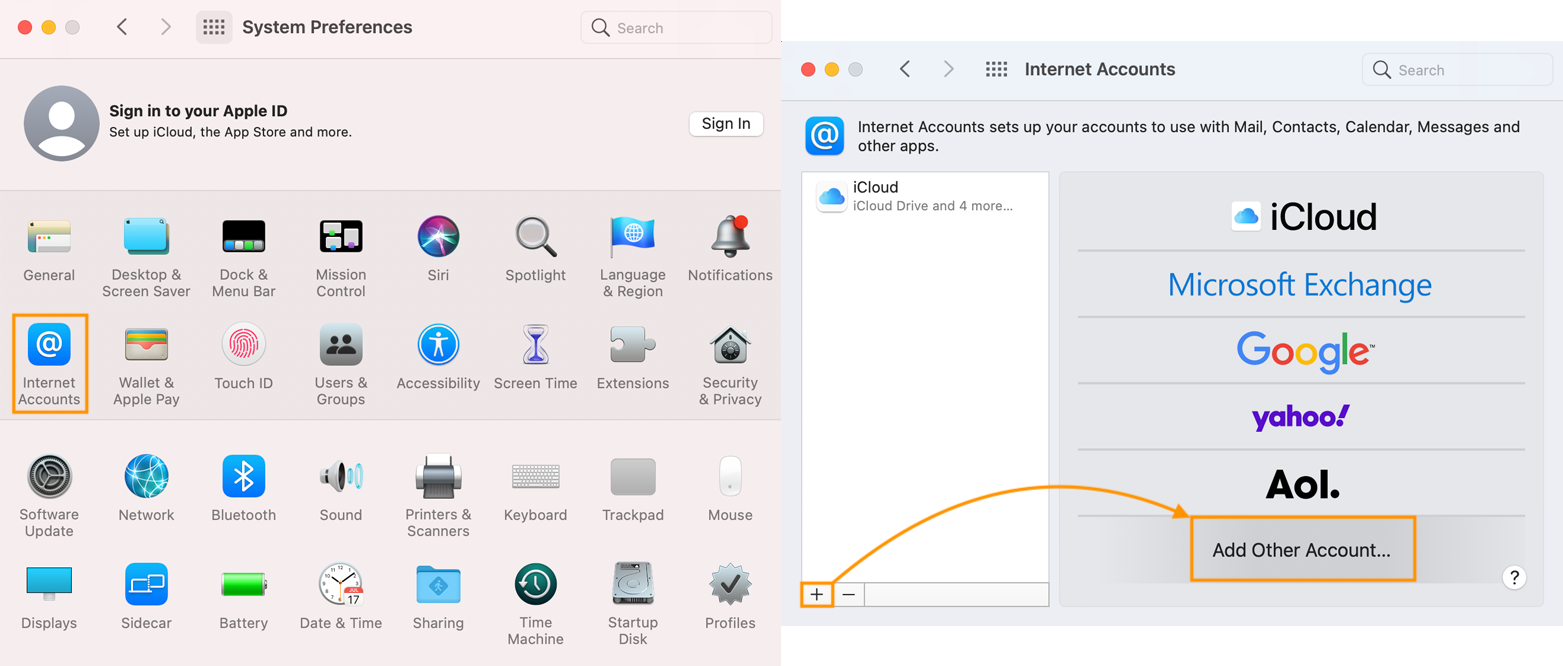
You need to create one account per application. To use all BlueMind applications, you therefore need to create three accounts: Mail, Calendar and Contacts
Setting up a Mail account
- Follow the stepsto add an account
- Choose "Mail account":
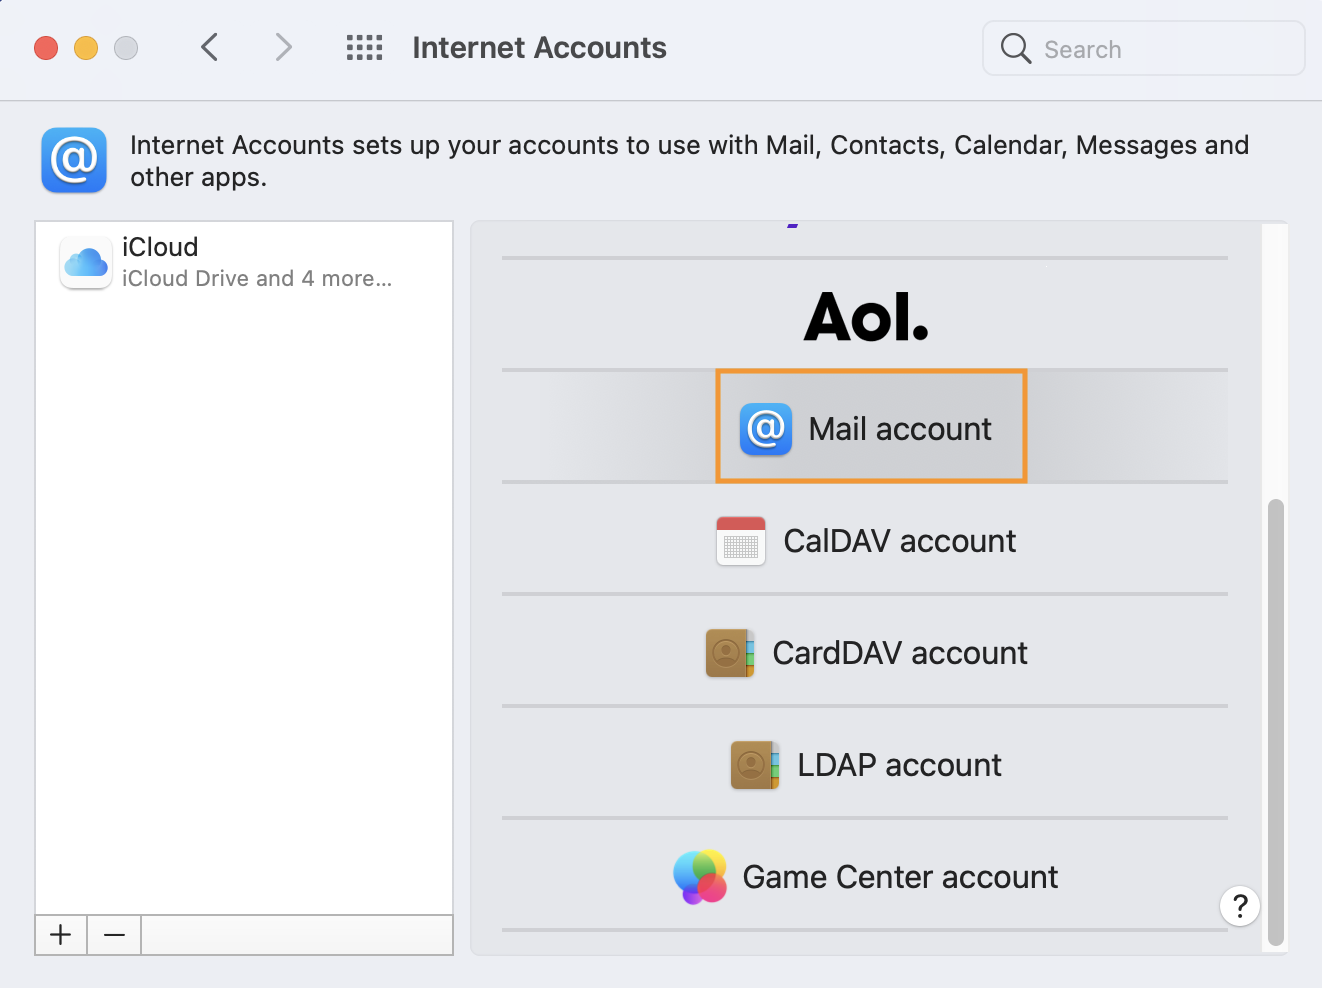
- Enter the requested information, then click “Sign in”
- Check and fix your account login details if necessary, then click “Sign in” again:
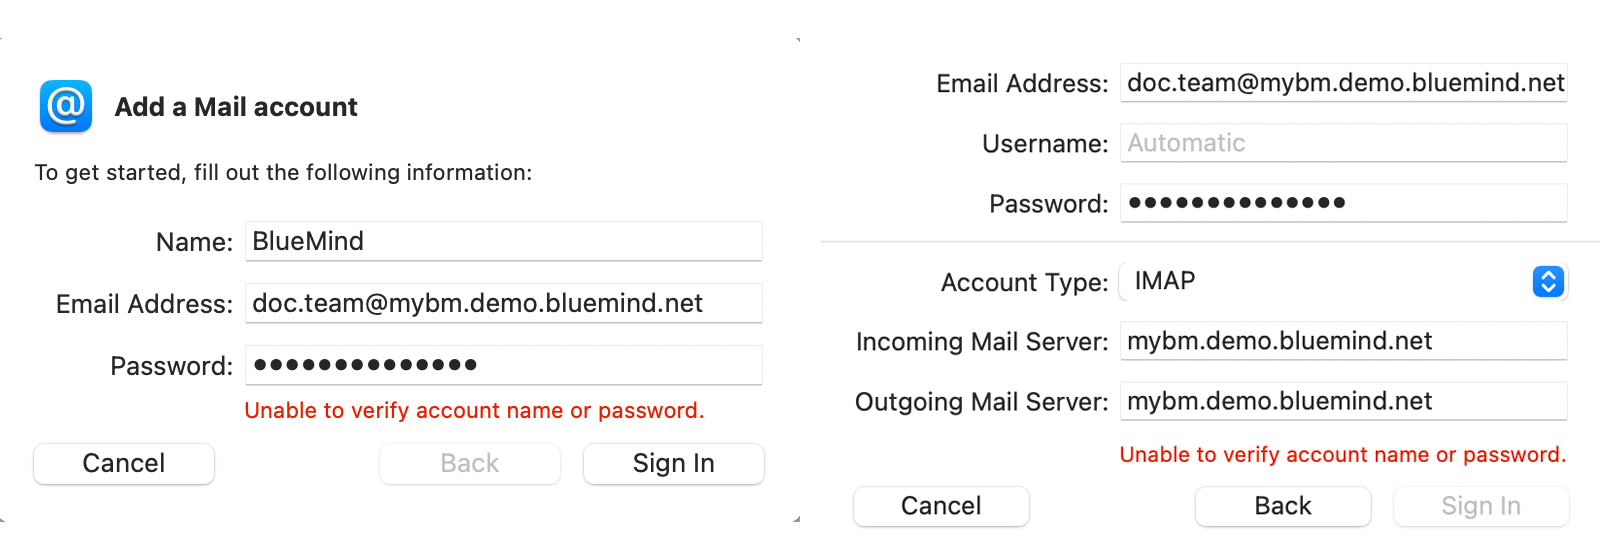
- E-mail address: e-mail address provided by the administrator
- Username: username complete, including the domain
- Password: the password provided by the administrator, which is used to log in to BlueMind
- Account type: select IMAP
- Incoming and Outgoing Servers: the server address provided by the administrator; this is usually in the general format server-name.domain.com
⚠️
If the server refuses to connect, check with the administrator to ensure that a ban on connecting without double authentication has not been set up.
theme.common.Pourinfo : Editing users > Password. - Select the Mail application:
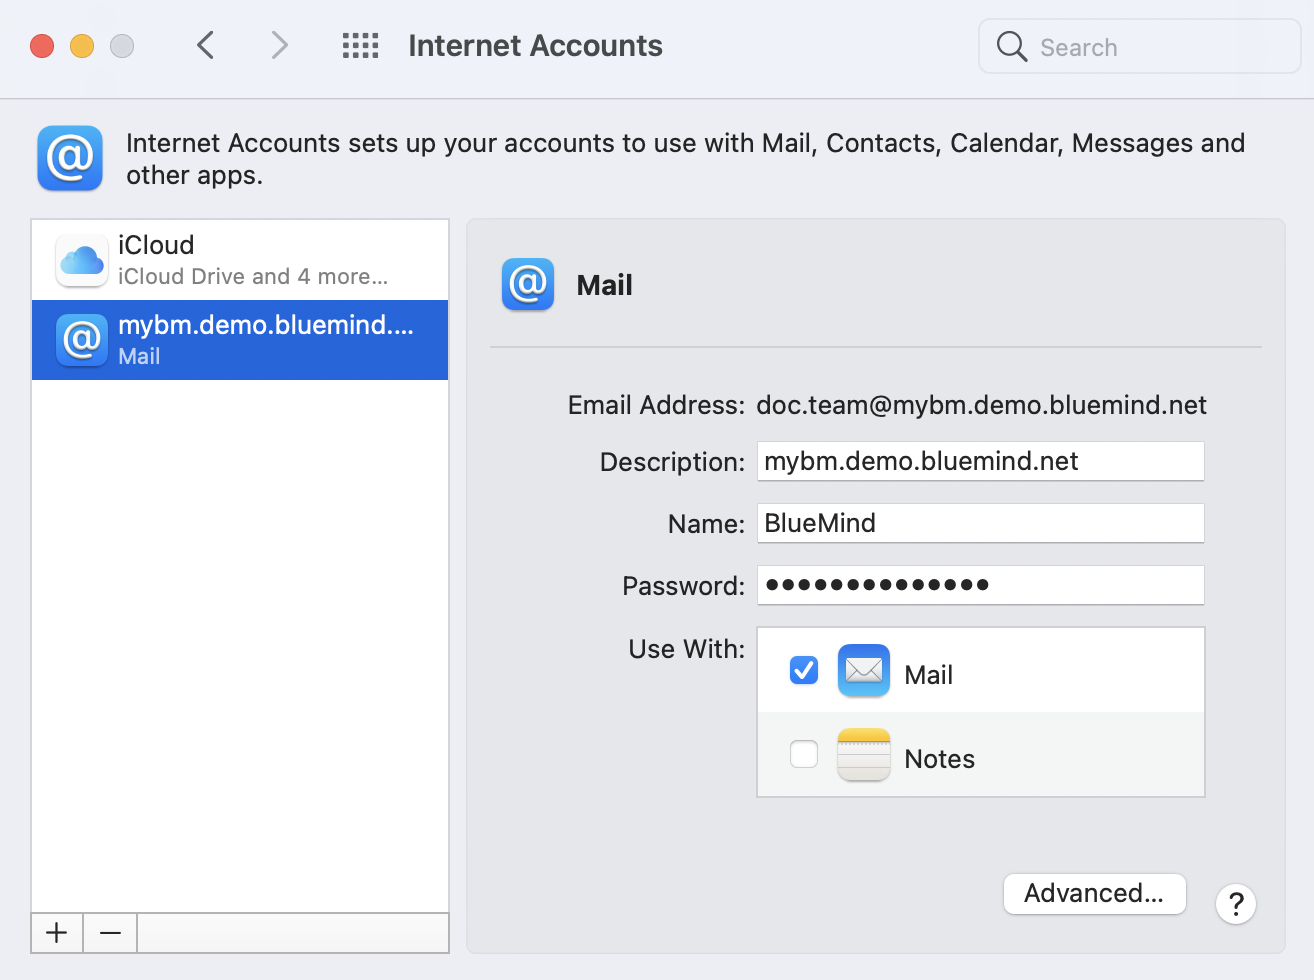
The Notes application is not offered by BlueMind, so there is no need to select it
Once the account has been added, open the Mail application
Setting up the Contacts account
- Follow the stepsto add an account
- Select ‘Mail Account’
- Select "CardDAV Account":
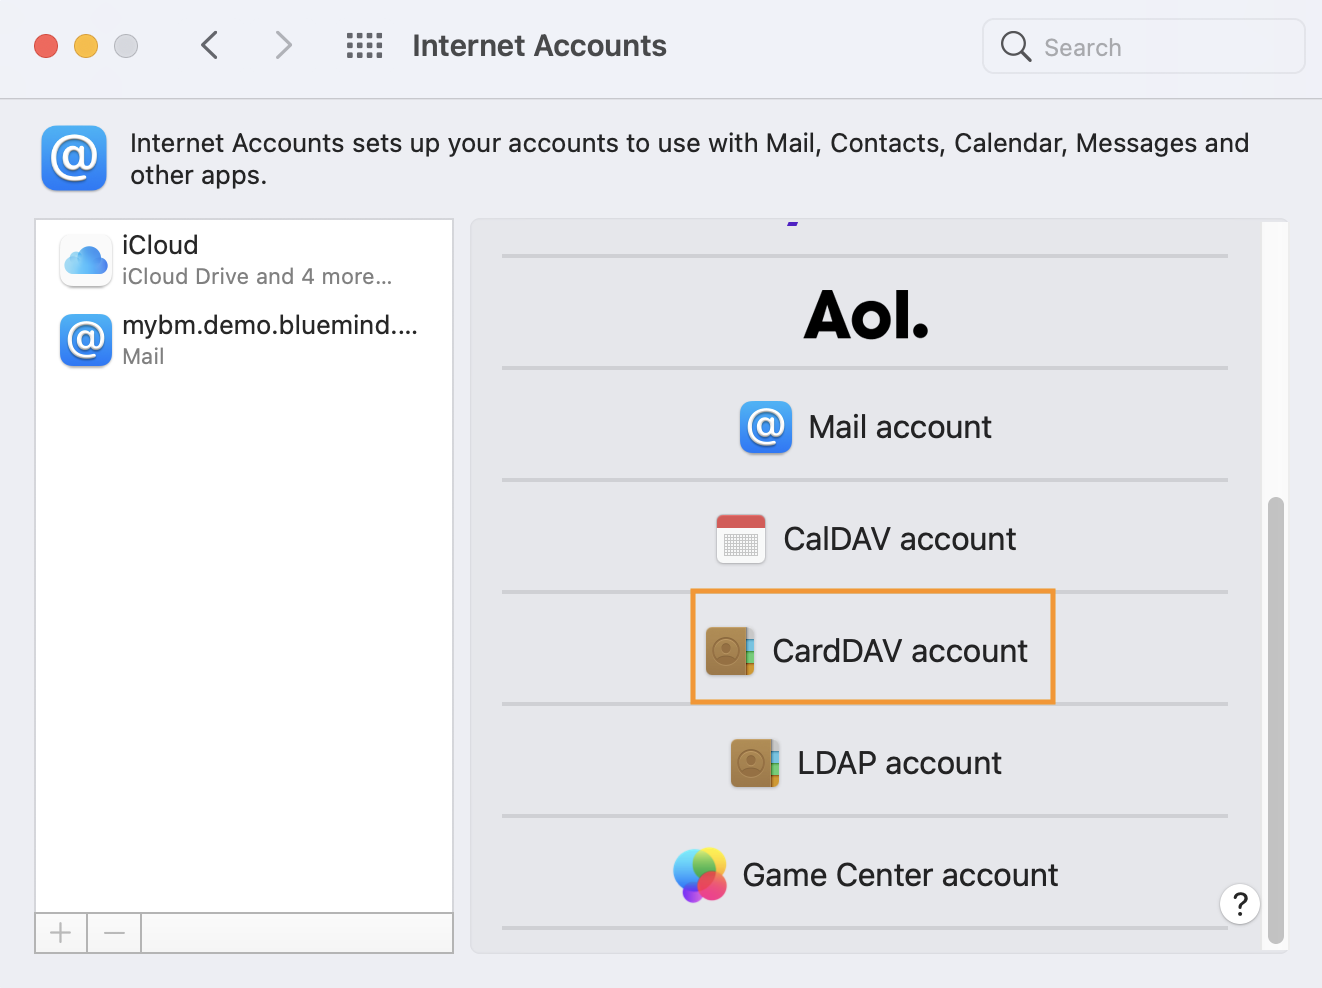
- Enter the requested information:
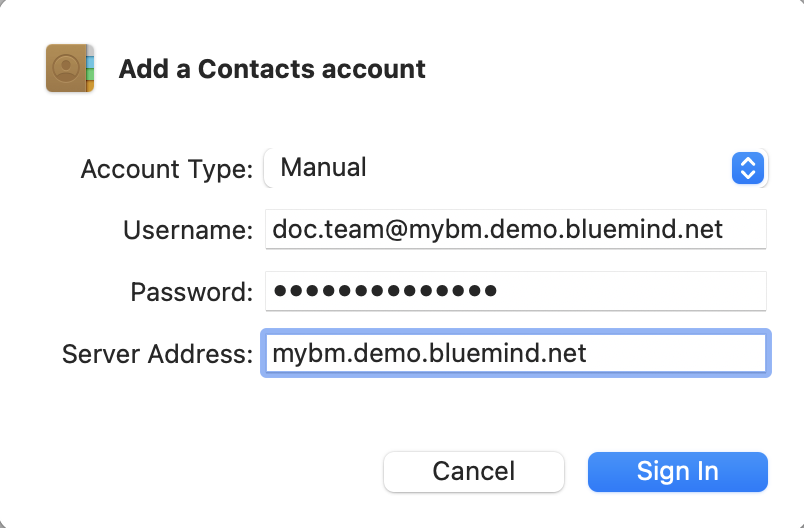
- Account type: select "Manual"
- Username: username complete, including the domain
- Password: the password provided by the administrator, which is used to log in to BlueMind
- Server address: the server address provided by the administrator; this is usually in the format server-name.domain.com
Once the account has been added, open the Contacts application
Setting up the Calendar account
- Follow the stepsto add an account
- Select "CalDAV Account":
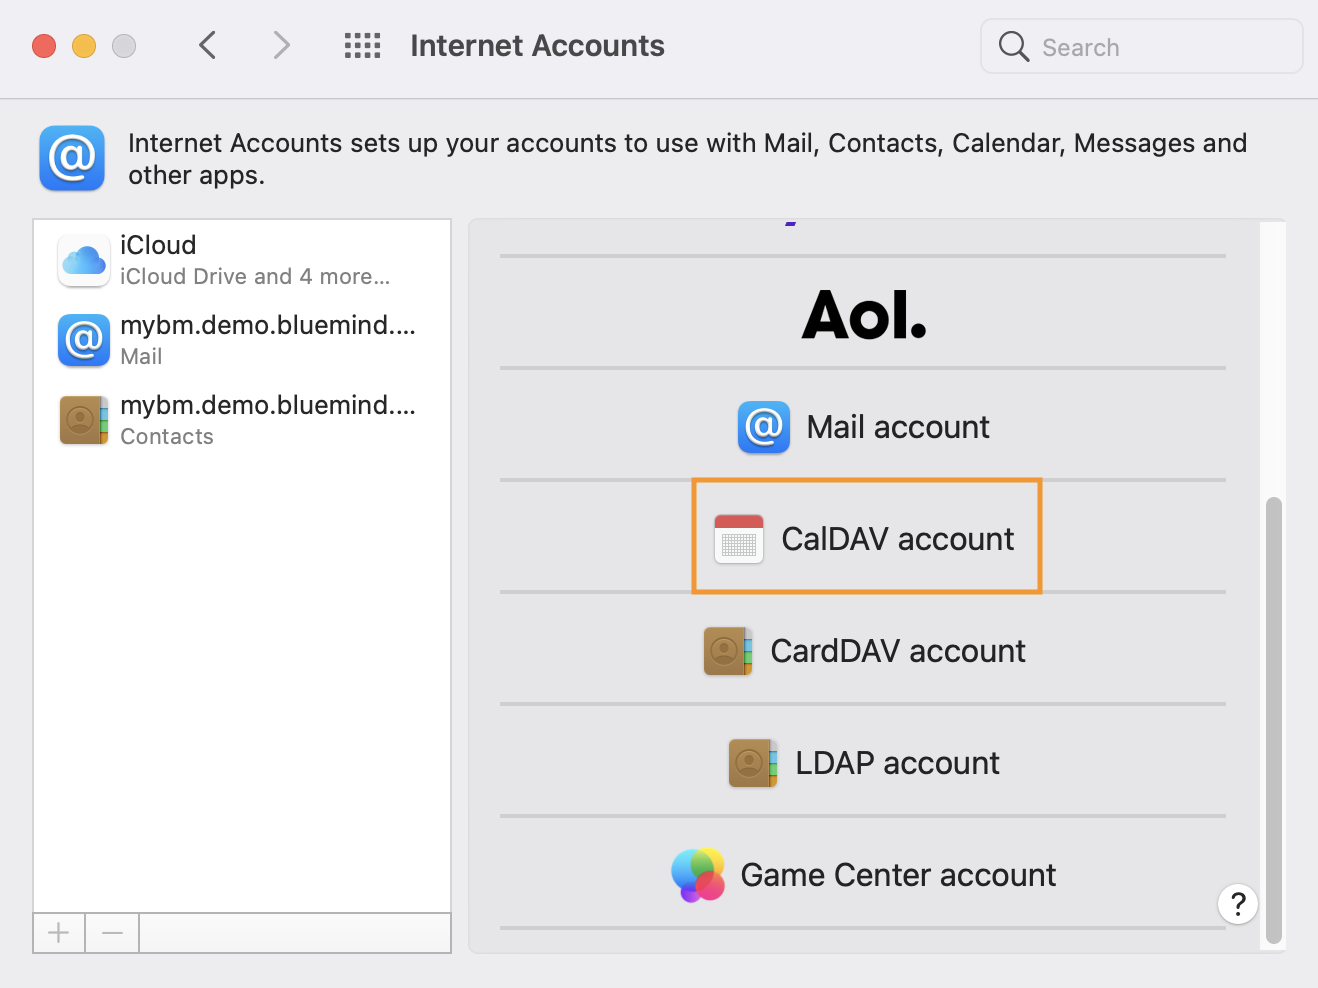
- Enter the requested information:
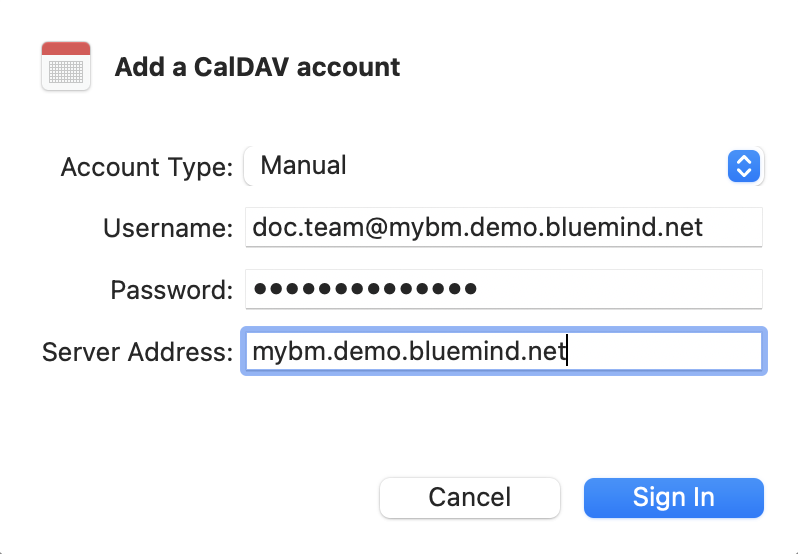
- Account type: select "Manual"
- Username: username complete, including the domain
- Password: the password provided by the administrator, which is used to log in to BlueMind
- Server address: the server address provided by the administrator; it is generally in the form
nom-serveur.domaine.com - Select the Calendars and Reminders applications for task management:
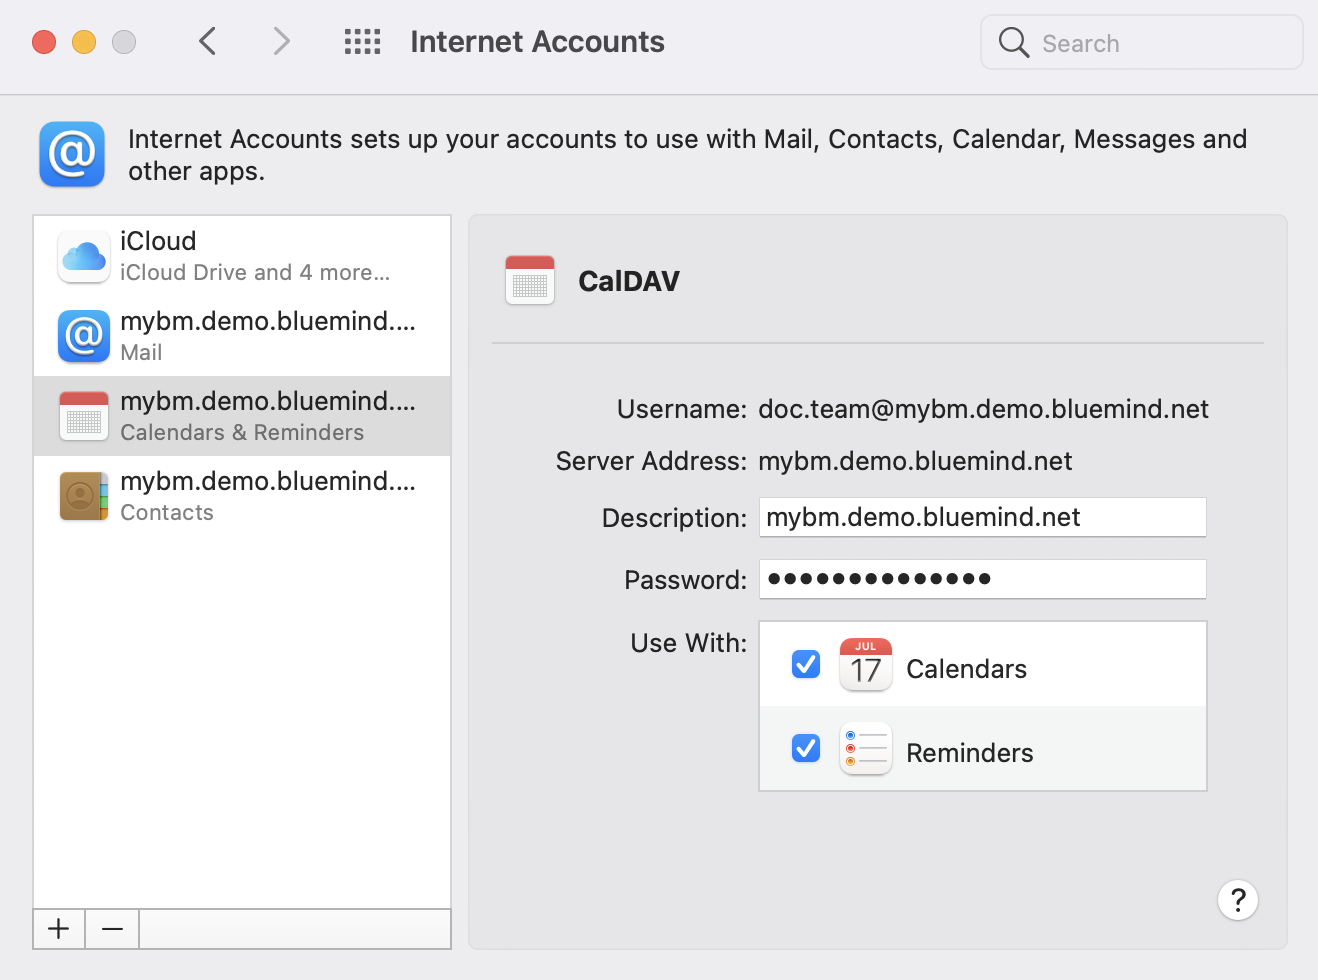
Once the account has been added, open the Calendar and Reminders applications