Domain management
The domain administration panel allows the domain administrator to access the technical settings for domains (server addresses, domain aliases, etc.) as well as to the common and default settings for their users (address books, email filters, storage quotas, etc.).
The implementation of MAPI (Native Outlook) on a domain requires specific configuration which may affect all domains on a server.
In this case, it is essential to read this page: Implementing MAPI for Outlook.
Accessing the domain management area
Once logged into the administration console with an account that has sufficient rights to manage domains, go to System Management > Managed Domains to access the list of domains for the installation:

For more information on administration rights, see the page Roles: access and administration rights.
Creating and deleting a domain
Creating a domain
From the list of domains, click the  button and enter the details in the popup window that opens:
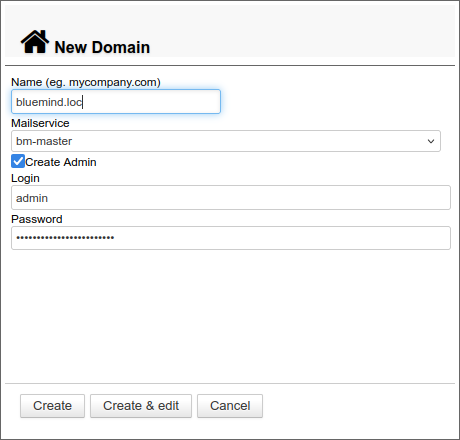
Click ‘Create’ to create a user quickly and easily, or click ‘Create & Edit’ to create the domain and access the configuration options.
Deleting a domain
From the list of domains, tick the box at the start of the row for the domain you wish to delete, then click  . Then confirm the deletion request:

The deletion of the domain is definitive, and the administration console and Dataprotect do not allow the domain and its settings to be restored. Only a system restore, if a backup plan is in place, will restore it to the date of the last backup.
For more information, please see the pages:
Managing a domain
General configuration
The "General" tab in domain administration displays information and options for the selected domain:
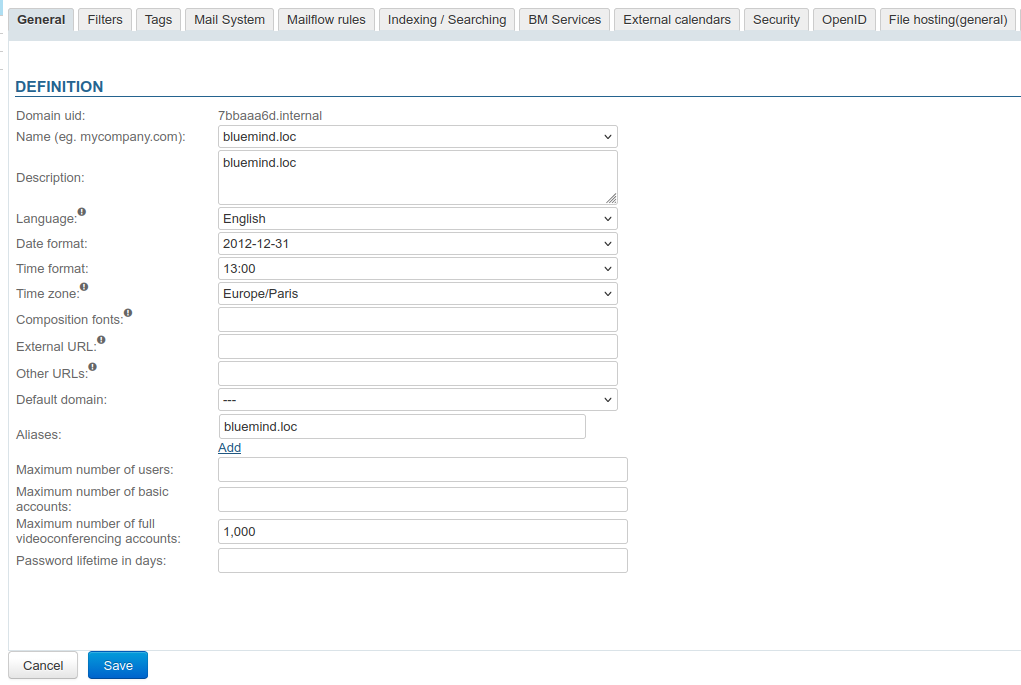
The domain’s UID serves as its identifier; it is unique within BlueMind and cannot be changed. However, the following settings can be configured:
-
Name: the domain’s display name, to be chosen from its aliases
. This name will be the default domain name used for new users’ email addresses. -
Description: a description of the domain; this is particularly useful where the installation comprises several domains, especially when they are similar.
-
Language: the default language for domain users
-
Date format: the default format for domain administration and users
-
Time format: the default format for domain administration and users
-
Time zone: the default time zone for domain users
💡 Changing the language or time zone
Changing the value of the “Language” or “Time zone” fields only affects users who are currently using the old value.
For example, changing the value from “Europe/Paris” to “America/Toronto”:- Users who previously had “Europe/Paris” are automatically switched to “America/Toronto”
- Users who had changed the default value to another value retain that alternative value
- Users created after this change will have "America/Toronto"
-
Fonts: one or more fonts or font families in addition to the message composer’s default fonts.
💡 Default families:
sans-serif,serif,monospace,cursive,fantasy.Font families must be separated by a semicolon; each font family may contain one or more fonts separated by a comma.
It is strongly recommended that a base font be listed as the last font in the family.
Example list: "Arial; Helvetica, sans-serif; Times New Roman, serif; Courier New; Courier, monospace; Comic Sans, cursive; Impact, fantasy"💡 Once the list has been entered and the screen saved, users will be able to use the fonts in the composer or select one of them as their default font in their preferences, provided that the font is installed on each user’s workstation.
For further information, see the relevant page in the user guide: Edit text -
External URL (optional field): URL address for accessing the domain (see External URLs )
-
Other URLs (optional field): Secondary access URLs for this domain, particularly useful for autodiscover addresses during the Implementing MAPI for Outlook
⚠️ External URLs and other items
The URL fields should only be filled in if using a shared server (see Multi-domain messaging).
For more information on the external URL and other URLs, see the dedicated page: External URLs
💡 When a URL is entered, an SSL certificate must be added. -
Default domain: the domain name suggested during the implementation of simplified login credentials
-
Aliases: you can add as many aliases as you like
- Click on “Add” to display a new text box and enter a new alias
- Click on the bin icon next to an alias to delete it
-
Maximum number of accounts: the maximum number of users that can be created on this domain. This option is used to distribute and limit the number of user accounts authorised per subscription across the domains.
- Empty field: no limit
- 0: no authorised accounts
- X: maximum number of accounts permitted
-
Maximum number of advanced Visio user accounts: the number of “full account + video conferencing” users you wish to have for the domain
Availability
This parameter only appears on subscriptions that include Videoconferencing with BlueMind
-
Password expiry in days: sets the number of days for which a user’s password remains valid after it has been issued or changed. This option applies to all users in the domain. However, it is possible to change this value or force a password to expire for a specific user by going to their administration page; for more information, see Edit users.
AD or LDAP connection
The expiration policy will not apply to users imported from an AD or LDAP directory.
Filters
This tab allows you to set filters that apply to all users in the domain: the filters shown here will apply to the email of all users in the domain.
Filters defined at a global level allow, for example, emails marked as “SPAM” following header analysis to be automatically moved for all users, or emails from certain senders or containing a keyword in the subject line (for example, “Memo” or “Scheduled system update”) to be marked as important.
Domain filters are run by the server BEFORE user filters, so their actions may prevent a user filter from working (moving to a folder, flagging or forwarding).
Creating and editing filters
Click on  to create a new filter or on
  to edit an existing filter:
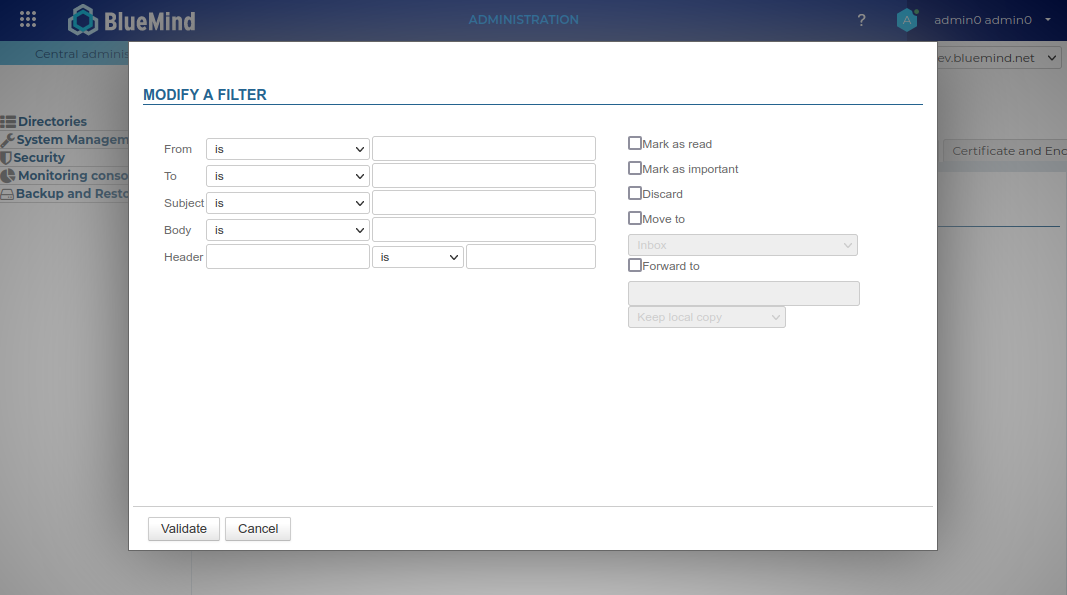
- Determine the criterion(s) to be met by the messages.
The type of control to be applied can be:💡 If a rule comprises several criteria, an email must meet all of them for the rule to be applied to it
- is: the value must be exactly the same as that specified
- is not: the value must be different from the value specified
- contains: the specified string must appear in the value being compared
- does not contain: the specified string must not be included in the value being compared
- Specify the action or actions to apply:
- Mark as read
- Mark as important: adds a flag to the email
- delete: deletes without going via the trash
- Move to + select folder
- Forward to + destination e-mail address(es): it is possible to specify several addresses, either internal or external, to which the relevant emails should be forwarded
- Click the ‘Validate’ button
- Once all filters have been created or edited, click the ‘Save’ button to save the changes and confirm creation.
Sorting filters
Filters are applied in the order in which they are listed, so the criteria and actions of a filter applied to an email may prevent subsequent filters from running. It may therefore be important to choose the order of execution.
- Use the arrows
 to sort the filters.
 - Once the filters are in the desired order, click the ‘Save’ button to save the changes.
Delete a filter
- Click the
 icon at the end of the row to remove the corresponding filter.
 - Click the ‘Save’ button to confirm the deletion or ‘Cancel’ to keep it.
Tags
This tab allows you to manage domain tags, which will be shared by all users:
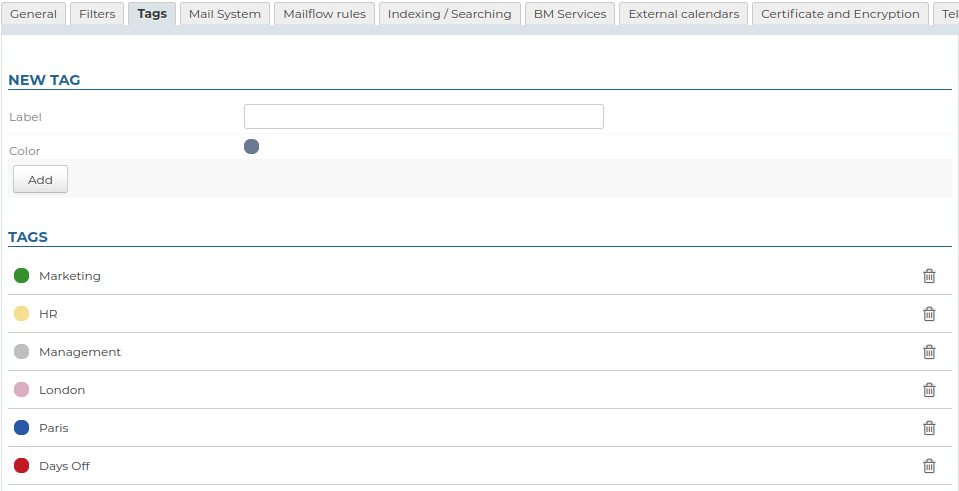
Create a tag
- Enter the label
- Choose a colour (by default, an available or random colour is suggested)
- Click Add
Edit a tag
- Edit the label: when you hover the mouse over it, a text box appears in place of the label:
- Click on it to activate it
- Enter the new label
- Once you have made your changes, exit the field for validation: using the <tab> key on your keyboard, or by clicking elsewhere on the page with your mouse
Note: Changes take effect immediately; there is no need to click the ‘Save’ button at the bottom of the page.
- Change the colour: click on the corresponding button and choose the new colour from those available.
Delete a tag
To delete a tag, click on the bin icon at the end of the relevant row, then click OK to confirm.
Once validated, deletion is immediate and irreversible.
For more information on tags, see the relevant pages in the user guide:
- Configuring the user account - Manage tags
- Contacts - Add tags
- Calendar events - Add tags
Mail
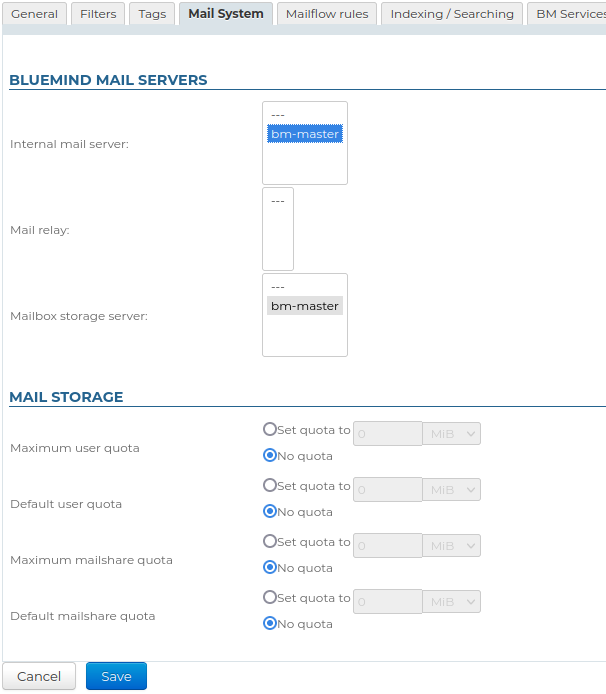
This tab allows you to configure the servers that handle the BlueMind mail system for the domain:
- Internal mail server
- Mail relay
- Mailbox storage server
This is also where the quotas imposed on all users in the domain are defined:
- Maximum user quota: the maximum quota permitted when configuring a user’s mailbox
- Default user quota: the quota assigned by default when a user is created
- Maximum mailshare quota: the maximum quota permitted when configuring email for a shared mailbox
- Default mailshare quota: the quota assigned by default when creating a shared mailbox
Changing these settings does not alter the quota already allocated to users or shared mailboxes within the domain. To do this, go to the settings for their respective email accounts. theme.common.Pourinfo Edit users and Editing shared mailboxes.
Email routing
This section allows you to configure the relay address and the forwarding of emails to it within a multi-server architecture.
For more information on these settings, see the dedicated page ‘Route emails directly to another domain’
Email flow rules
This tab allows you to apply actions to all incoming and/or outgoing emails for the domain.
Each action can be configured according to senders, recipients, etc. by adding a rule.
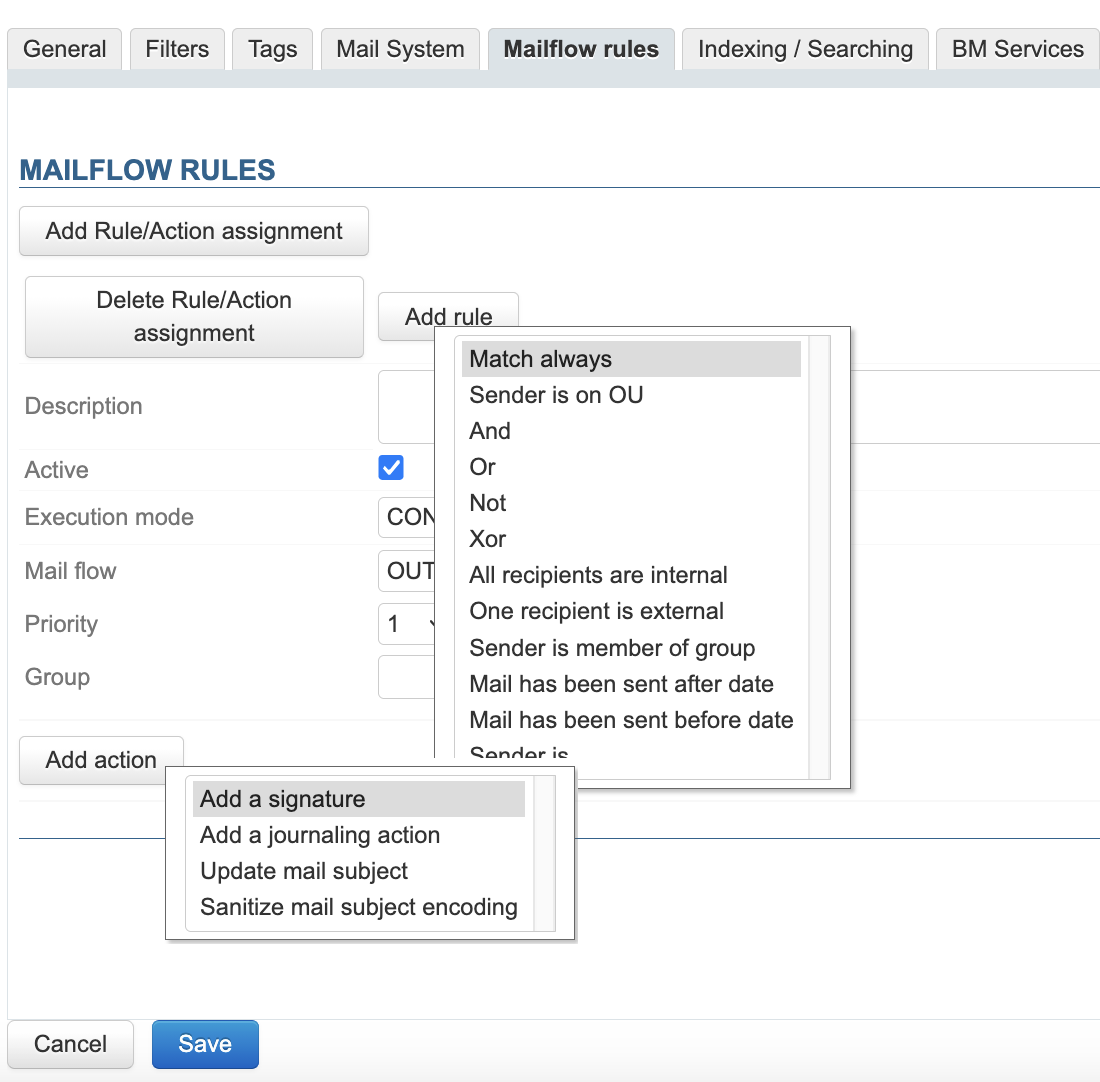
The available actions are:
- Email journaling
- Adding company signatures
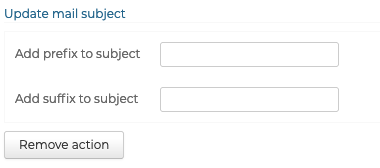
- Adding a suffix and/or prefix to email subject lines
- Encoding of the subject lines of incoming emails to fix characters that are not in the ASCII standard
Indexing/Search
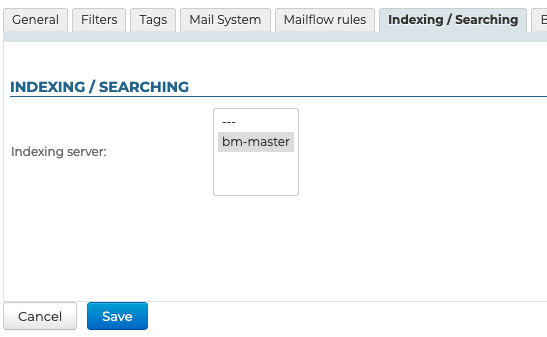
This tab allows you to set the address of the indexing server shared by BlueMind applications (mail app, contacts, calendar).
BM Services
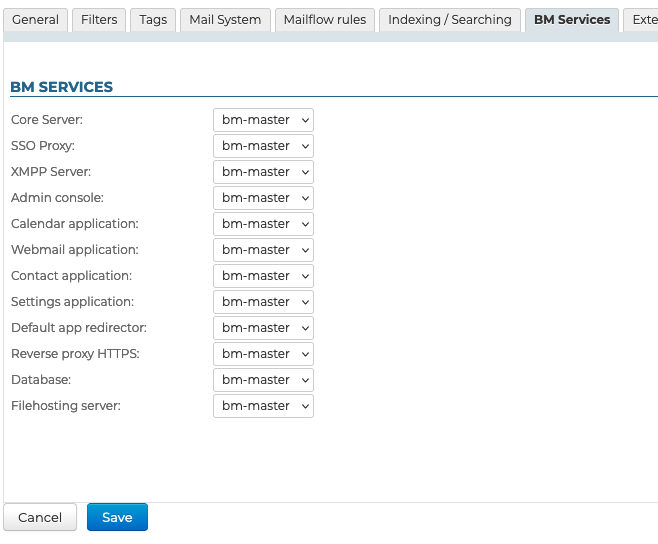
This tab allows you to specify the relevant server for each BlueMind service within the domain:
- Servers:
- Central
- SSO
- Administration console
- Applications:
- Calendar
- Contact
- Settings (managing personal settings)
- Redirection to the default application
- HTTPS proxy
- Database
- File storage server with the Filehosting by BlueMind
External calendars
This tab allows you to set the minimum synchronisation interval for the domain’s external calendars:
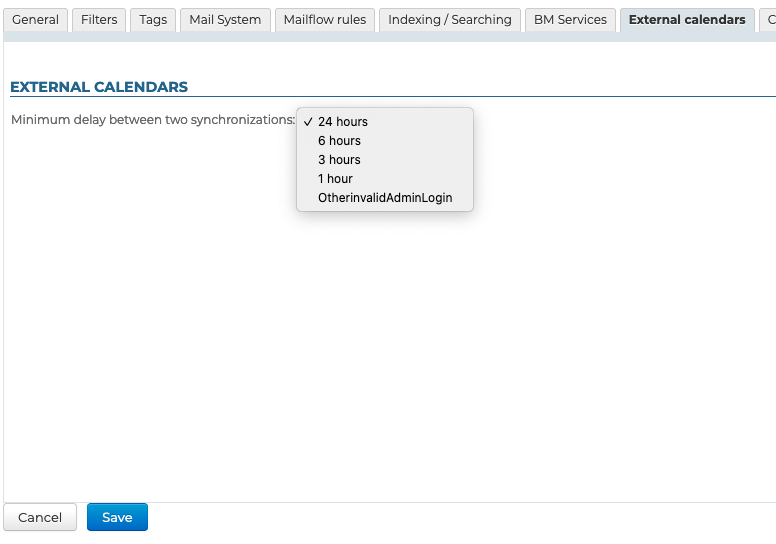
Thus, users’ external calendars will be added to the synchronisation queue when:
- the minimum time limit (above) has been exceeded
- they are not already in the queue
When a calendar encounters errors during synchronisation (e.g. server unreachable), penalties are applied, thereby delaying the next synchronisation.
For more information on creating and managing external domain calendars, see the dedicated page Entity Management > Edit Domain Calendars
Security
Authentication
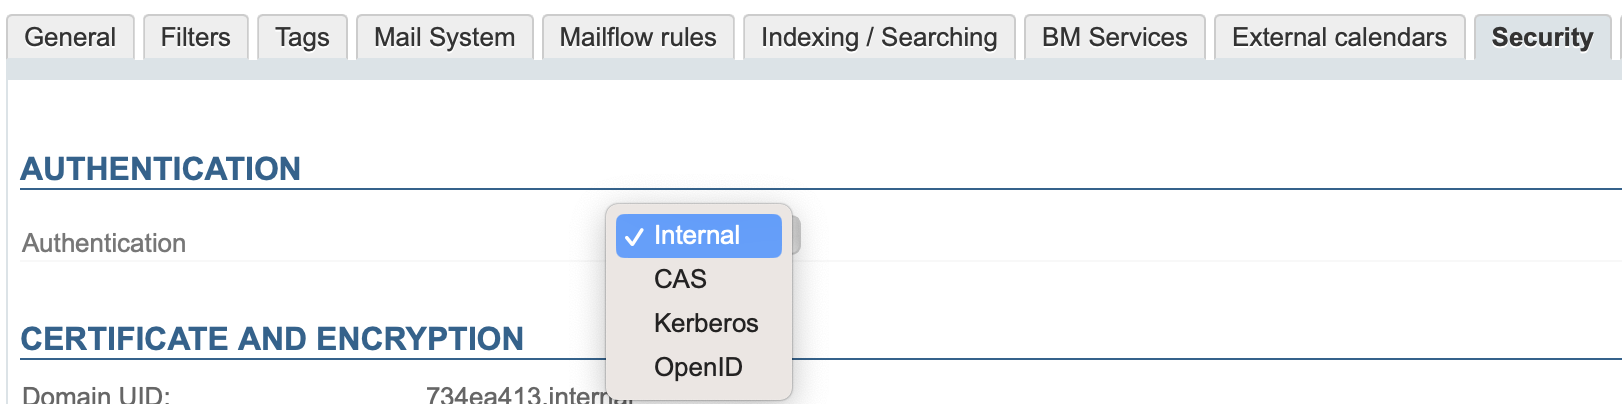
The first section of this tab allows you to define the type of user authentication:
- Internal
- SSO CAS authentication (see Setting up SSO CA)
- Kerberos SSO authentication (see the page Setting up SSO Kerberos)
- OpenID authentication (see the page Setting up SSO with an external OpenID authentication server)
Internal authentication covers two scenarios:
- Authentication based on an internal user database, including passwords. Authentication is then managed entirely and independently by BlueMind.
- Authentication via an external directory, when LDAP Synchronization or Active Directory Synchronization is configured. In this case, authentication is securely delegated to the AD or LDAP directory, without BlueMind having access to passwords.
Both types of authentication can be active simultaneously.
Certificates and encryption
When an external URL is configured on the domain’s “General” tab, this section of the tab allows you to generate the corresponding SSL certificate.
Select the SSL certificate engine from the drop-down list and follow the appropriate procedure:
- File-based management
- by Let's Encrypt
- No certificate management
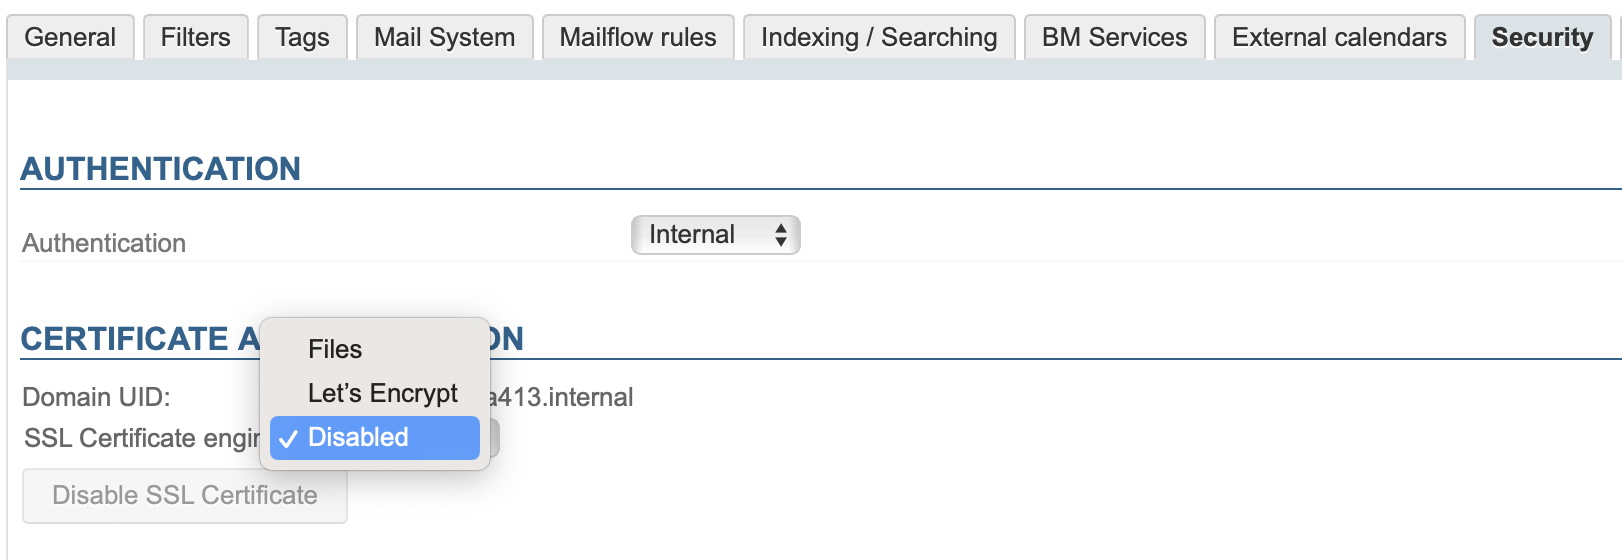
Click on ‘Deactivate SSL certificate’ to delete it
For further information, see:
S/MIME certificates
To enable S/MIME, certificates from trusted certification authorities must be imported here

For more information on S/MIME, see the dedicated page Configuring S/MIME.
OpenID
This tab is used to define OpenID configurations for external systems that use this mechanism, such as Webex or Zoom. The values depend on the BlueMind application saved on the external system.
- Username: The system username
- OpenID endpoint URL: The API endpoint URL
- Application ID: Client ID for integration with the external system
- Application Secret: Integration token for the external system
- Token endpoint URL: The URL of the token endpoint
Filehosting
The “Filehosting” tab allows you to configure the domain’s attachment server:
- Retention period (days): the number of days for which files are retained
- Auto-detach threshold (MiB1): the minimum size above which files are automatically detached when added to an email
- Maximum size of a standalone attachment (MiB1): maximum file size accepted as a standalone attachment
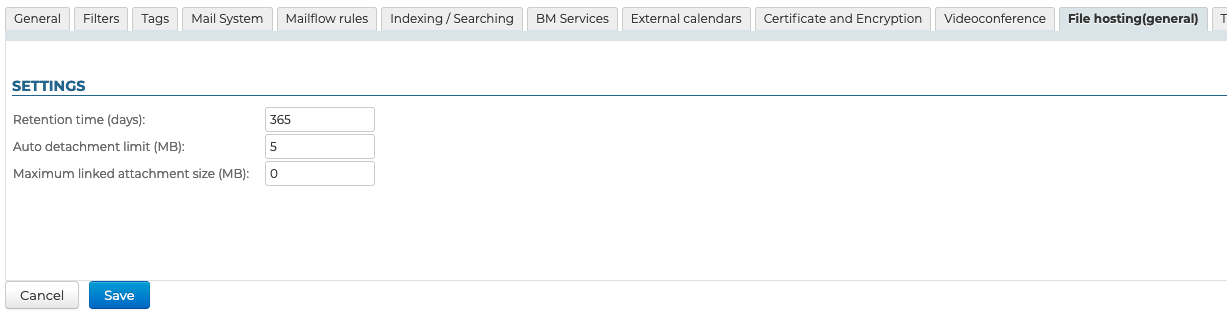
For further details on installing and administering the filehosting server, please refer to the dedicated chapter : File hosting
Videoconferencing
This tab allows you to configure the server and/or the pattern for the installed videoconferencing system, in this case BlueMind Video
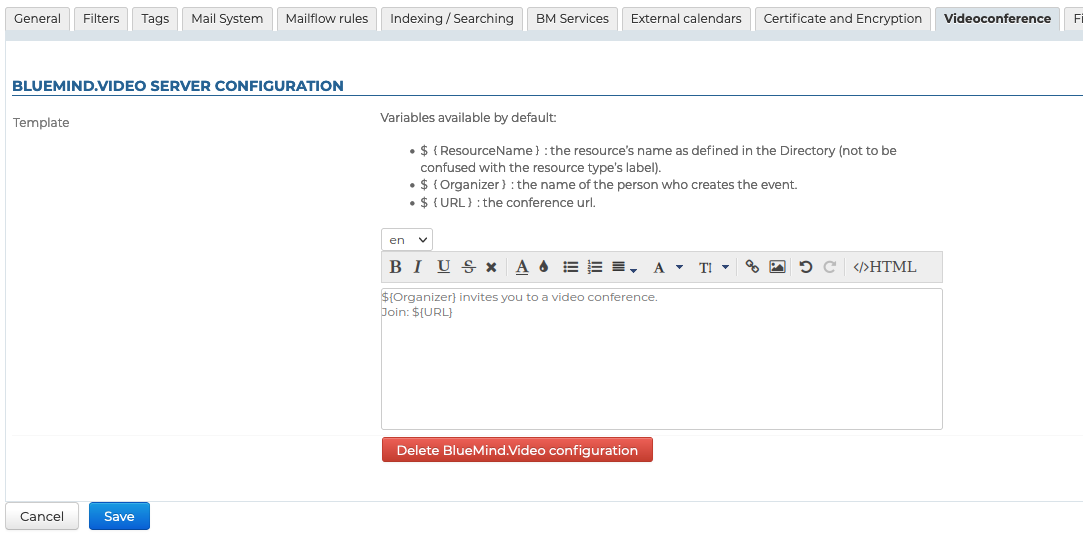
It is also possible to install a Jitsi, Webex or Teams video conferencing system.
For further information on installing and configuring the various solutions, please refer to the relevant chapter: Built-In Videoconferencing.
Telephony
For the implementation of built-in telephony, see the pages dedicated to supported add-ons:
LDAP Import
This tab is optional. It allows you to manage an external LDAP directory.
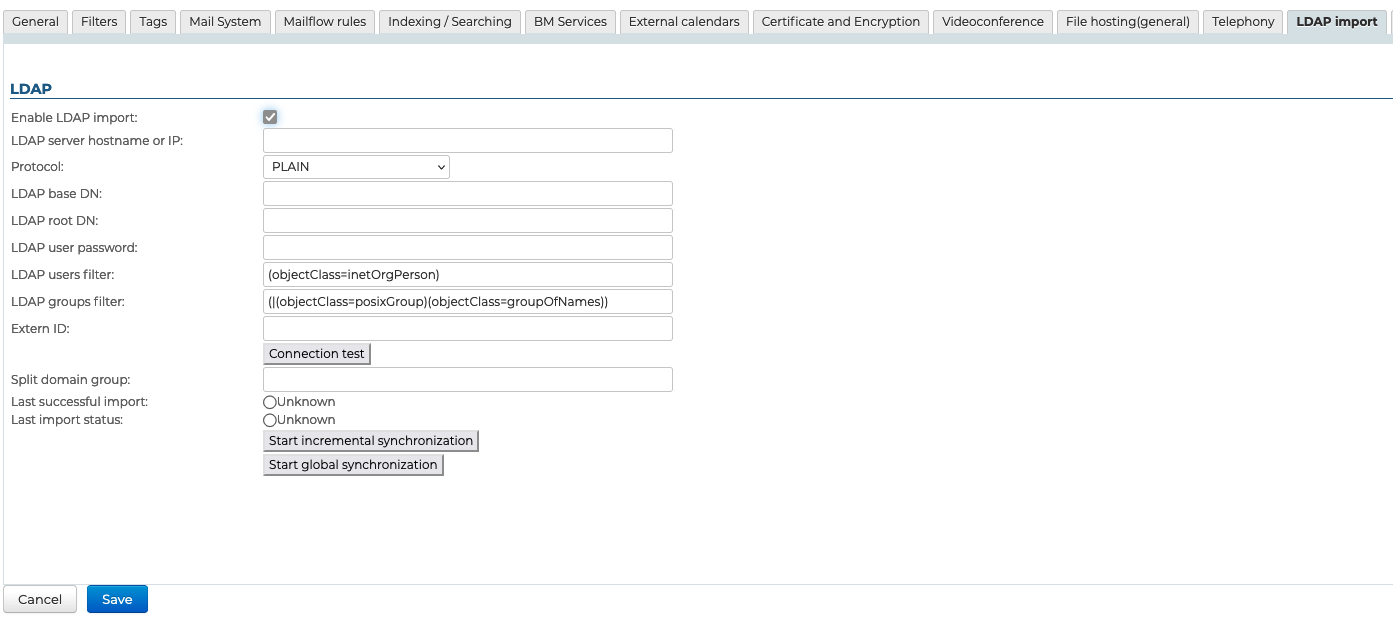
For further details on the installation and configuration of an LDAP directory, see the dedicated page: LDAP Synchronization
AD Import
This tab is optional. It allows you to manage an external Active Directory.
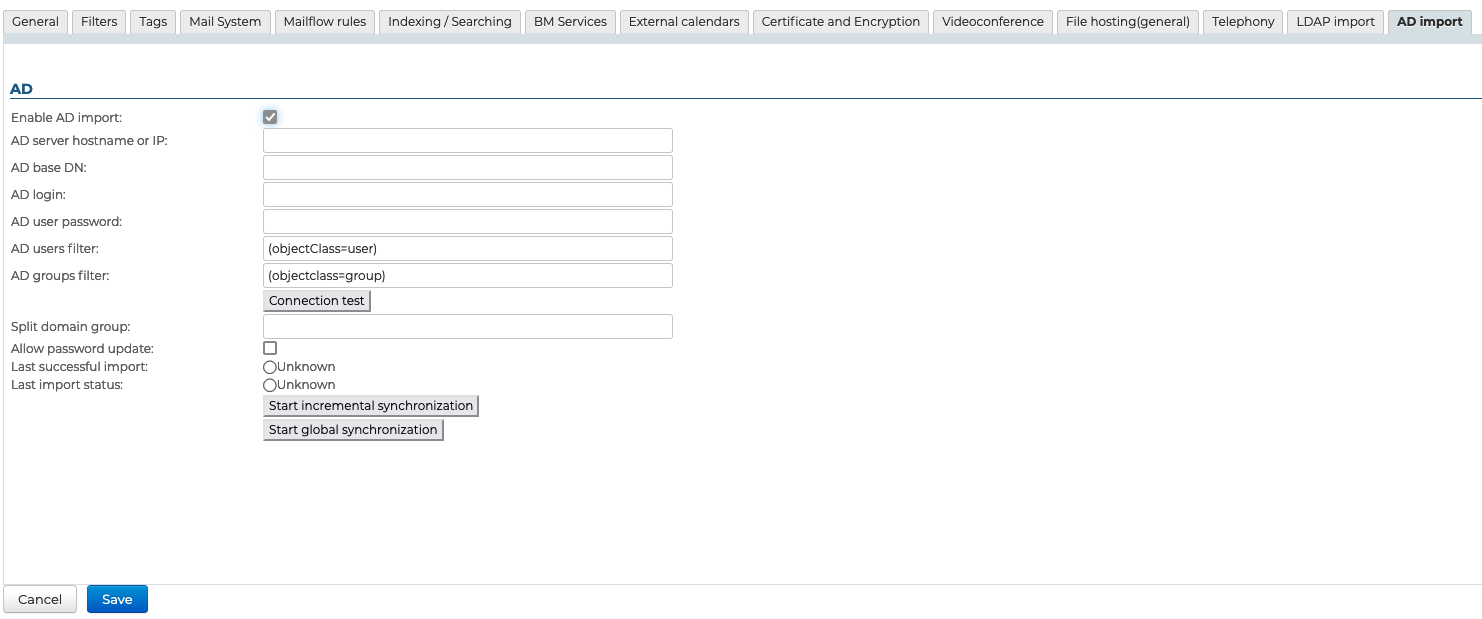
For further details on the installation and configuration of an Active Directory, see the dedicated page: Active Directory Synchronization