Organise a meeting
The BlueMind calendar allows you to organise collaborative events – whether one-off or with recurrence – to book a room or equipment, and to add a video conference.
Add users and resources
Once the event has been created, go to the right-hand side of the event details page and type the first few letters of the users, shared mailboxes or groups you wish to invite – autocomplete will suggest relevant contacts who can be invited.

An invitation can only be sent to the user’s default calendar or to a shared mailbox.
When a user has several personal calendars, it is not possible to specify which calendar the invitation should be sent to. Similarly, a domain calendar cannot be invited; only entities (users, shared mailboxes, groups, etc.) can be invited.
Booking a resource – that is, a facility (meeting room, vehicle, overhead projector, etc.) made available to users, is carried out in the same way as the invitation for participants: go to the right-hand side of the page and type the first few letters of the resource – autocomplete will suggest all the resources shared by the administrator.
To indicate whether a user’s attendance is mandatory (default) or optional, click on the (!) or (+) icon next to their name.
Check availability
If a guest is unavailable during the selected time slot, an alert message appears at the top of the details page.
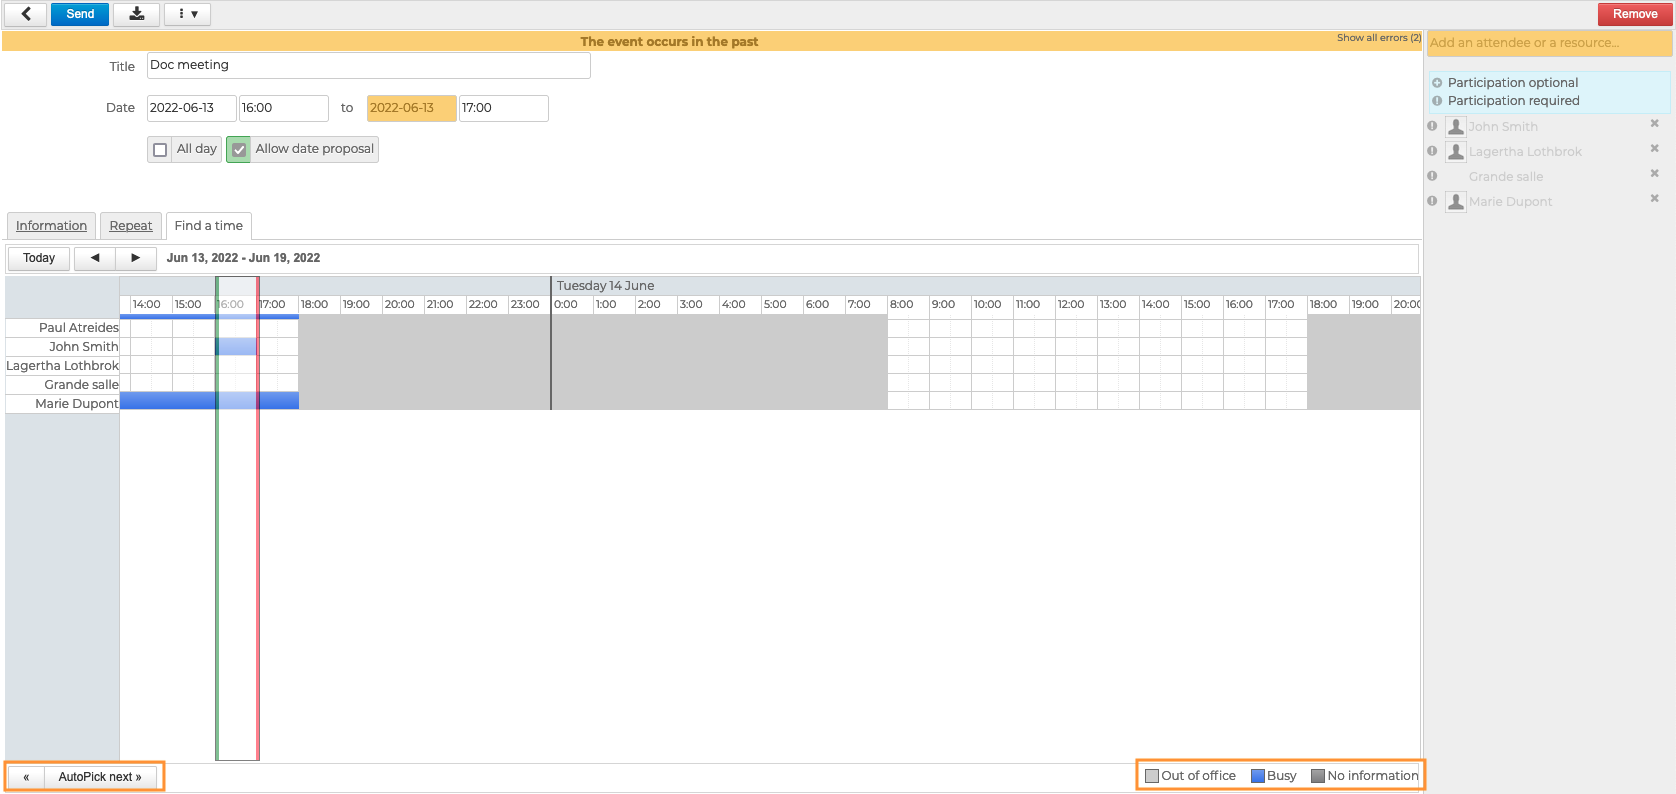
To find a time slot when all invitees are available, go to the ‘Check availability’ tab.
BlueMind automatically suggests the first available slot, highlighted in green and red, based on the date entered in the form. To automatically move to the next slot, click on ‘Autopick next’ at the bottom left.
It is also possible to move the time slot by dragging and dropping with the mouse, and to resize it by dragging the green or red lines independently.
As shown in the legend, the light grey areas correspond to time slots outside working hours, as defined by the user in their calendar settings.
The blue areas correspond to events where the user is marked as “busy”.
The blue indicators beneath the times at the top of each column show the time slots where at least one participant is busy; consequently, times without a blue indicator are available to all invitees.
Adding videoconferences
BlueMind offers several solutions for linking videoconferences to events:
- via the integrated solution BlueMind Video (based on Jitsi Meet)
- via a connection to one of the external solutions supported :
This feature must first be installed by administrators, who then make it available to users.
To add a video conference to a meeting, go to “Add a video conference”. If an external service has been installed by the administrator in addition to the BlueMind Visio service, or if static video conferences have been made available, the button displays a drop-down list allowing you to select the service or resource to use:
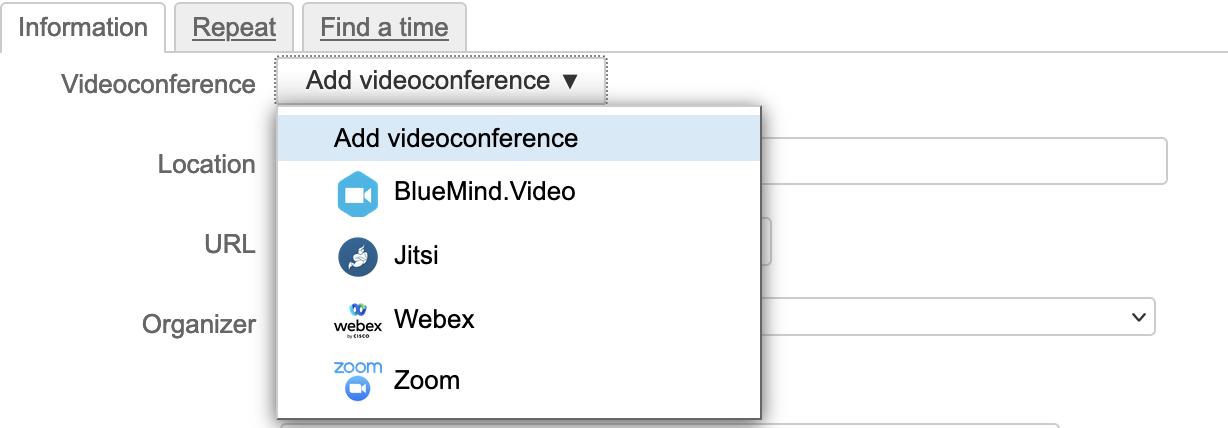
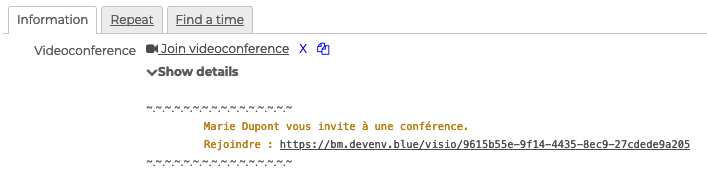
A link is automatically added to the event, along with accompanying text if this has been configured by the administrators:
:::tip Static videoconference
In the case of so-called ‘static’ video conferences, the access URL will always be the same; you can save it as a favourite.
:::
The two icons next to the event allow you to:
 Remove a video conference from the event
 Copy the address to the computer’s clipboard
When adding a Webex video conference, a popup window opens, asking you to log in with an email address:
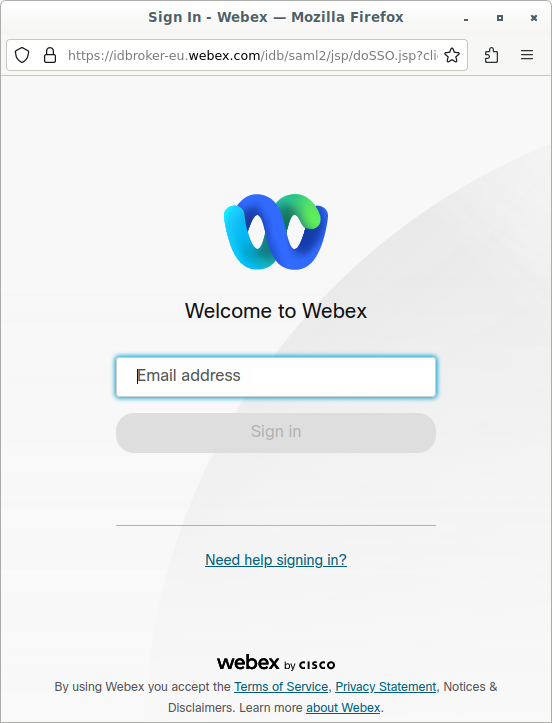
This is the e-mail address for your Webex user account. If you do not have a Webex account, please contact your administrators.
⚠️ If no popup appears, please check that your browser and/or an extension is not blocking it from opening, or that it has not opened in the background.
Create a recurring meeting
As with any event, the BlueMind calendar allows you to schedule a recurring meeting at regular intervals.
To set up the recurrence of a meeting, see Configuring the recurrence of an event
Send invitations
Once the meeting has been set up, click  to save the meeting and send out the invitations.
For each user, the meeting is added to their calendar and they receive an email notification. They can then validate their participation via the Calendar or the mail app.
↳
For a shared mailbox, the meeting is added to its calendar and the invitation is sent to users with a delegation or to the mailbox itself if no delegation has been assigned.
↳
For resources, there are two possible scenarios depending on the booking policy selected:
- Automatic booking is enabled: depending on its availability, the resource booking is either validated or declined. The organiser receives an email notification from the resource
- Automatic booking is not enabled: the resource manager receives a booking request notification. Once the request has been validated or declined, the organiser receives an email notification from the resource manager.
↳For further information see the page Resources.
Manage participation
The organiser, or their delegate (see Manage delegations), receives replies to invitations by email.
You can also view replies directly in the Calendar by clicking on the event:
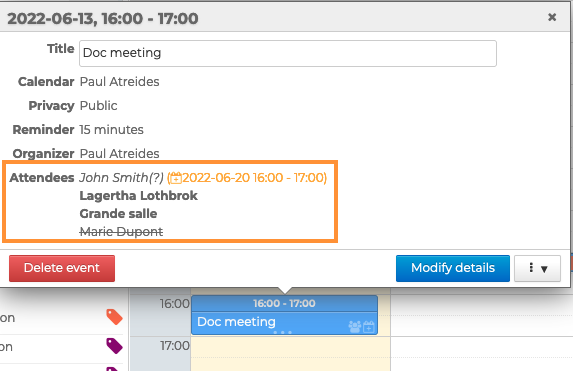
- Users who have confirmed their participation are shown in black
- Users who are pending (or have replied ‘maybe’) are greyed out
- Users who have declined the event appear greyed out and crossed out
- Users who have suggested a new time appear in italics, with their proposed new time
Participants invited via a forwarded invitation are automatically added to the list, along with the status of their response.
Please also note that in this case, unlike when editing a meeting, it is not possible to send the new list of participants to all invitees. Consequently, new invitees will only appear in the organiser’s calendar and their own.
Manage rescheduling requests
When a user suggests a new time, the organiser, or their delegate, can accept or decline the suggestion via:
-
the notification received by email
💡
For further information see the page Managing invitation notifications -
the action bar in your Calendar:

Click on the relevant icon to accept or decline the proposal. -
The ‘Proposals’ tab that appears when you edit the event details:
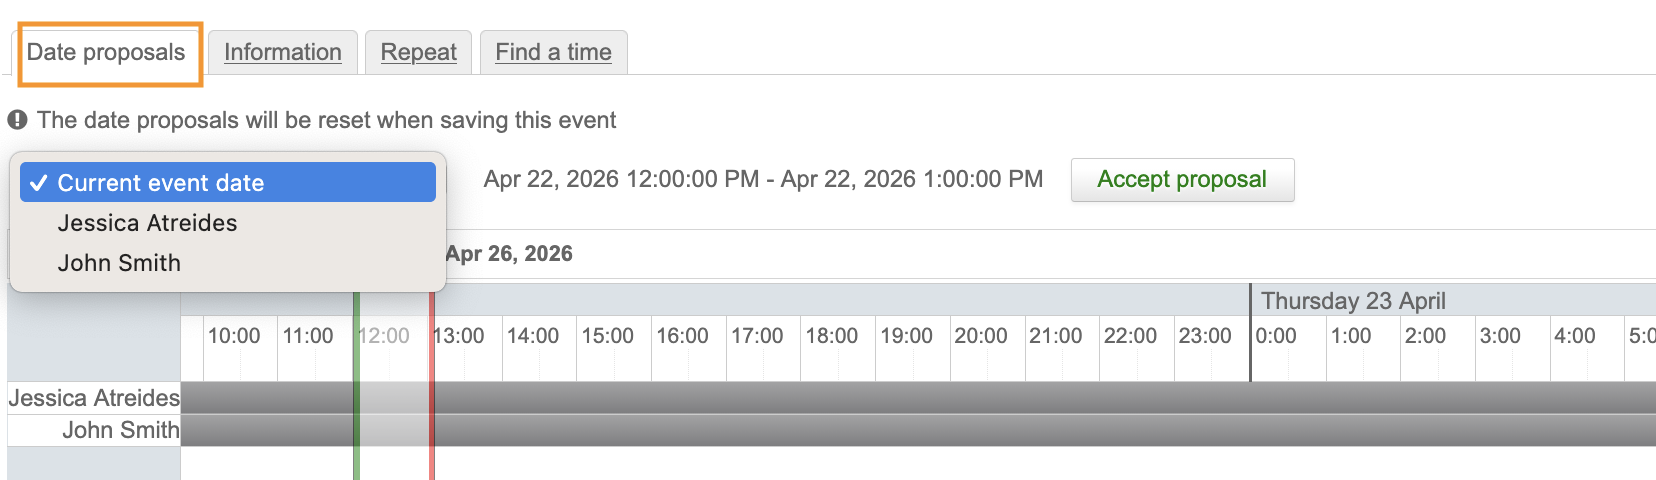
After selecting the desired proposal, click on ‘Update the date with this proposal’ and then on ‘Send’.Recurring events- If the guest suggests a new time for the entire series, the “Proposals” tab is only displayed if the organiser edits “all future events” or “all events in the series”.
- If the guest suggests a new time for a single instance, select the relevant instance and choose to edit “this event only” to view the “Proposals” tab.
If the organiser accepts the proposal:
- The meeting has been amended
- All participants will receive an email notifying them of the change to the event.
If the organiser declines the suggestion:
- The meeting remains unchanged
- The participant who made a proposal receives an email informing them that the organiser has declined it
- the suggestion disappears from the calendar popup where it appeared
- the other participants do not receive anything
💡 Further information
For further information For information on rescheduling proposals, recurring events and delegation, see see the following pages and sections:
Editing a meeting
The organiser can edit, duplicate or delete a meeting at any time. For more details, see ‘Edit a meeting as an organiser’
Guests can also edit their own view of a meeting. However, changes made by the organiser take precedence. For more details, see Edit a meeting as a guest.
Find out more
Related BlueMind documentation pages
- Creating Events
- Editing a calendar event
- Managing invitation notifications
- Manage resource bookings
- Responding to event invitations
- Creating Videoconferences
- Installing a videoconference service