Set up your user account
Each user can customise their BlueMind interface. In particular, they can choose the language or create delegations.
To do this, open the preferences from the navigation bar at the top of every BlueMind page:
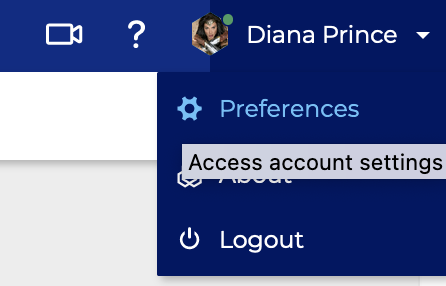
Some changes are applied automatically and saved on the fly; an information banner will then appear at the bottom of the page:

When user action is required, the Save and Cancel buttons appear at the bottom of the page :

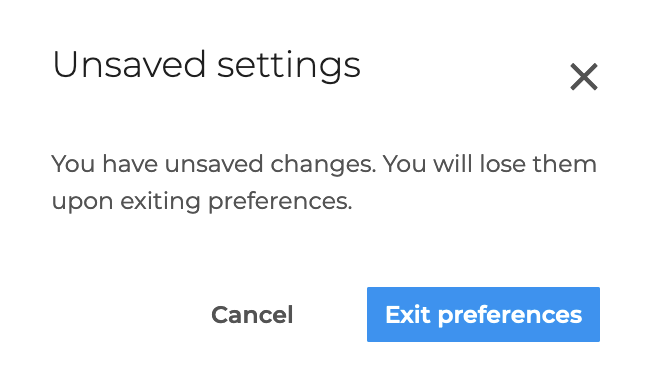
If the user clicks the close cross to exit the preferences settings, they will be asked to confirm if any changes have not been saved :
Configure general preferences
Setting localization preferences
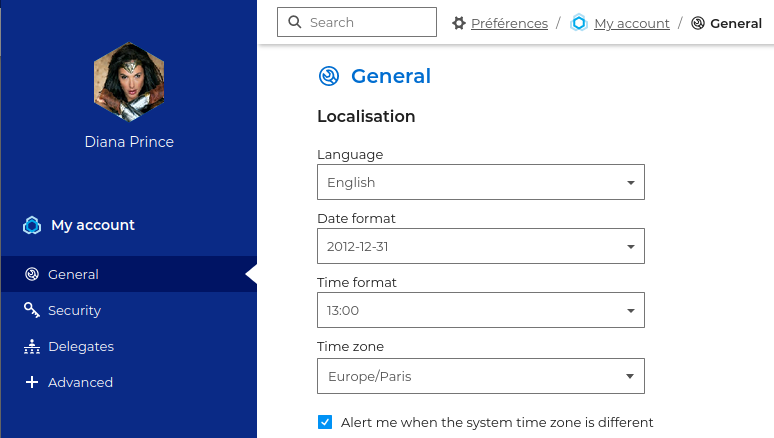
Localisation allows you to set the application’s general localisation and display preferences:
-
Interface language
-
The date display format:
jj/mm/aaaaoraaaa/mm/jjormm/jj/aaaa -
Time display format: 24-hour
13:00, or the Anglo-Saxon format1:00 pm -
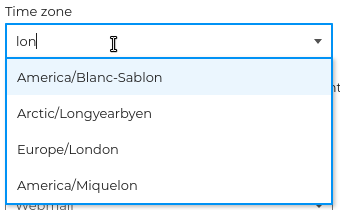
Time zone: select the text and delete it to view all available time zones, or type the first few letters of the country or city to search for a time zone:
Consistency with the environment
If the selected time zone differs from the system time zone, a link allows you to easily synchronise them:
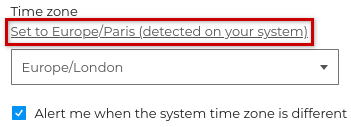
The option ‘ Notify me when the system time zone is different ’ allows you to be notified when the selected time zone differs from that of your workstation:

💡 Unticking this option allows you to use a different time zone without being prompted each time you log in again.
BlueMind has been translated and is currently being translated into several languages. The available languages and their progress can be viewed on the website dedicated to the application’s translation: https://forge.blue-mind.net/translate/
Set the launch application
Also within the general preferences, ‘Default application’ allows you to choose which application will open when you log in to BlueMind: the mail app or the calendar.

Choose a theme
The theme allows you to display the mail app in light or dark mode. By ticking the ‘System theme’ option, the display will adapt to the mode set in your computer’s settings.
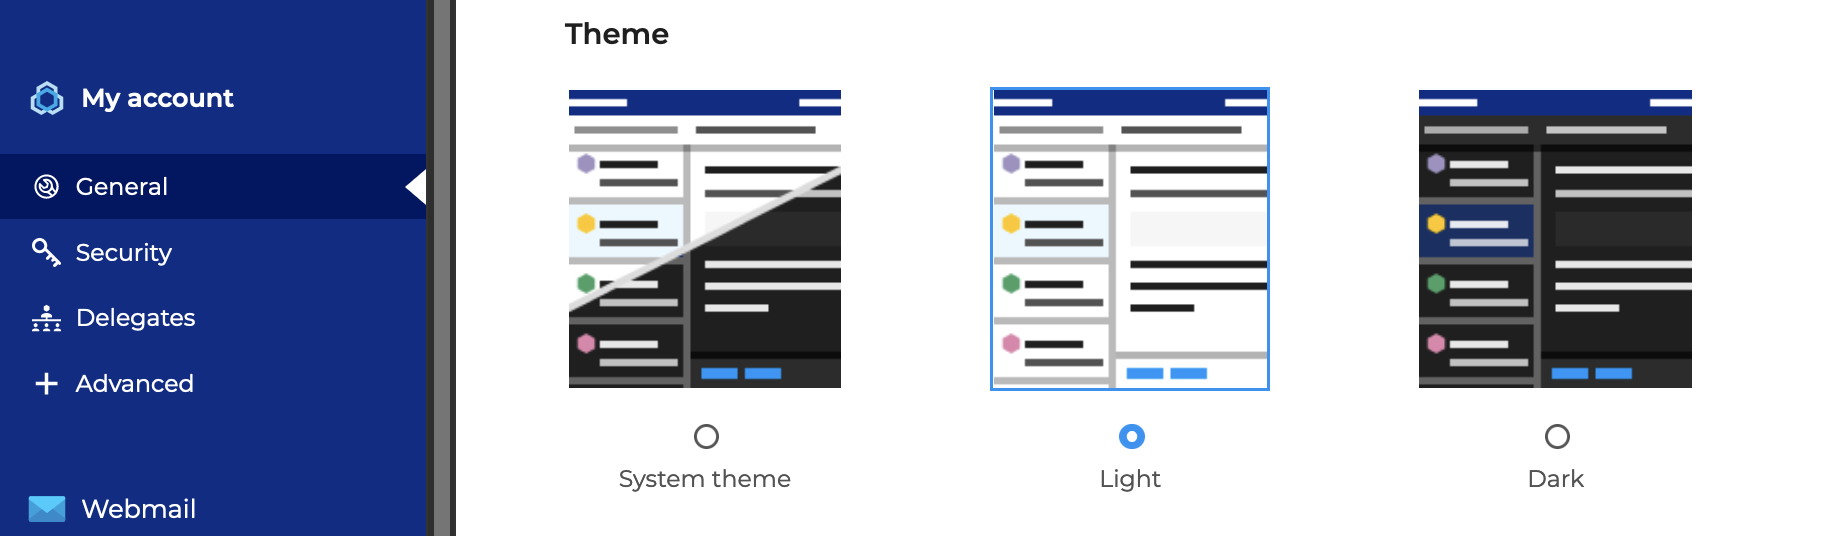
The dark theme is currently only available for the mail app.
theme.common.Pourinfo, Customizing Mail.
Manage tags
Tags allow you to add one or more keywords (or tags) to emails, contacts and calendar events so that you can organise them and find them quickly.
Domain tags, created by the domain administrator, appear automatically:
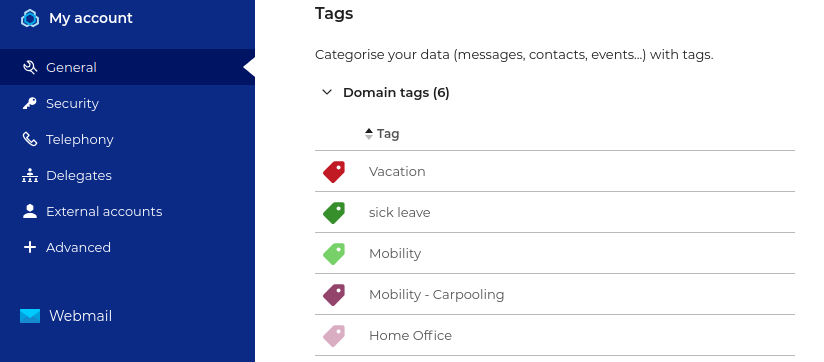
Domain tags cannot be edited and cannot be added to emails; they can only be added to contacts or events.
Personal categories appear under "My tags" :
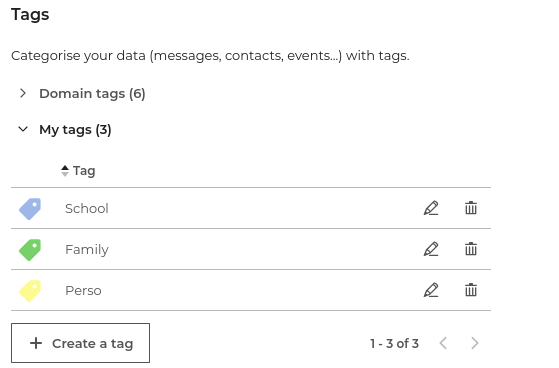
To sort or reverse the sort order, click on the column header  .
.
To add a personal tag, go to “+ Create a tag” then
- Enter the label
- Choose a colour (by default, one available colour is suggested)
- Click on Create
Go to  to edit a tag and to
  to delete one.
Renaming a tag is equivalent to deleting it and creating a new one: the tag is not updated in emails.
Just like tags deleted from the user’s preferences, renamed tags remain visible in emails where they have been used, but are greyed out.
Tags are linked to the account. Therefore:
-
Only the account owner can change categories from the preferences. Delegates or users with write access to a shared mailbox can create or Adding tags messages from the mailbox, but cannot modify the text or color, or delete them.
-
The delegate only accesses their own categories, i.e., domain categories and their personal categories. A delegate or user with write rights on les carnets d'adresses ou calendriers cannot therefore assign the delegator's personal categories to the contacts ou événements.
theme.common.Pourinfo :
Manage security settings
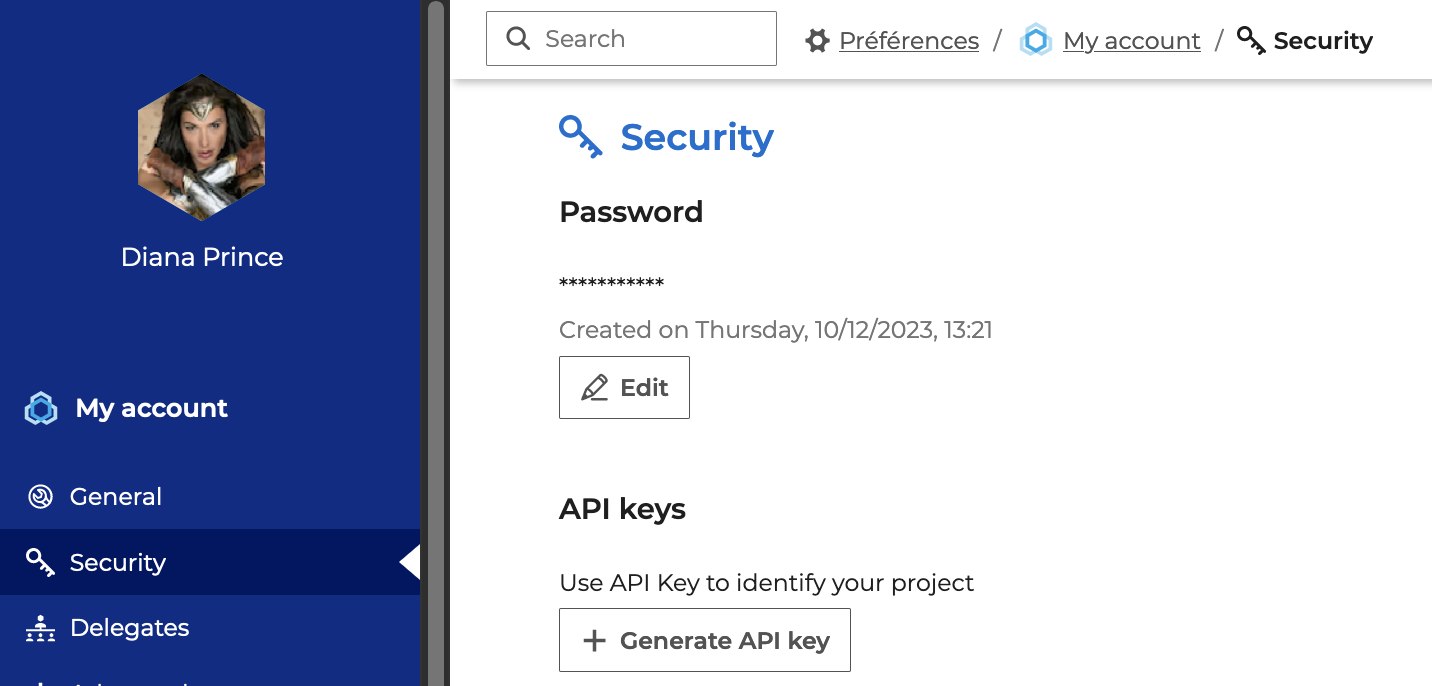
The “Security” section allows you to manage your password and generate API keys:
Change your password
To change your password:
- Click on Edit to open the pop-up window:
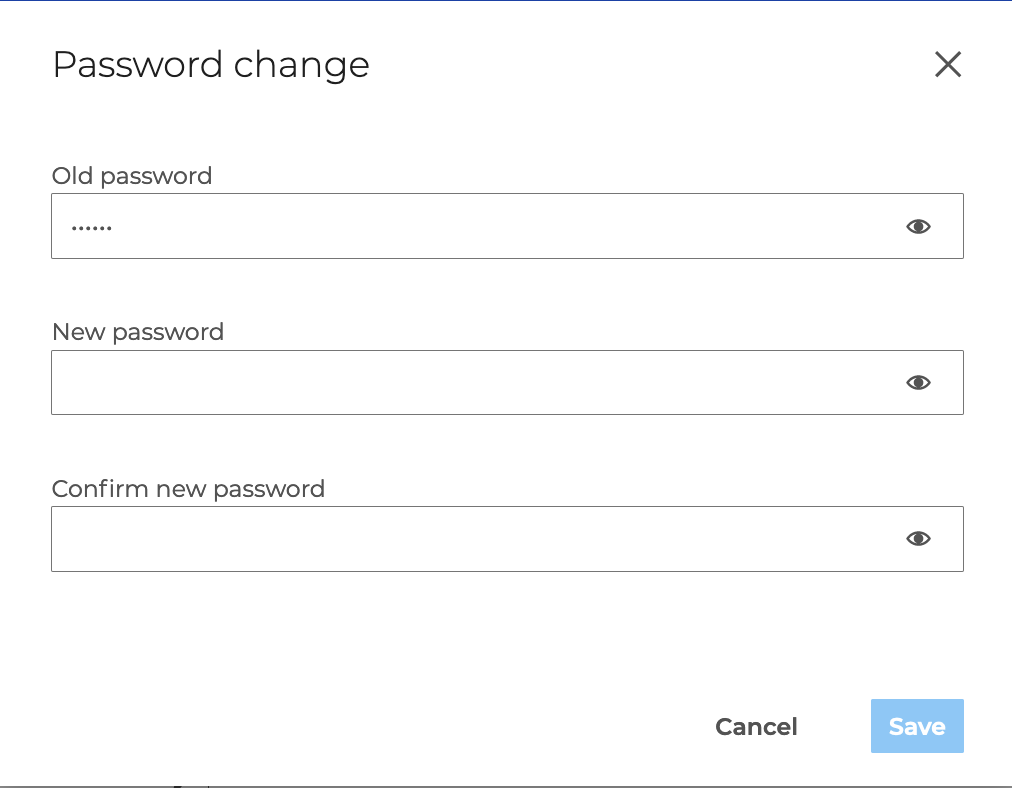
- Enter the new password in the “New password” and “Confirm new password” text boxes
- click Save
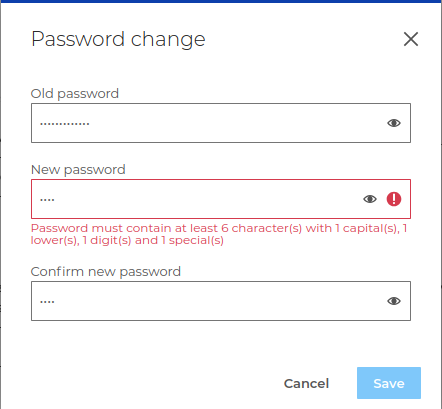
Administrators can set a password policy; the interface will then alert you if the new password does not comply with the current rules:
Manage API keys
API keys can be used to log in to a user account without using the account’s login password. In particular, they allow you to connect an external service without having to provide it with the user’s password, and to revoke its access at any time by deleting the key.
Generate an API key
To create a key:
-
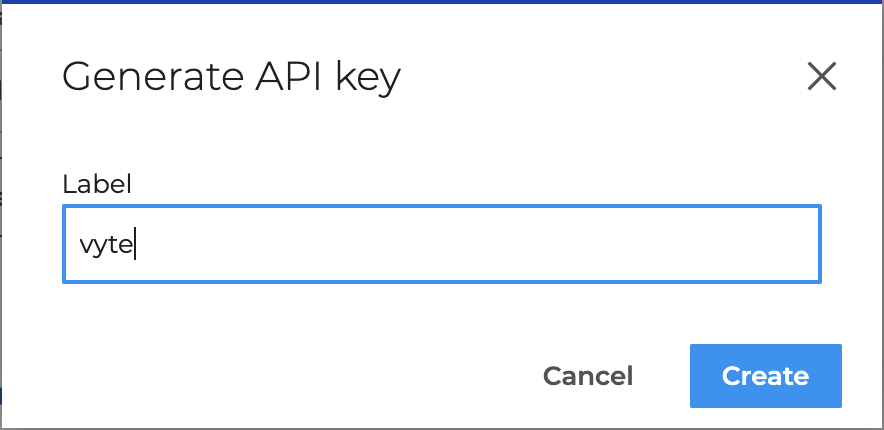
Click on the ‘+ Generate an API key’ button to open the pop-up window:
-
Enter a name to identify the key’s purpose (for example, the name of the service or site for which it will be used), then click Generate.
-
Copy the API key value to add it to the external service and keep it if required, then click Finish.
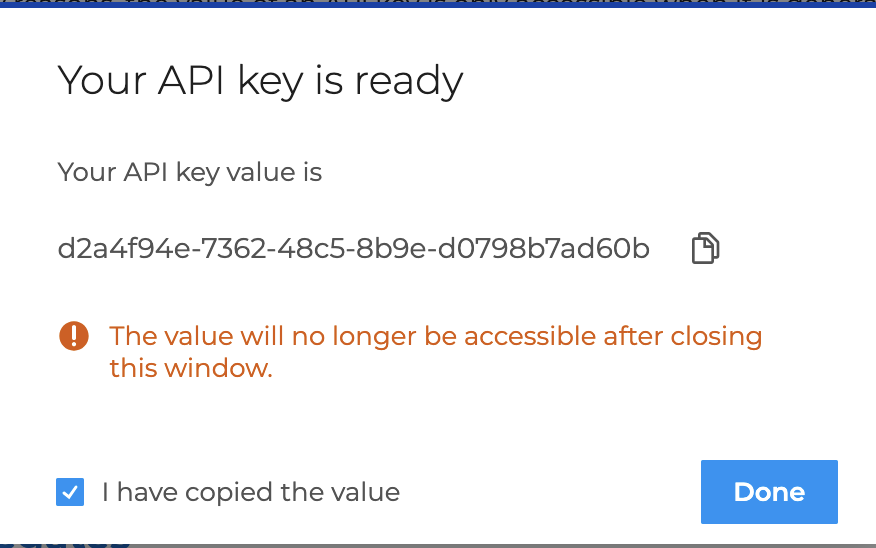
⚠️ For added security, the API key value is only visible when it is created; it cannot be retrieved afterwards.
The key is created immediately and added to the user’s list of keys. Each user can create as many keys as they wish.
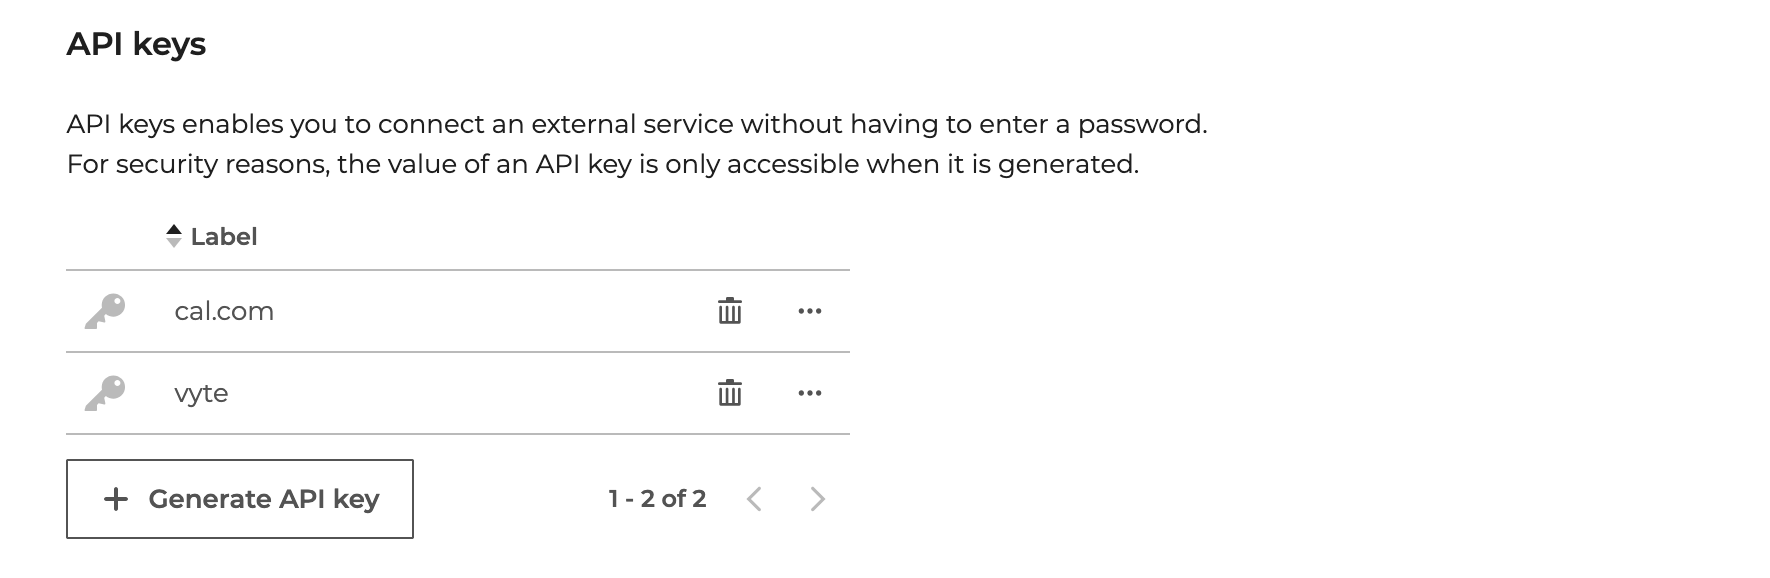
Overwrite an API key
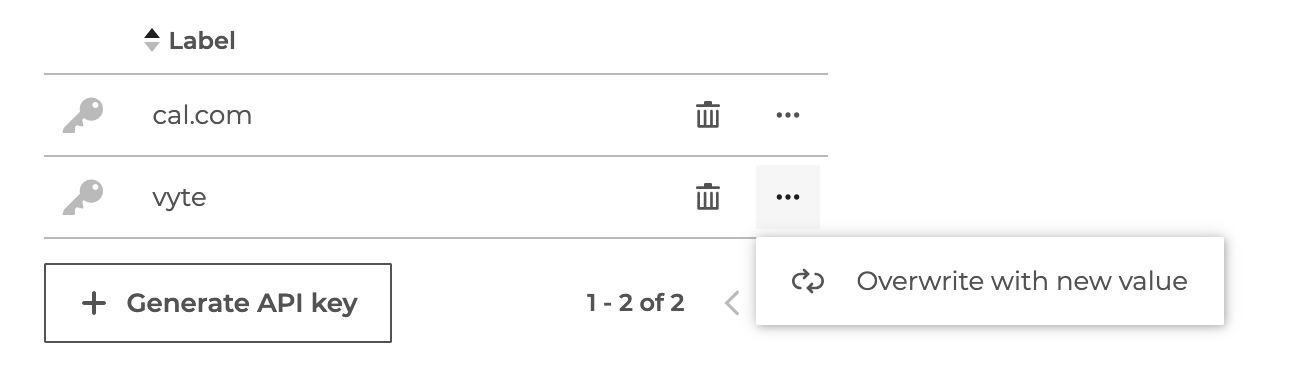
If you lose an API key, you can regenerate it.
To do this:
- Click on ‘Overwrite with a new value’ in the key menu
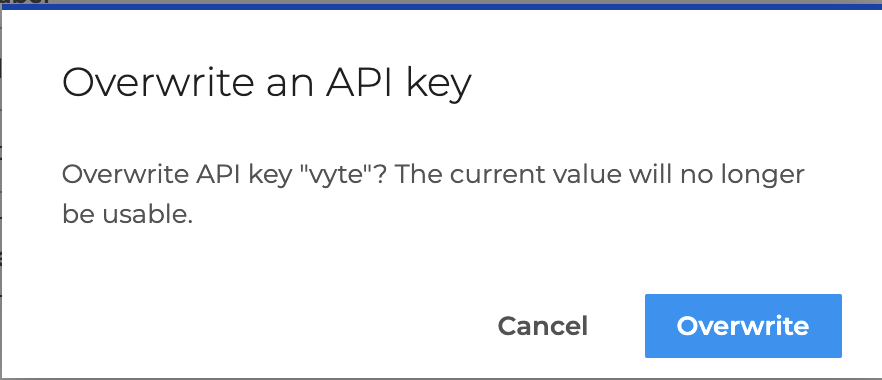
- Validate by clicking ‘Overwrite’ in the pop-up window
- Copy the new API key value
Delete an API key
When an API key is no longer in use, it is advisable to delete it for greater security.
To do this:
- click on the icon of the desired API key
- Confirm by clicking ‘Delete’ in the pop-up window
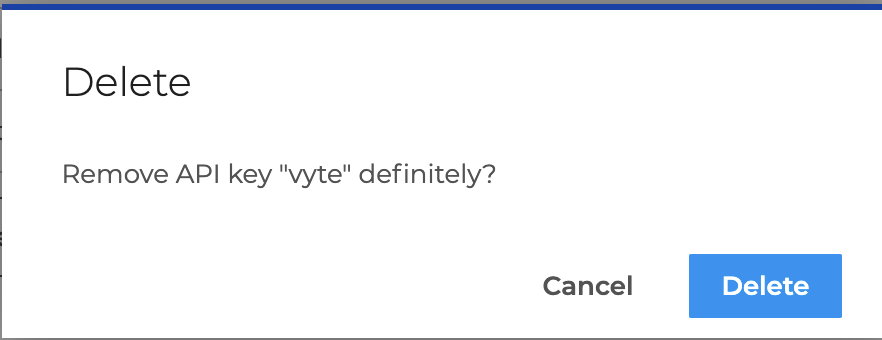
The key is immediately removed from the list.
Secure your connection with OTP
OTP stands for "One Time Password". This is a randomly generated 6-digit number that strengthens authentication and complements the user's password.
This number is valid only once for 30 seconds, after which a new number is generated.
To secure access to BlueMind, the administrator can make this type of multi-factor authentication (MFA) mandatory.
Install an OTP manager
As a prerequisite for configuration, an OTP manager must be installed on your mobile phone or computer.
There are a large number of apps available for use; here are a few examples:
- FreeOTP
- Google Authenticator
- Microsoft Authenticator
- Bitwarden Authenticator
If in doubt, consult the administrator or the department responsible for the organisation’s IT system to find out whether an OTP manager is recommended or used internally.
Initialise OTP configuration
When OTP security is made mandatory by the administrator and no key has yet been generated, BlueMind automatically prompts you to set one up the next time you log in:
-
Access BlueMind via a browser (on a computer or mobile device)
-
Once you have entered your username and password in the usual form, BlueMind displays the configuration page:
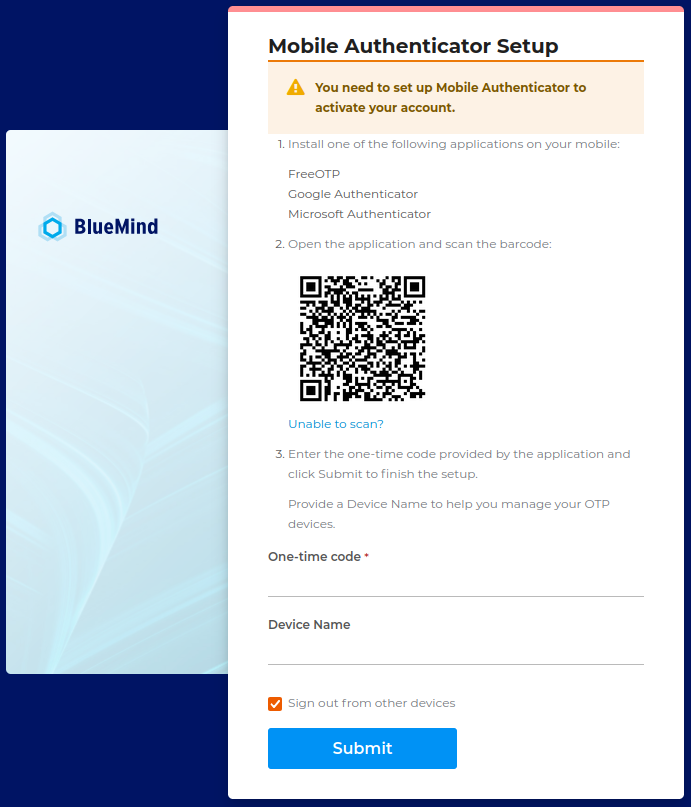
⚠️ An OTP manager must be installed. Users are free to choose whichever secure application they wish (see above).
-
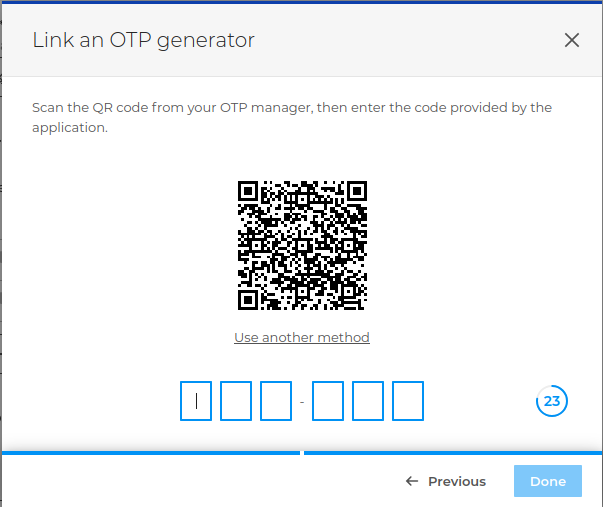
Use the application to scan the QR code displayed on the screen.
💡 If you are unable to scan the QR code provided (e.g. no suitable device available, using the mobile itself, user preference, etc.), click on “Unable to scan?”:
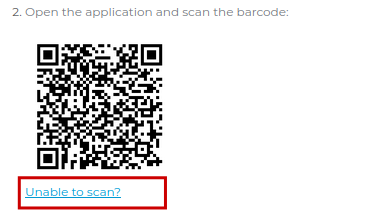
An identification key will then be displayed, which you must copy and paste or type into the chosen application:
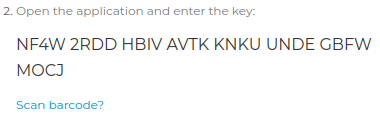
💡 To return to the QR code, click “Scan the barcode?”
The screen also displays a section setting out the security rules to be followed or configured in the application if necessary, namely:- Type: Time-based
- Algorithm: SHA1
- Numbers: 6
- Interval: 30
-
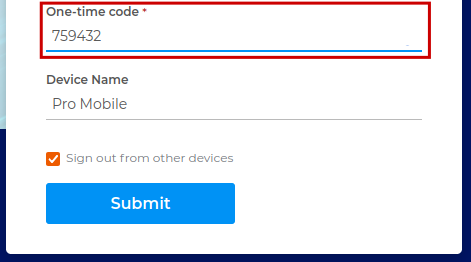
In return, the application will provide a one-off code; enter this code in the appropriate field:
-
Name the device and then click ‘Submit’ to perform validation of the connection.
💡 Device name
The “Device name” field is free text; it allows you to identify the device or application being used in cases where the user logs into BlueMind via different methods (e.g. a mobile app whilst on the move and a key manager built into the workstation’s browser) and therefore needs to manage multiple keys.
Manage your OTP keys
You can create as many OTP keys as you wish or need, for example to log in to BlueMind on different devices.
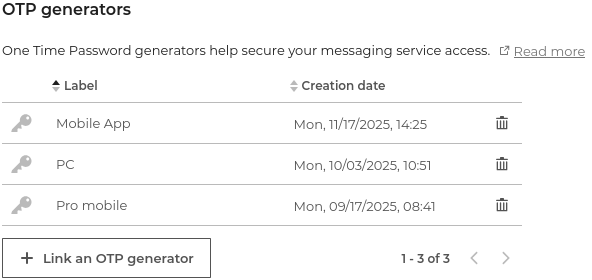
To view, delete or create new keys, go to the ‘My Account’ preferences section > Security > OTP Generators:

To revoke a key, click on the corresponding icon.
If the administrator has made logging in via OTP mandatory and no other key exists, the next time you log in, this will need to be reconfigured via the initial configuration page.
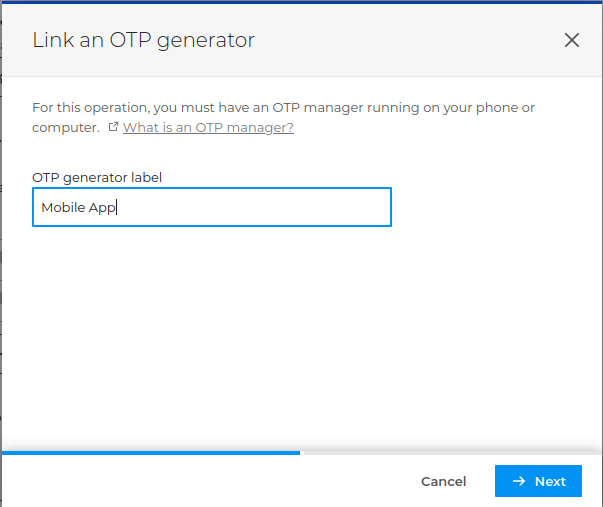
To create a new key, click on ‘ Link an OTP generator ’ then:
- Name the key and click ‘Next’:
- Use your preferred method to create the key, in the same way as during the initial setup:
- Enter the code given by the handler used:
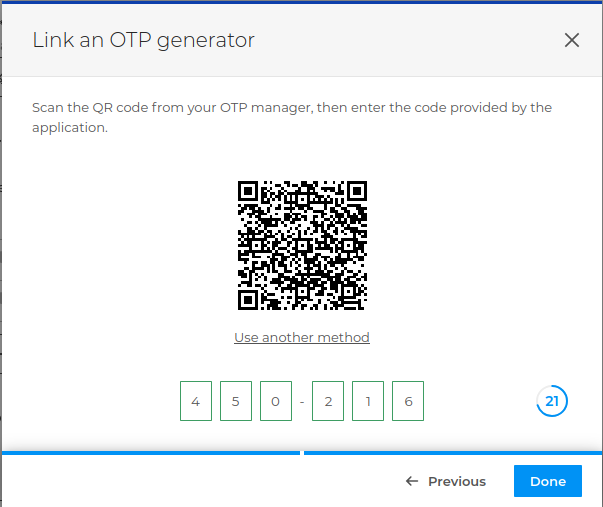
- Click ‘Done’; the key is added to the list:
Log in with OTP
Once at least one key has been created (see above):
- Access BlueMind via a browser (on a computer or mobile device)
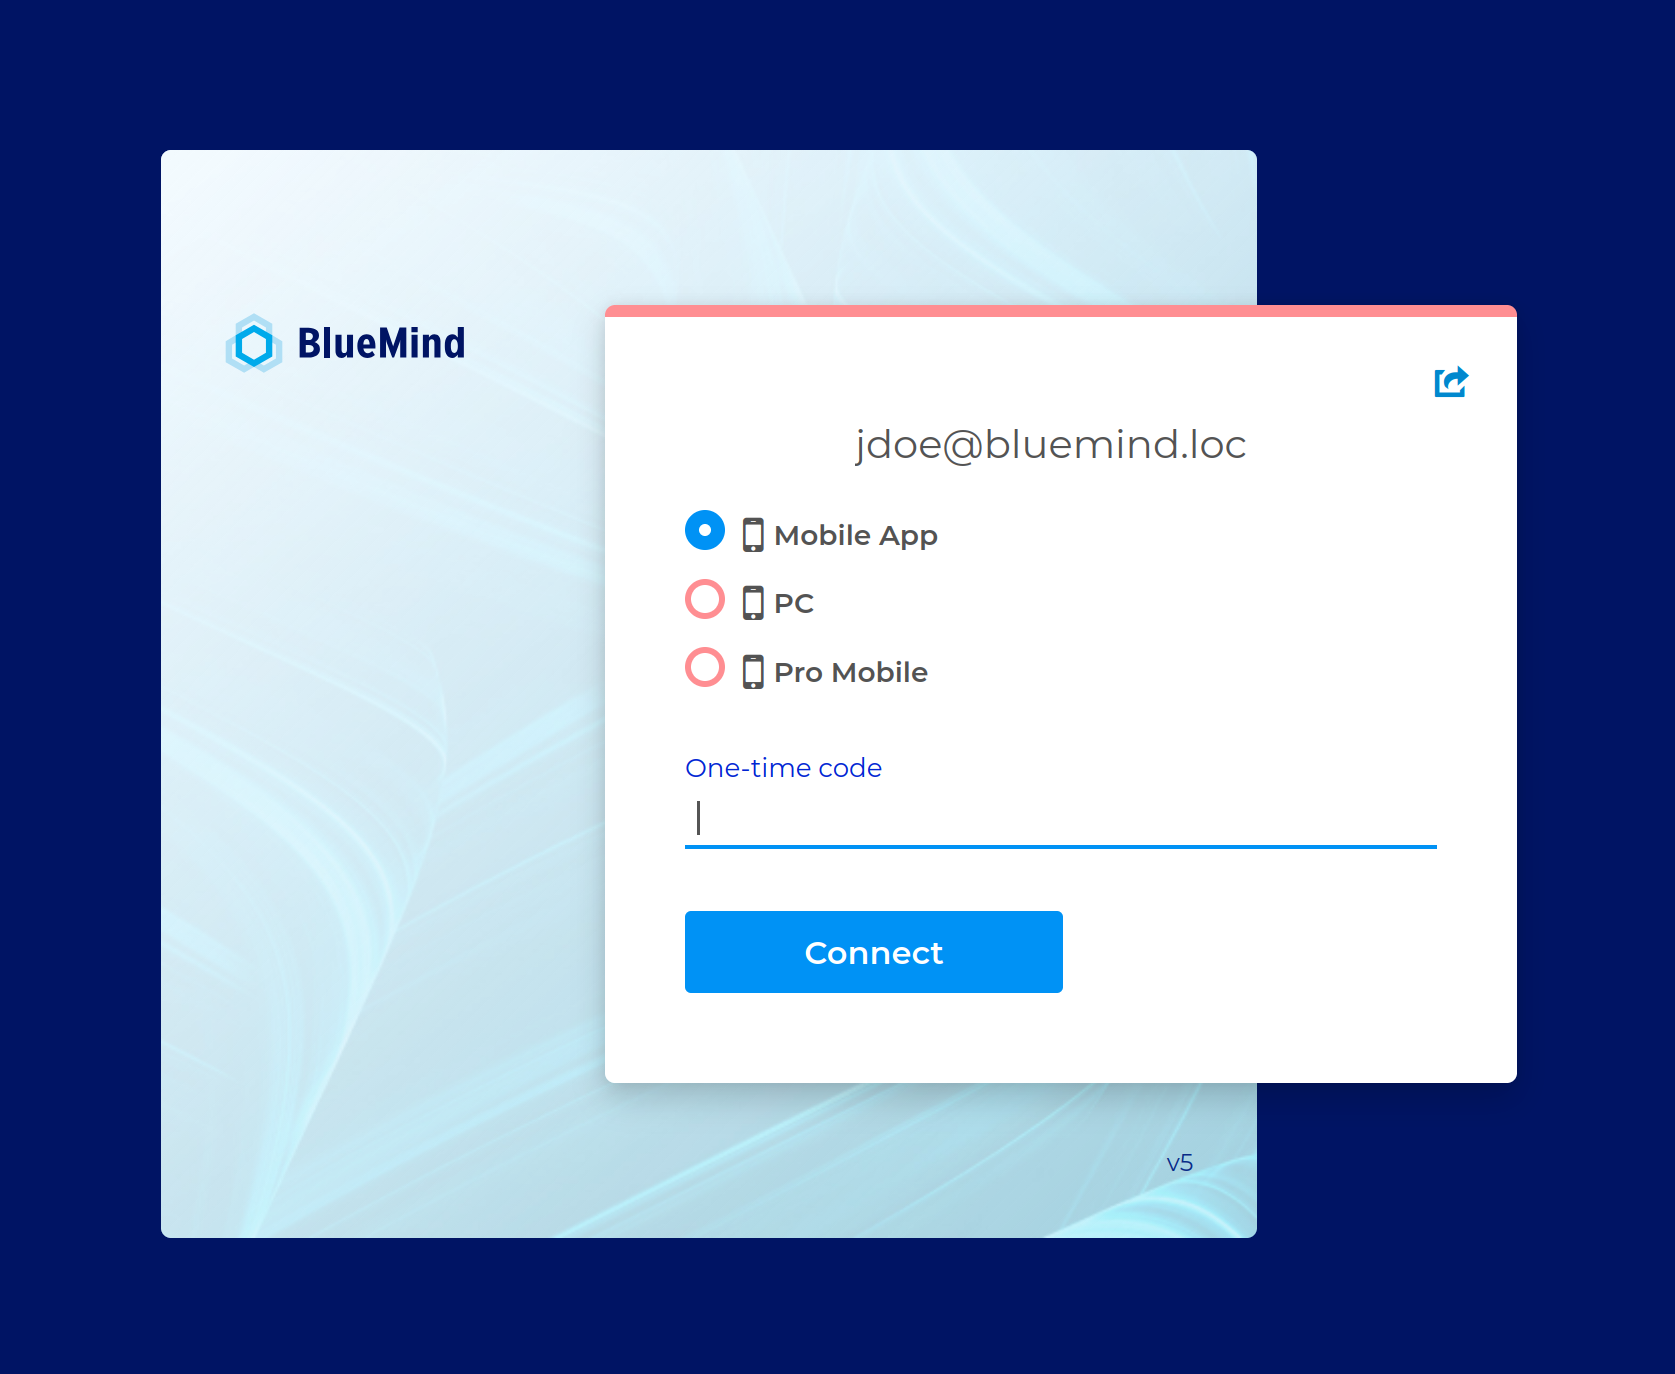
- Once you have entered your username and password in the usual form, BlueMind will ask you to enter a one-time code:
To log in:
-
Select the appropriate key (this option is only available when multiple keys are configured).
-
Open the relevant application
-
Generate a code
💡 Some apps display the code directly and refresh it automatically every 30 seconds.
-
Enter the code
-
Click on "Log in"
Manage delegations
The Delegations section allows the user to appoint delegates and define their level of access rights.
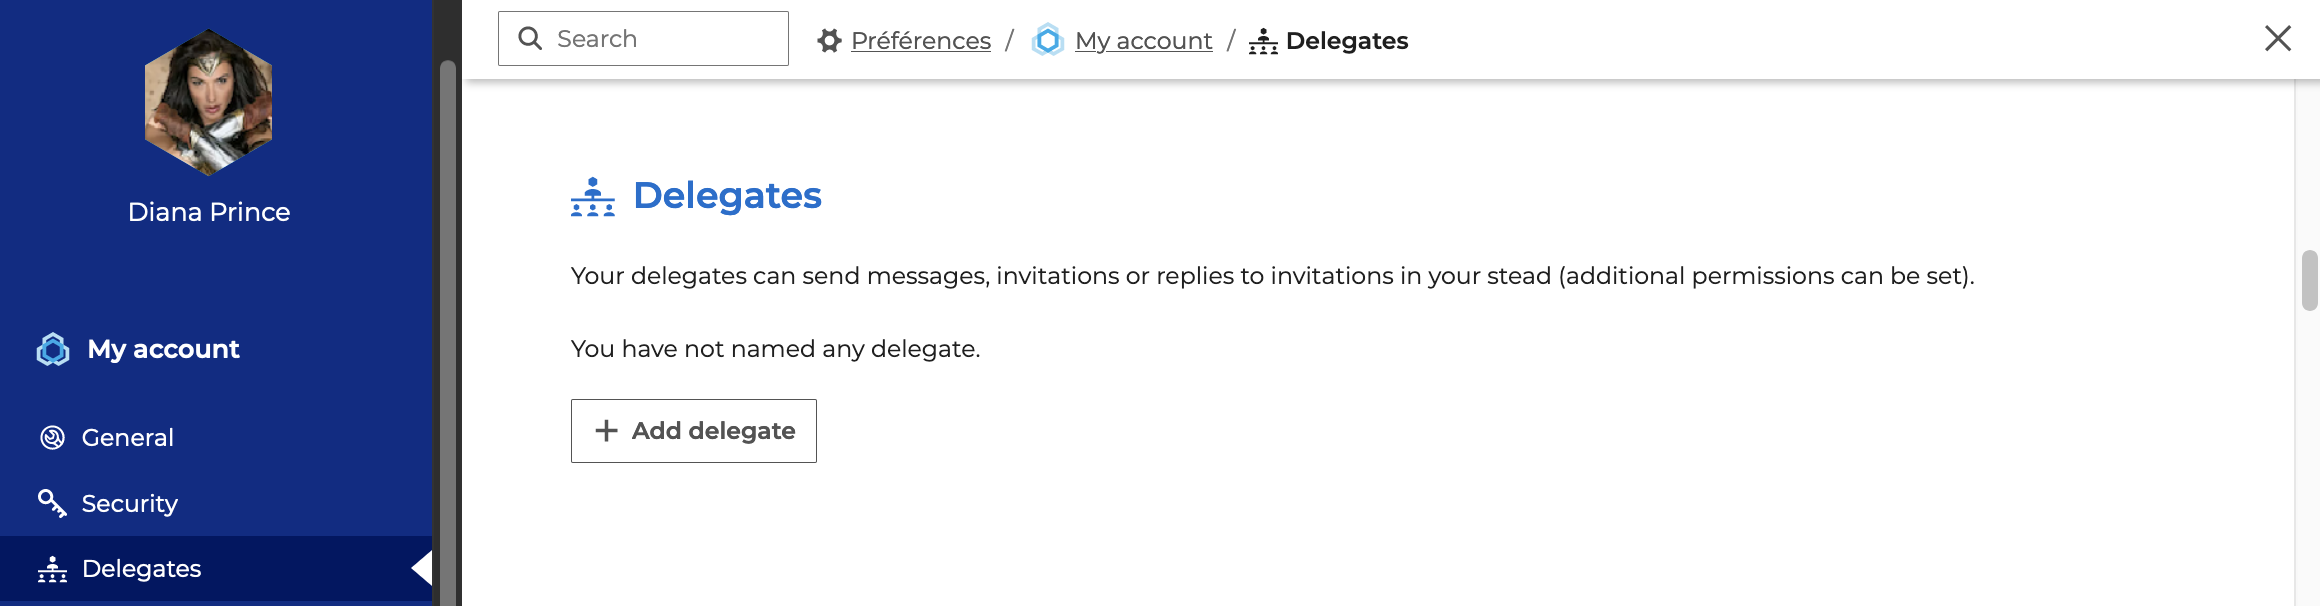
A delegate is a user or group of users within the domain who is authorised to act on behalf of the delegating user. Depending on the options selected, the delegate :
Please note that delegations only apply to the default mailbox and default calendar (My Mailbox, My Calendar). It is not possible to create a delegation for e-mail addresses or secondary calendars created by the user.
To make it easier to manage the sharing of default applications (My Inbox, My Calendar, My Contacts, My Tasks), users can also change the access levels for each delegate from this section.
Create a delegation
To add a delegate:
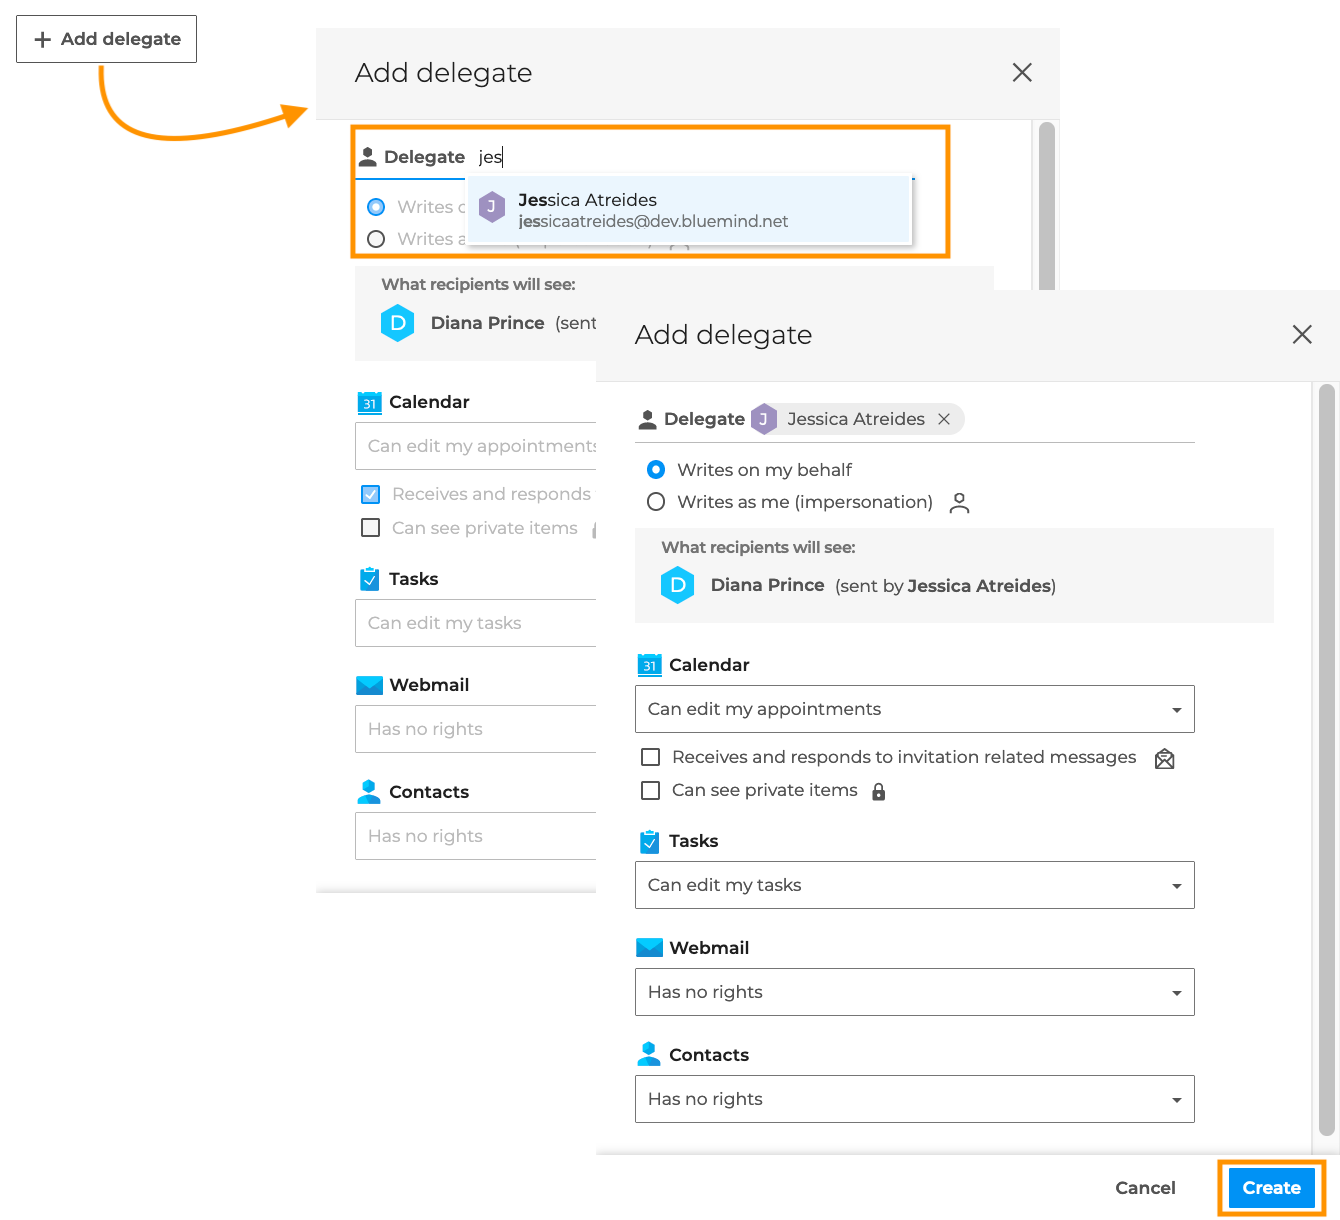
- Click on “+ Create a delegation” to open the pop-up window
- Add a user or group in the “Delegate” field: type the first few letters and select from the autocomplete list.
- Configure delegation by selecting the desired options and access rights levels for applications
- Click on "Create"
Set up delegation
1. Set the delegation level
Delegation allows a delegated user to send emails using the delegating user’s e-mail address. The first setting to configure concerns the desired level of impersonation. Depending on the option chosen, the recipient may or may not see that the email was sent by a delegate.
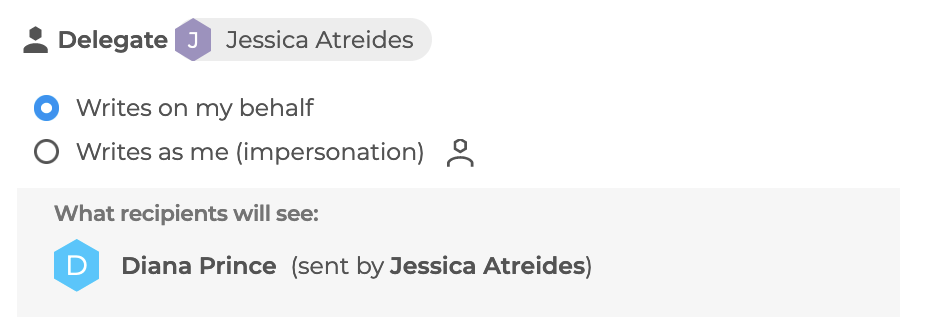
⇒ Minimum option: The delegate may write on my behalf
The “Written on my behalf” option is ticked by default; this is the minimum permission required to create a delegation.
With this option, when the delegate sends an email using the delegating user’s e-mail address, the recipient can see that the email was sent by the delegate:
See the documentation on ‘Writing on behalf of another user’ for more details on using this option.
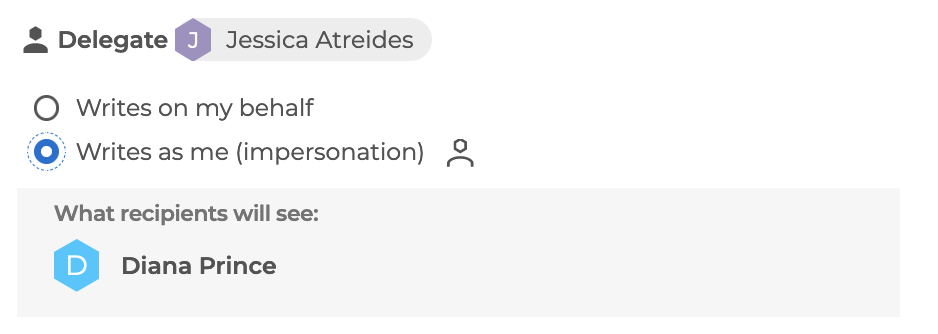
⇒ Maximum option: The delegate can write as ‘me’
The “Written as me” option completely performs impersonation on the emails sent.
This option allows the delegate to send emails using the delegating user’s e-mail address without the recipient being able to see it:
See the ‘Writing as another user’ documentation for more details on using this option.
No sharing level is required for a delegate to write on behalf of or in the name of a delegator.
However, it is recommended that the delegate be granted at least read-only access so that they can view and reply to emails received by the delegator.
2. Grant invitation management rights
Once you have selected the delegation level, you can allow the delegate to manage invitations received by the delegator via their mail app.
To do this, select at least the ‘Can edit my appointments’ sharing level for the Calendar and tick the desired option(s):
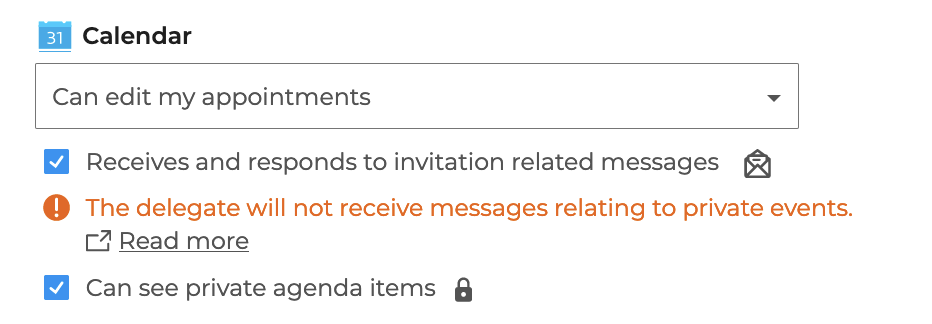
⇒ Minimum option: The delegate receives my invitations and replies to them
To allow the delegate to manage invitations from their mail app, tick the option “Receives and replies to emails relating to invitations”.
In addition to write access to the default calendar – allowing the delegate to manage events from the Calendar – the delegate receives all notifications relating to the delegator’s public events in their inbox and can reply to them, ‘on behalf of’ or ‘as’ the delegator – depending on the delegation option selected.
It is not necessary to grant the delegate read access to the delegator’s mailbox for this option to work.
See the documentation at Delegating invitation management for further details on using this option.
⇒ Maximum option: The delegate can view my private events
An additional permission may be granted to the delegate so that they can view and manage private events from the Calendar. To do this, also tick the option “Can view private events in the Calendar”.
When this option is ticked, the delegate can view the details of the private event and can reply to the invitation in the calendar.
Regardless of the level of delegation chosen, a delegate never receives notifications relating to private events in their mail app. A delegate can only manage private events via Calendar.
⇒ Additional setting: the delegator chooses whether or not to manage their invitations
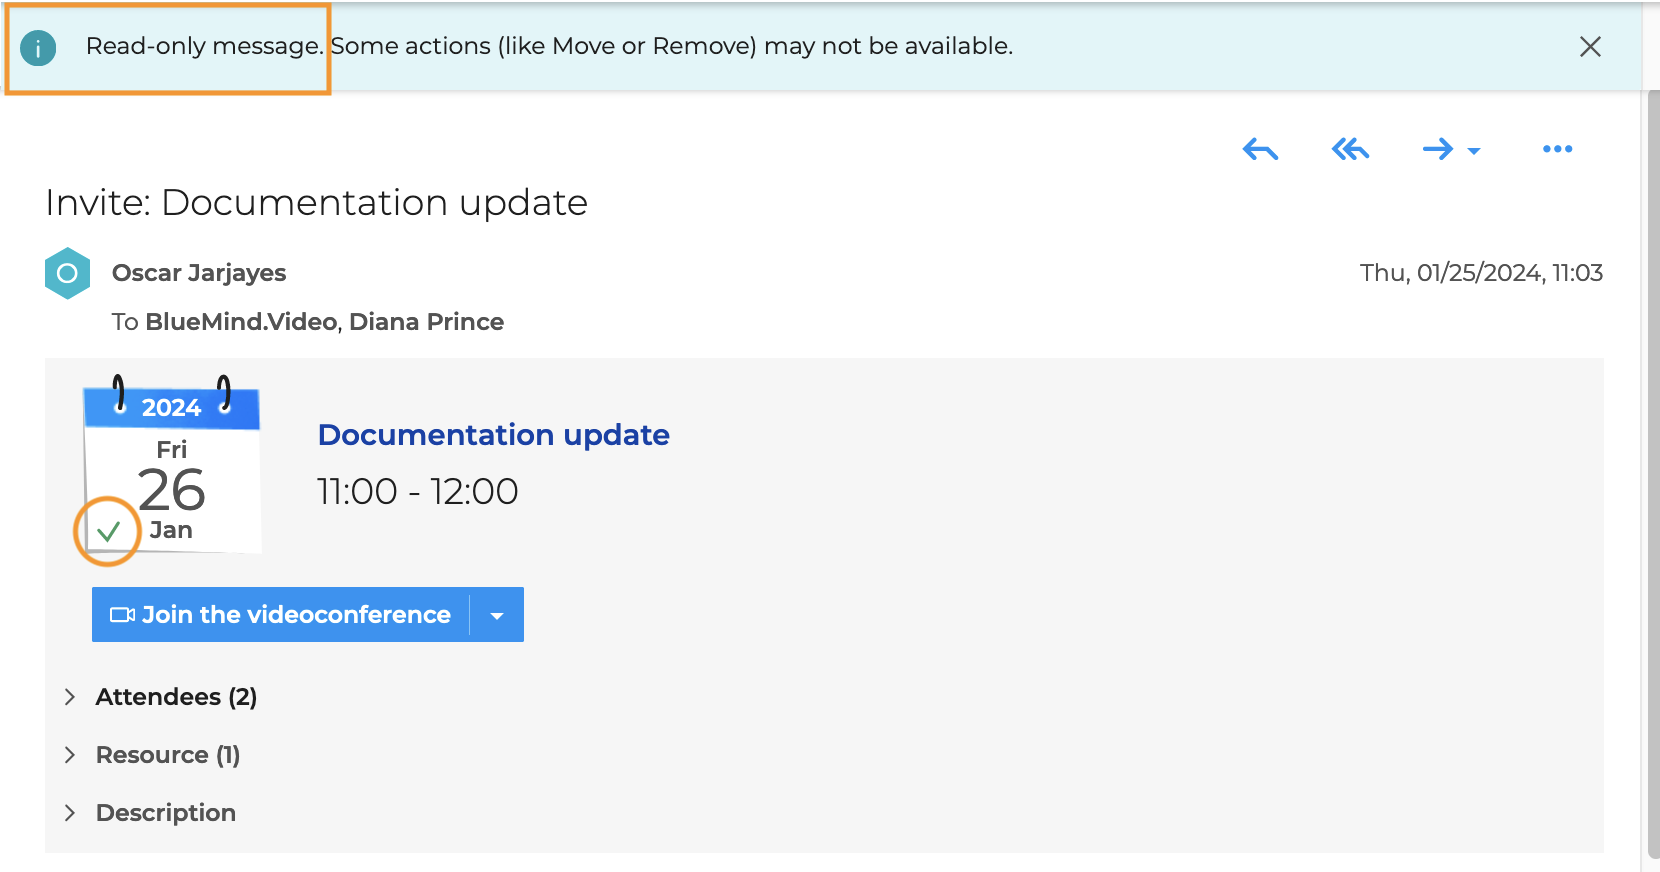
Once at least one delegate has been created with the option “Receives and replies to invitation emails”, an additional setting appears below the delegation summary table, allowing the delegator to choose whether or not they also wish to manage their invitations:

- I am not receiving emails: only the delegate receives the notification and manages the invitation; the delegator receives neither the invitation nor the replies sent by the delegate
- I receive a copy: both the delegate and the delegator receive the invitation, but only the delegate can manage the invitation; the delegator receives a read-only copy of the invitation and can view the delegate’s response via the date icon:
- I also receive the emails: both the delegate and the delegator receive the invitation and can manage it – this setting is selected by default
See the ‘Manage invitations’ documentation for more details on managing invitations via the mail app.
3. Manage access to my default applications
The delegation creation window also allows you to view and configure the default application sharing rights (My Inbox, My Contacts, My Calendar, My Tasks) assigned to the delegate.
When a delegate is selected, the rights previously assigned in the sharing settings for each application are displayed automatically.
If no permissions have been set, the default permissions are:
- Calendar: “Can edit my appointments”
- Tasks: “Can edit my tasks”
- Mail app: “Has no permissions”
- Contacts: “Has no permissions”
When a sharing right is changed here, the change is immediately reflected in the application’s sharing settings (refresh the page if necessary).
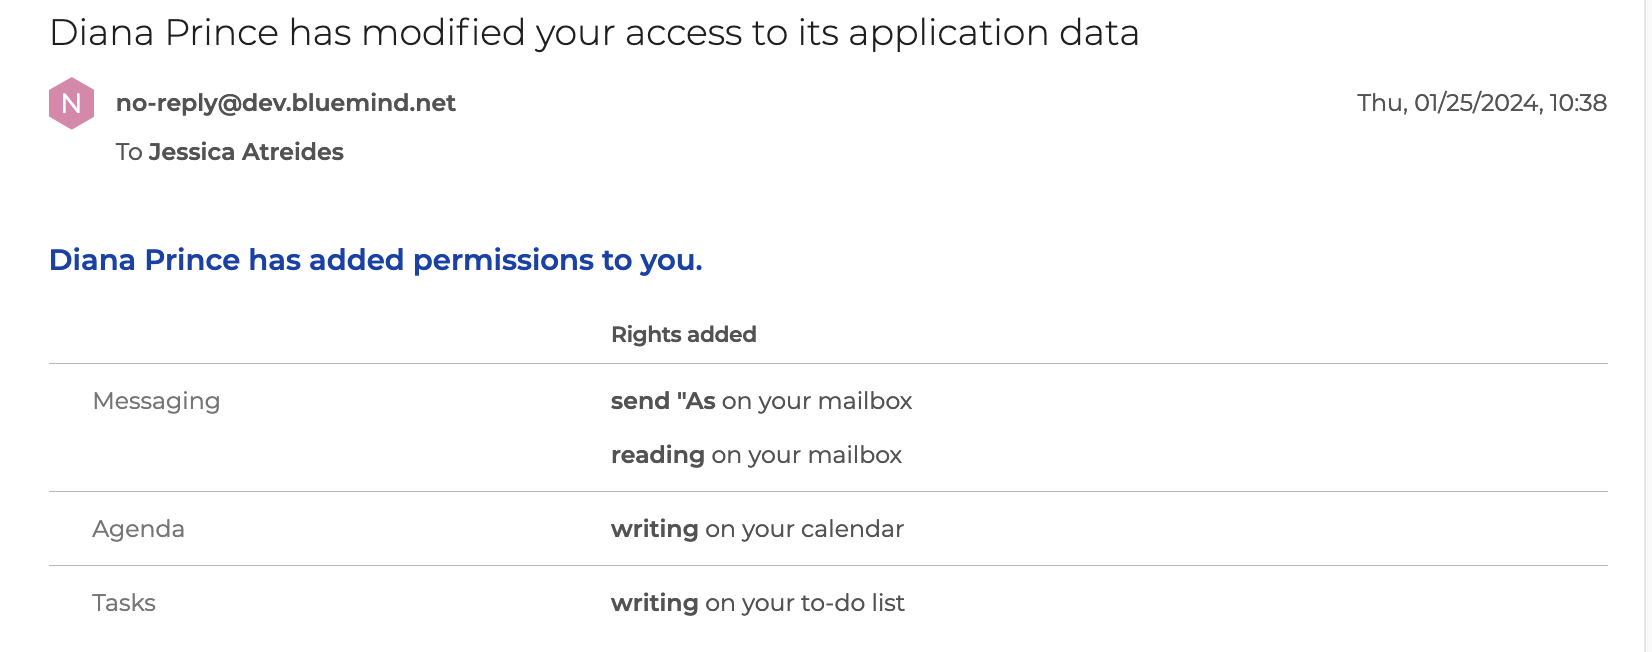
Once the delegation has been created, the delegate receives an email notification summarising the rights that have been granted to them:
Manage delegations
Once the delegations have been created, a table summarises all the delegations and rights granted to each delegate:
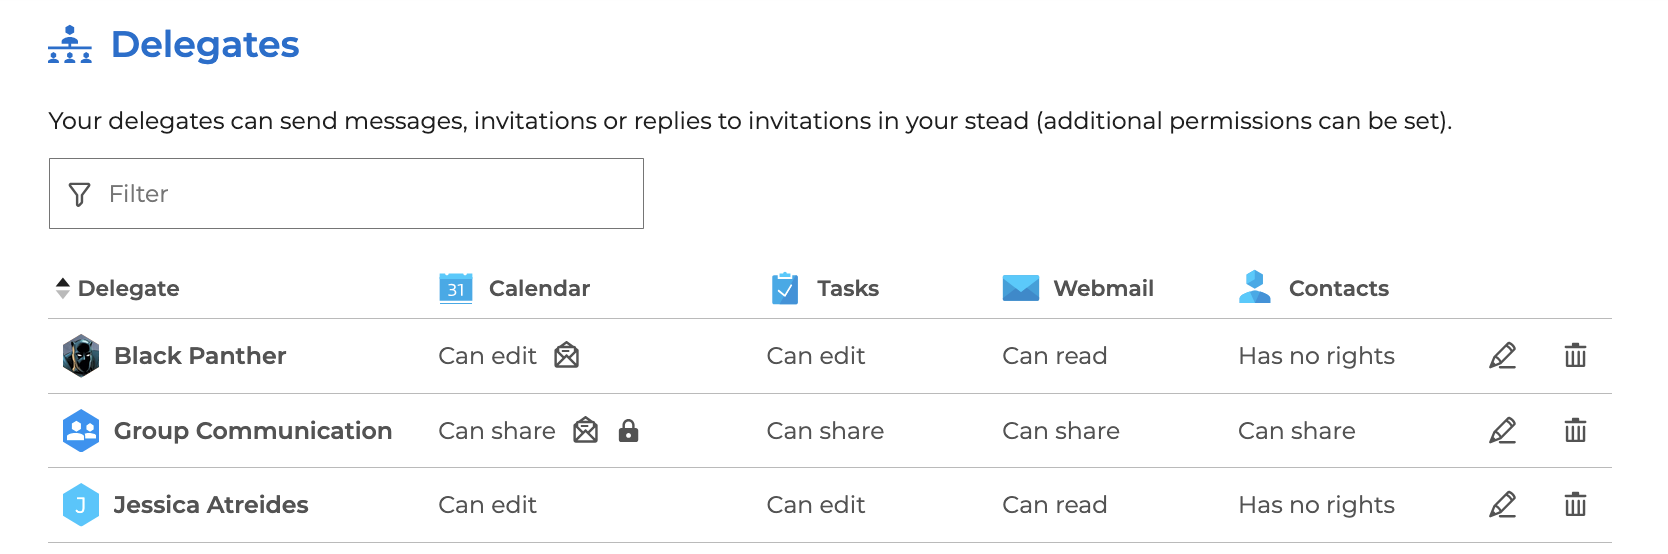
- The
 icon indicates that the delegate Write as me
 - The
 icon indicates that the delegate Receives and responds to my invitations
 - The
 icon indicates that the delegate Can see my private events
Click on  to edit a delegation and
  to delete it.
Managing external accounts
BlueMind connects with a number of services to make it easier for users to exchange and use their data (attach files from a Nextcloud, Interstis or Alfresco drive, launch calls with Xivo or Wazo, connect to Teams meetings, etc.).
Create an external account
To configure the connection to an external account, go to the Preferences section > My Account > External Accounts:
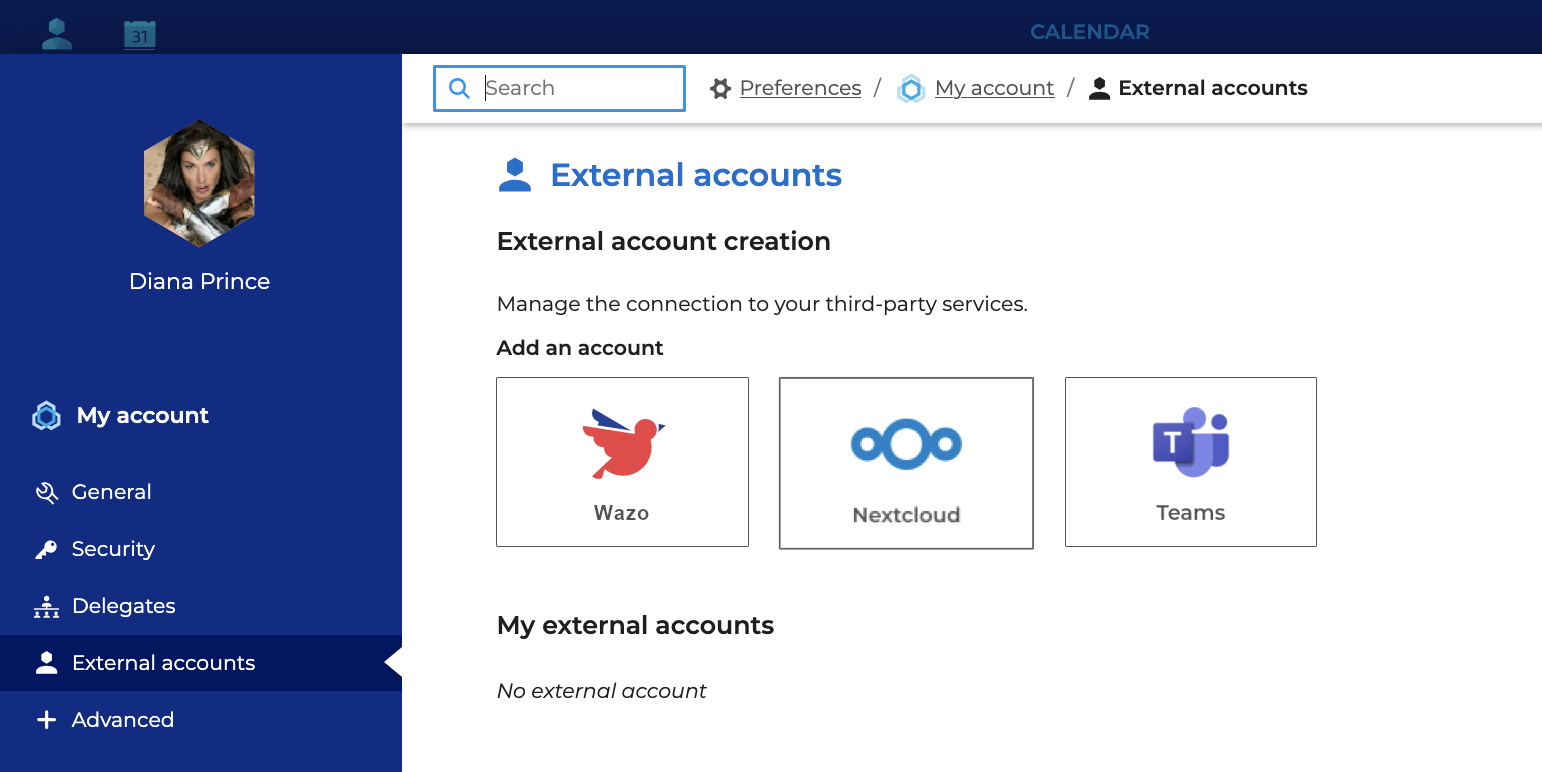
If a service does not appear, contact an administrator: only installed and enabled services are visible.
Click on the desired service and enter the requested information:
- Alfresco
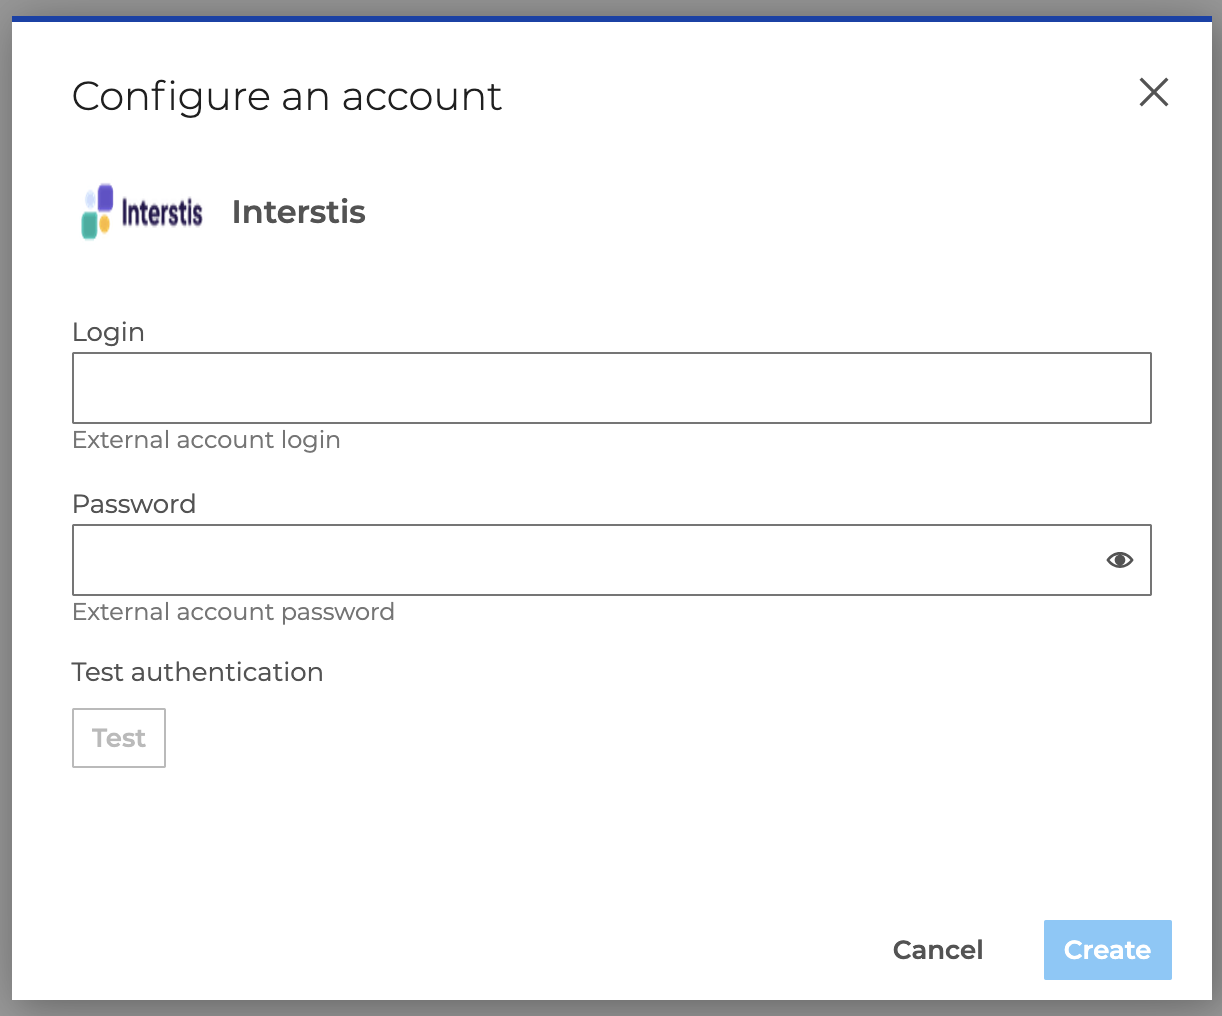
- Interstis
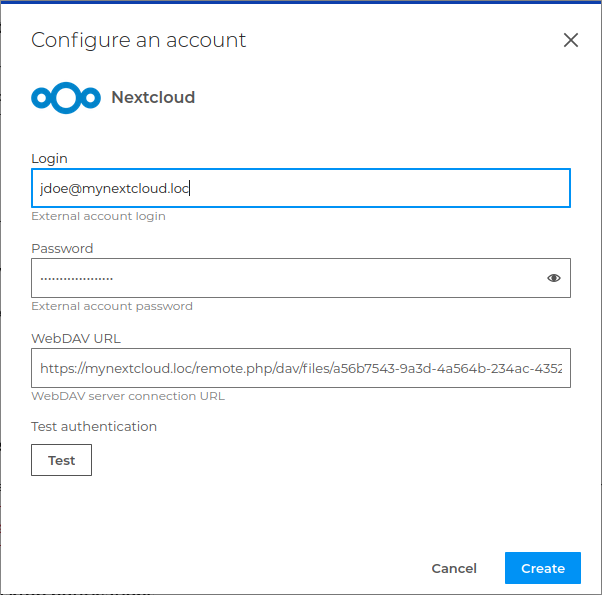
- Nextcloud
- Teams
- Wazo
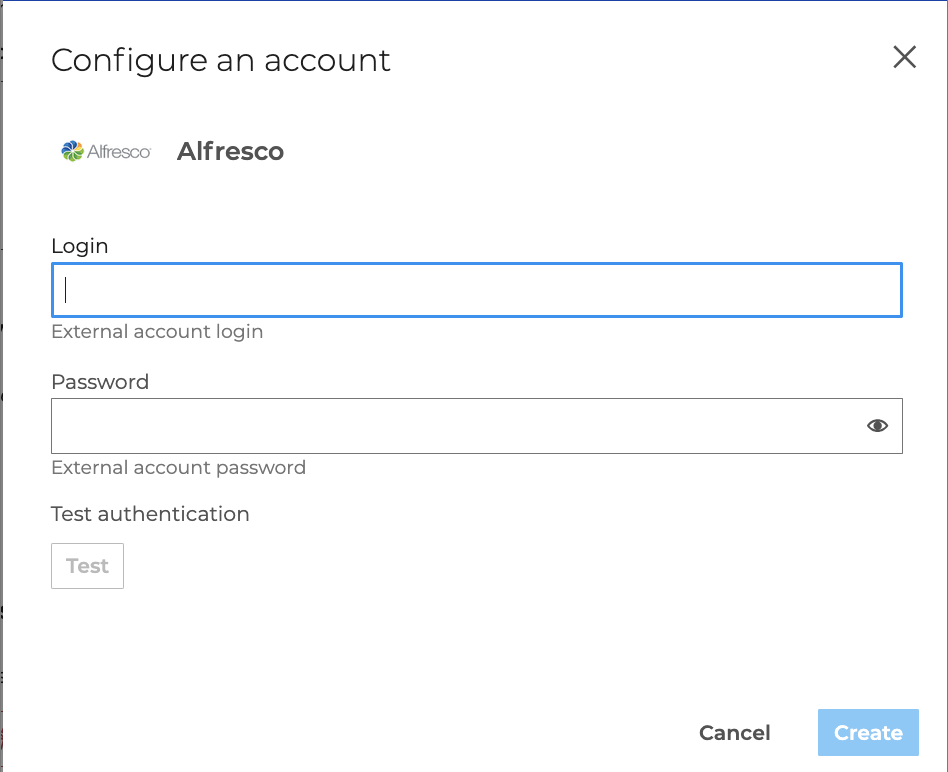
- Enter your username and password,
- Enter your username and password,
-
Enter your username and password,
LDAP SynchronizationWhen Nextcloud is connected to an LDAP directory, the WebDAV URL is no longer formed using the user’s username but with the account’s UUID; it takes the form
https://<serveur_nextcloud>/remote.php/dav/files/<UUID>.
It is therefore necessary to specify the WebDAV URL, which can be found in the Files settings of the user’s Nextcloud space: in Nextcloud, go to the Files app and navigate to Files Settings > WebDAV: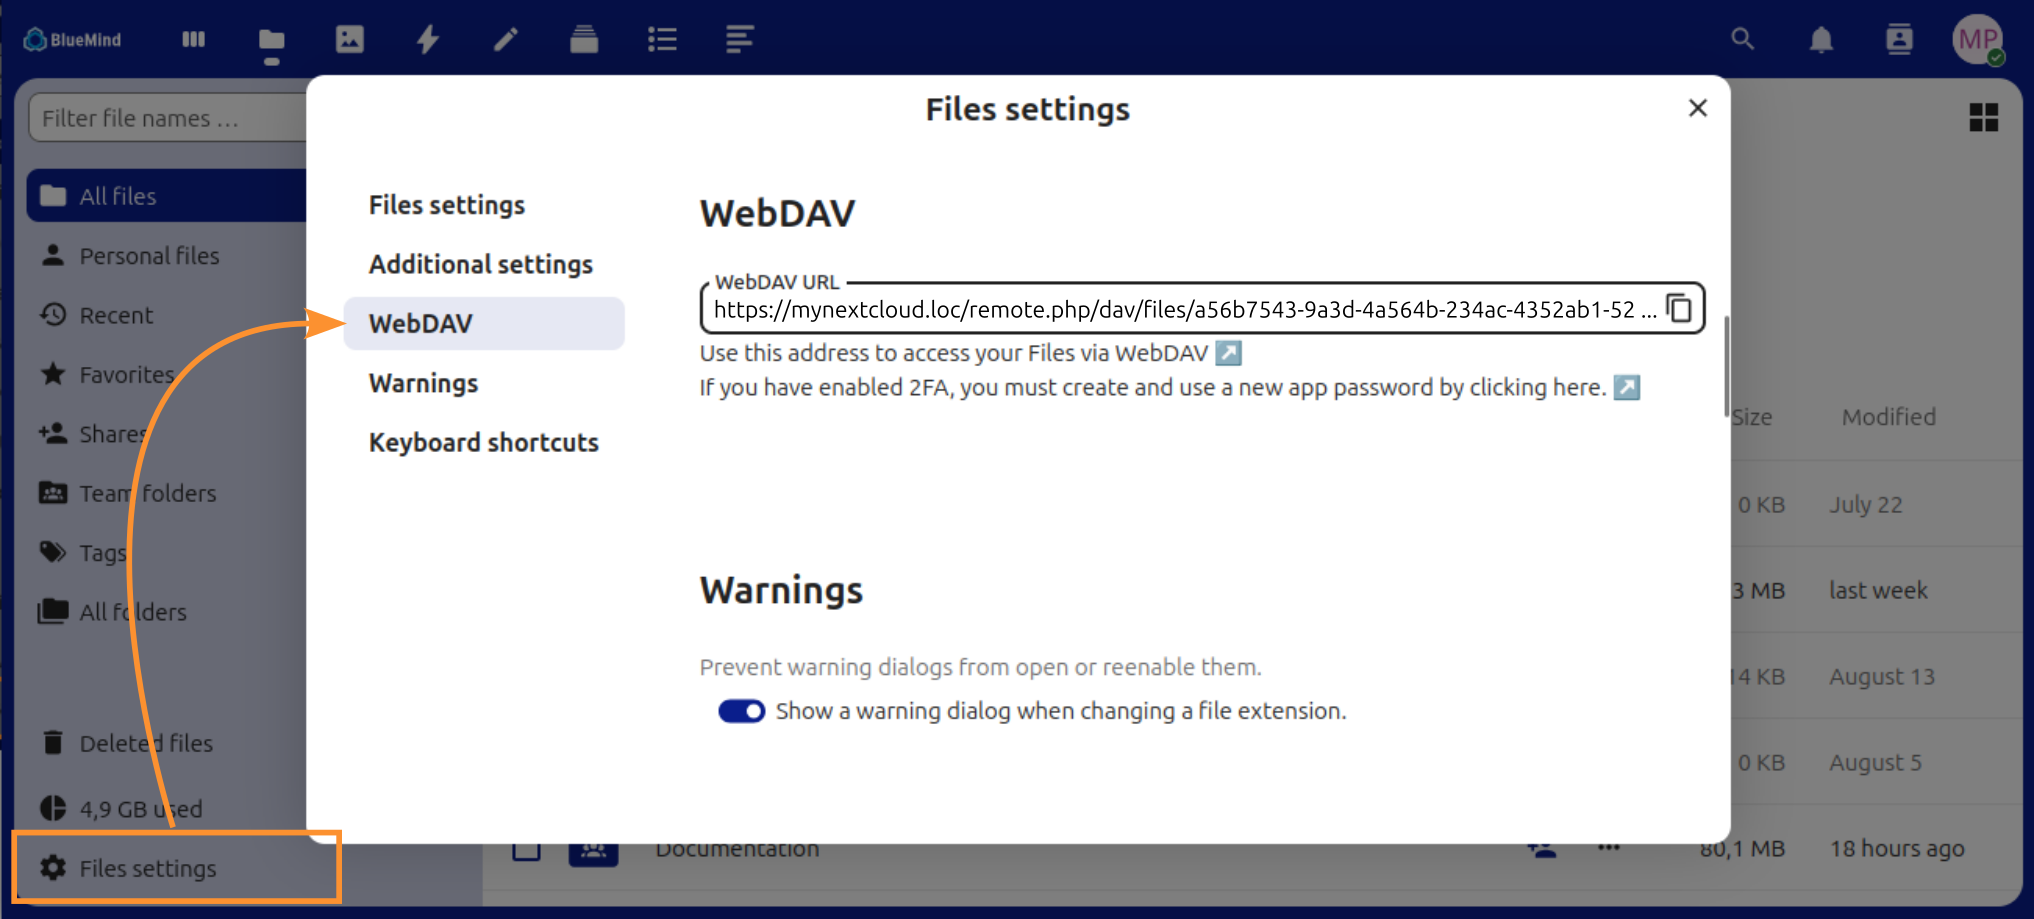
💡 If you are unsure whether this synchronization is enabled, you can configure the URL without risking any disruption to normal operation.
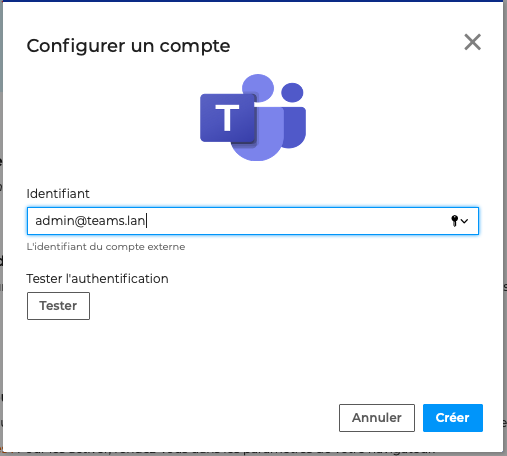
- Enter your username (email address used in Teams),
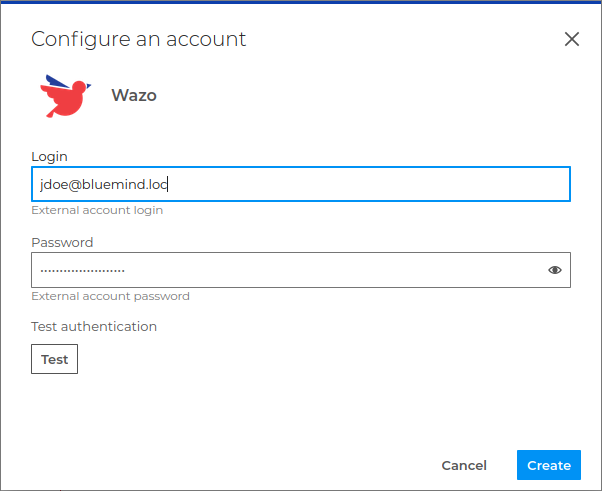
- Enter your username and password,
- Click on ‘Test’ to validate the settings,
- If the test is successful, click Create.
Edit/delete an external account
Existing accounts are listed under the logos of the available services:
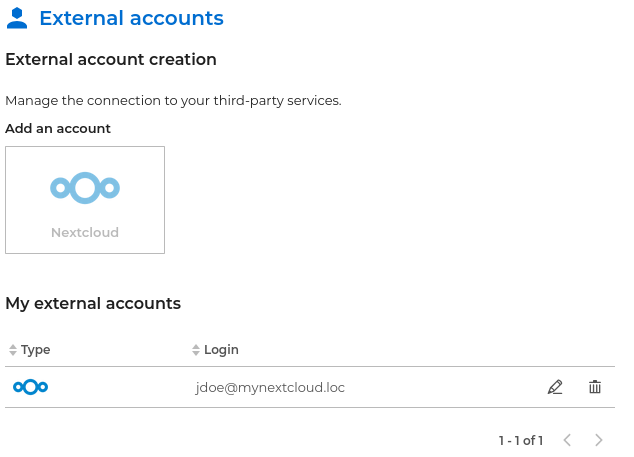
- Click on to change an account’s settings.
- Click to remove the connection to an external account.
Manage advanced settings
The “+ Advanced” section of the user account preferences allows you to reset the application’s local data and enable notifications:
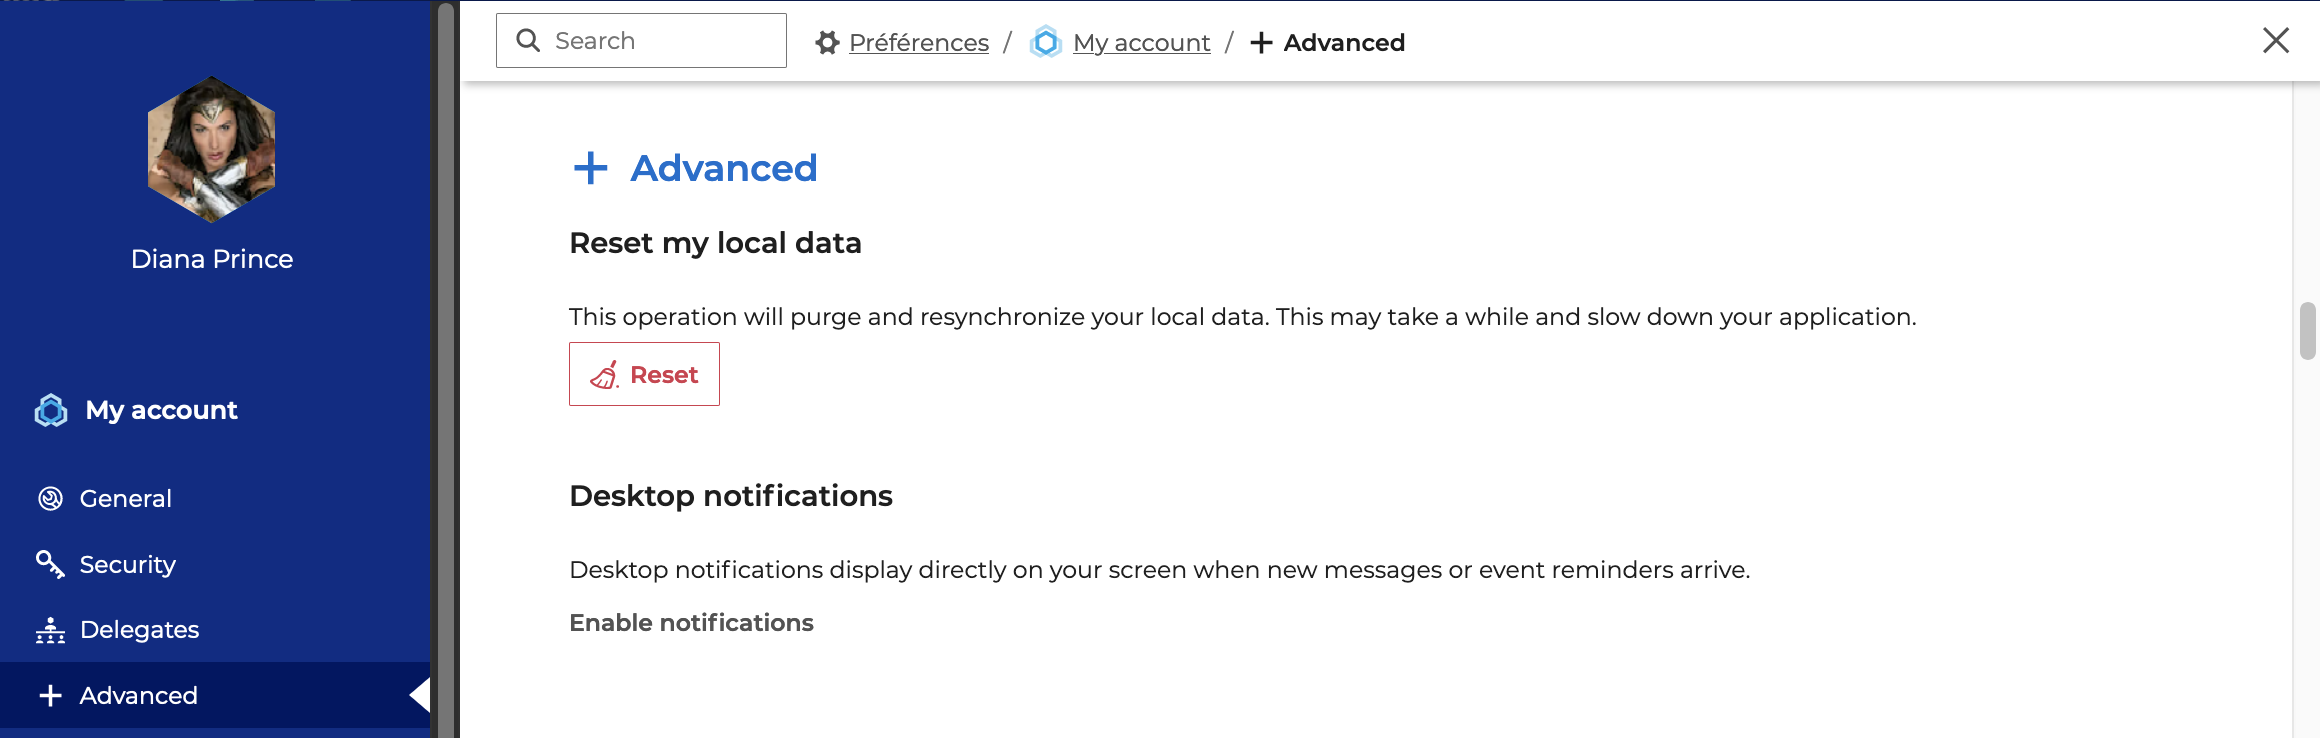
Reset local data
When using the BlueMind solution, the browser saves session-related data, such as user preferences, contacts used, etc. Thanks to these records, the server automatically retrieves data used regularly, enabling BlueMind to provide an optimal experience with its applications.
However, there may occasionally be inconsistencies in the local data, which could lead to display issues.
In this case, it is recommended that you contact the administrator. If the administrator deems it necessary, you can clear the local data and resynchronise it by clicking on “Reset”.
Enable notifications
Notifications allow you to receive on-screen notifications when a new message arrives, as well as reminders for events. To allow your browser to send these notifications, click on ‘Enable notifications’.
This feature is supported by all browsers compatible with BlueMind. theme.common.Pourinfo the page Compatibility.
Download a connector
The Downloads section allows users to download the Thunderbird connector provided by BlueMind in order to synchronise their software.
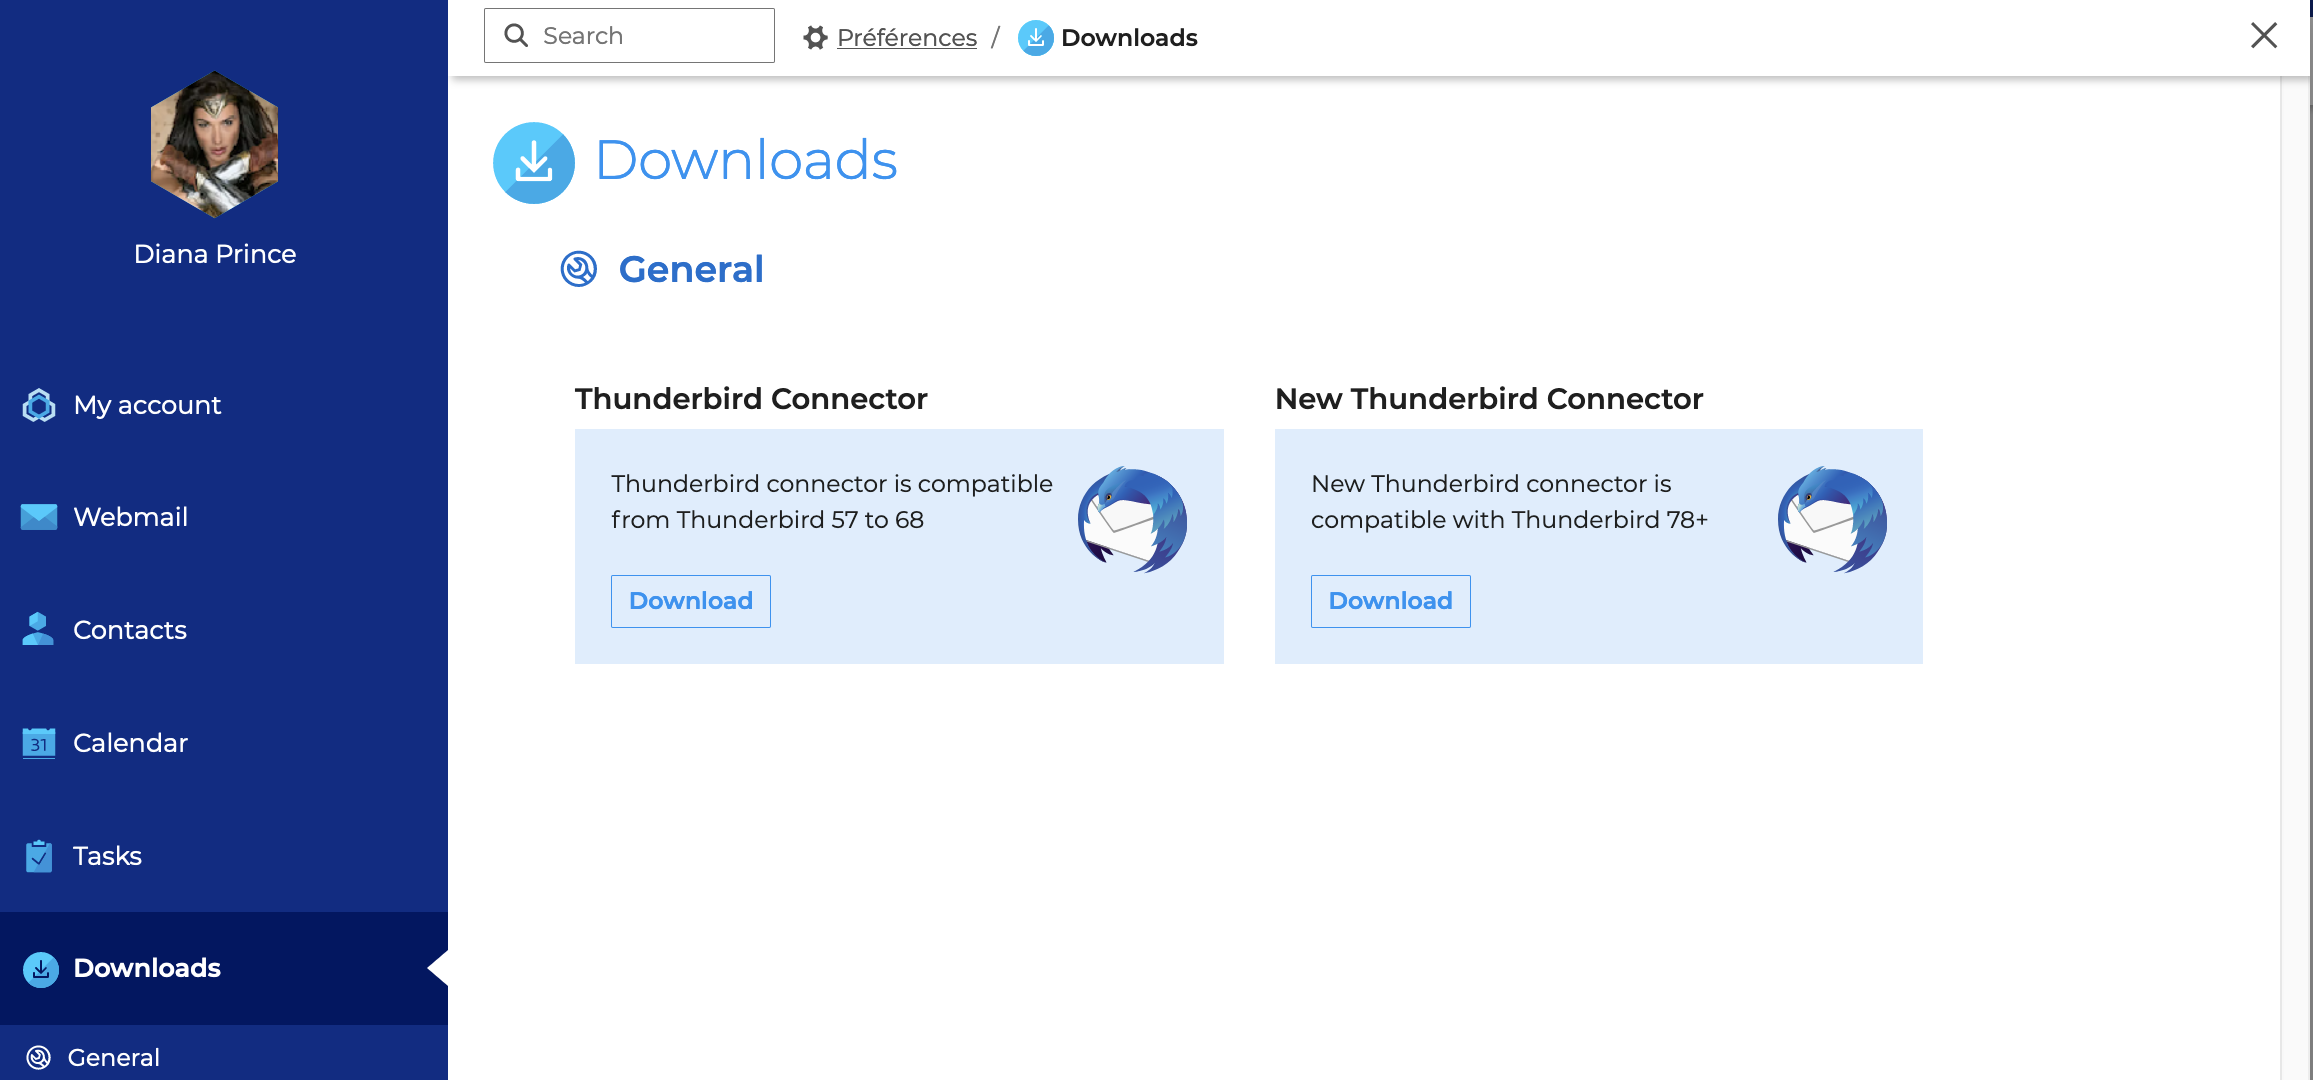
For more information, visit Configuring Thunderbird.
Find out more
Watch the related BlueMind videos:
- Email customisation and preferences in under 2 minutes
- Multi-factor authentication in under 2 minutes
Set preferences by application:
- The calendar:
- Mail app:
- Contacts:
- Tasks: