Configure an LLM
The BlueMind solution enables the integration of an LLM tool to allow domain users to improve or rephrase their emails using artificial intelligence.
Integration is standardised, so you can use the solution of your choice (Mistral, ChatGPT, Claude, etc.).
Configuring the LLM
To integrate AI, go to the administration console, select the required domain, then go to the ‘AI’ tab.
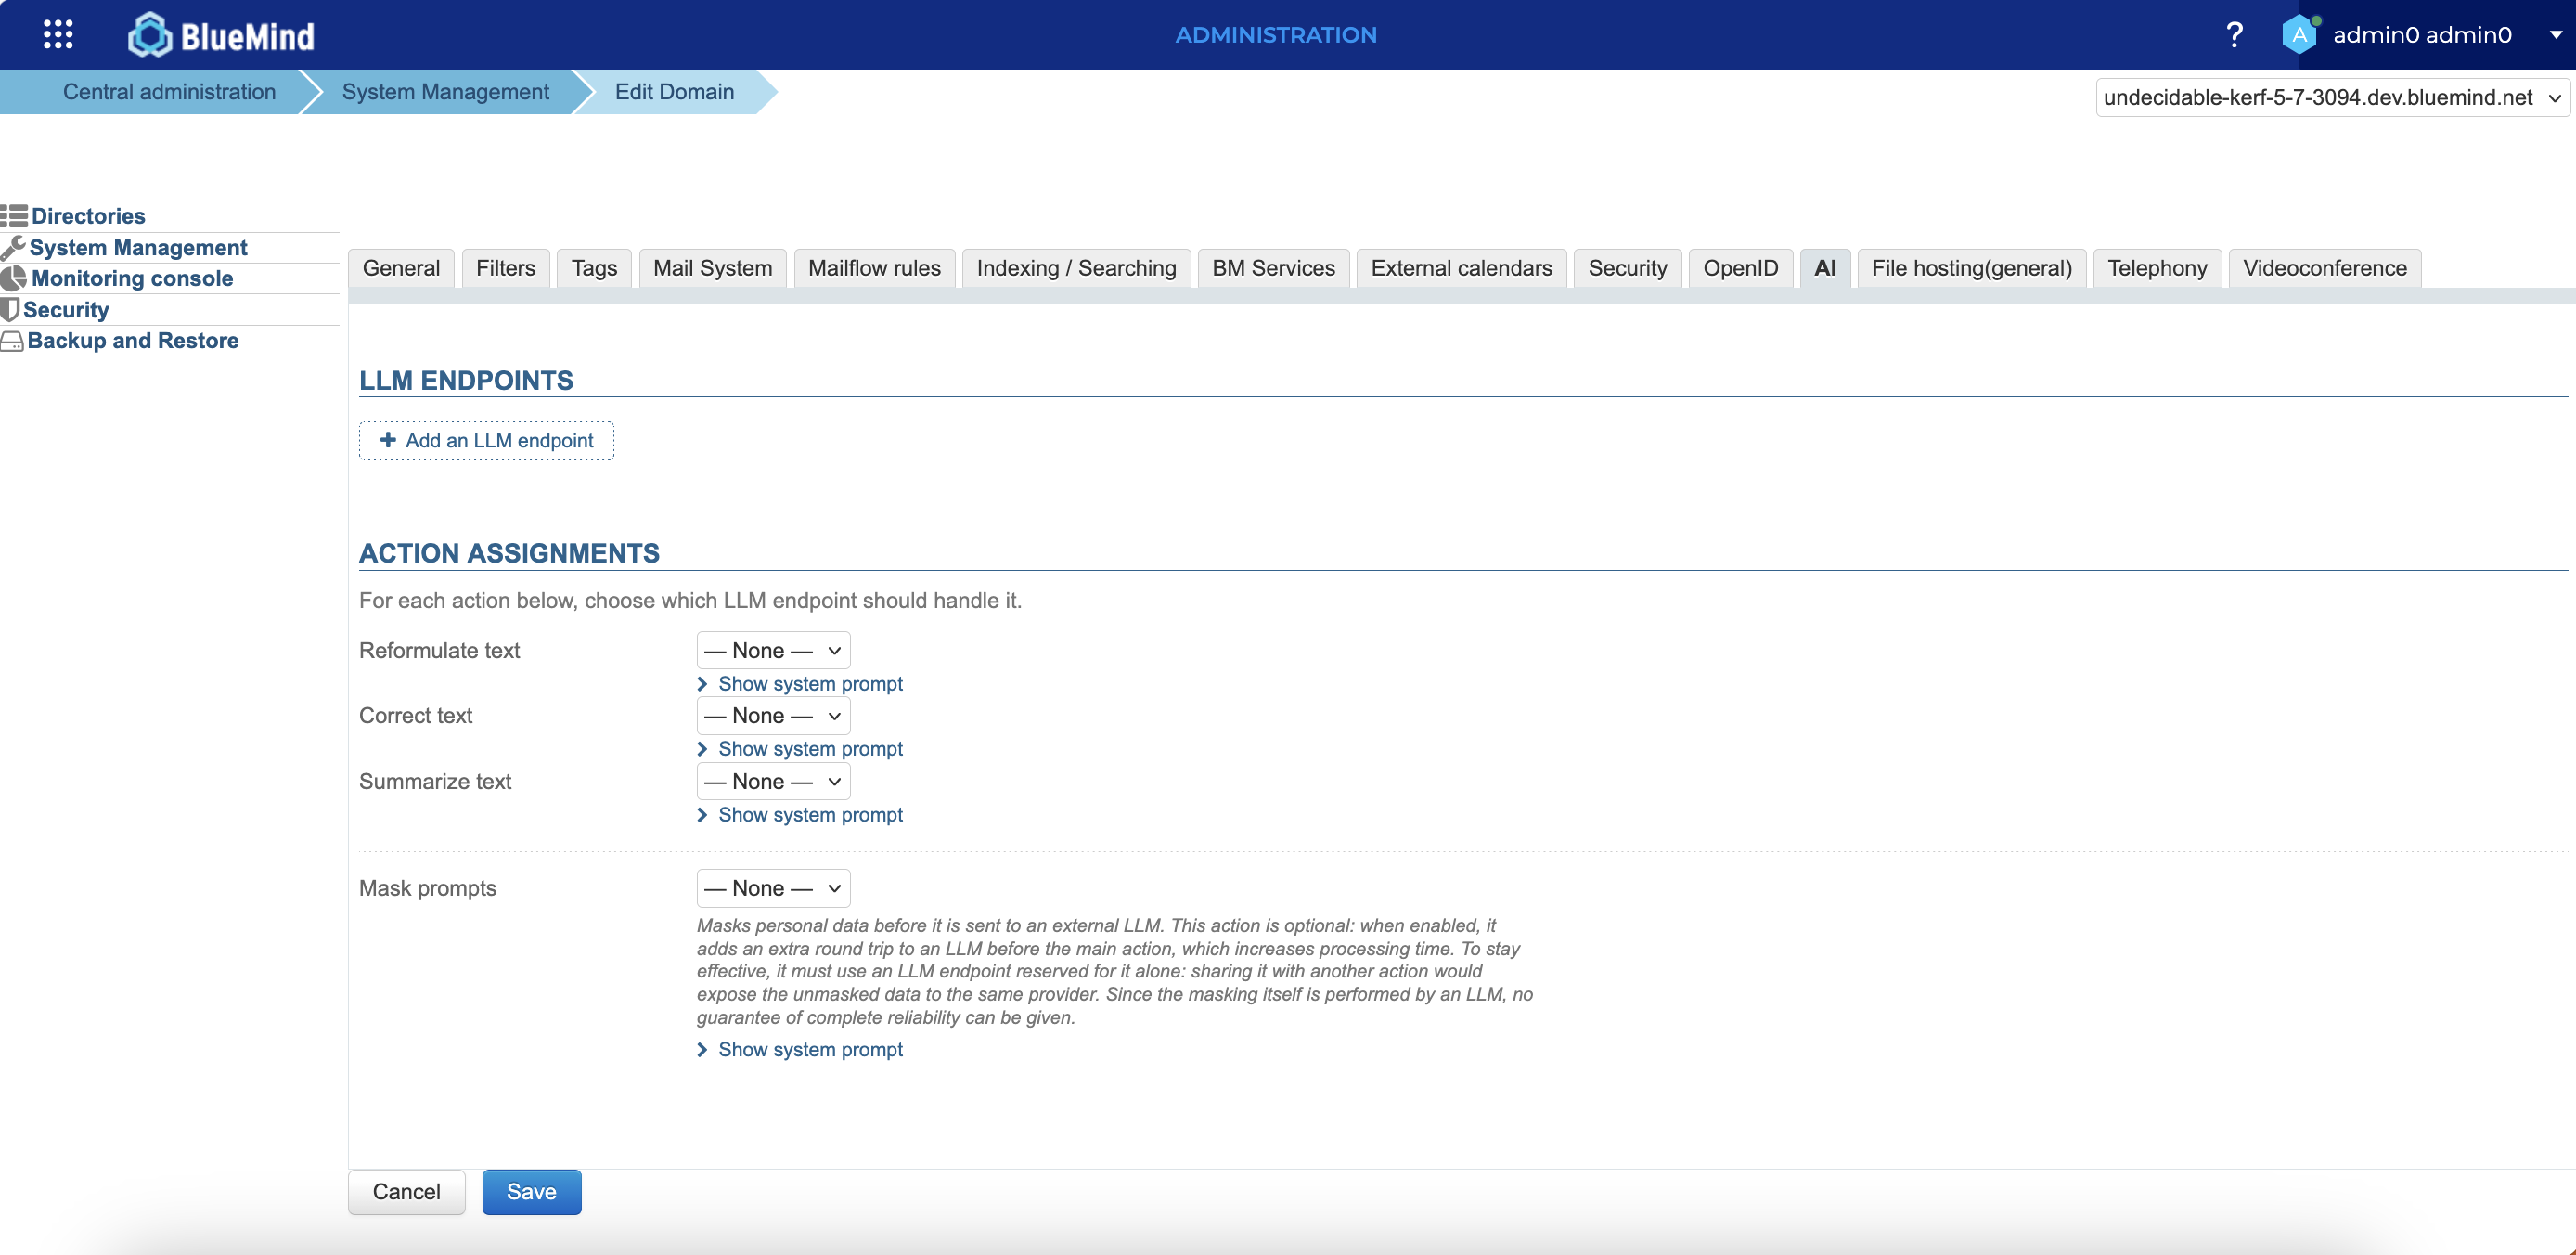
Configuring access points
Click on “Add an LLM access point” to open the configuration window.

Specify:
- the name given to the LLM access point
- The LLM’s URL
- the name of the LLM model
- the API key to access an external LLM (leave blank if the LLM is installed internally)
Click on Tester to check that access is working correctly.
You can add as many access points as required – for example, to reserve an access point for prompt masking (see below).
Assign actions to LLMs
Once the LLM access point(s) have been configured, specify which one to use for each action.
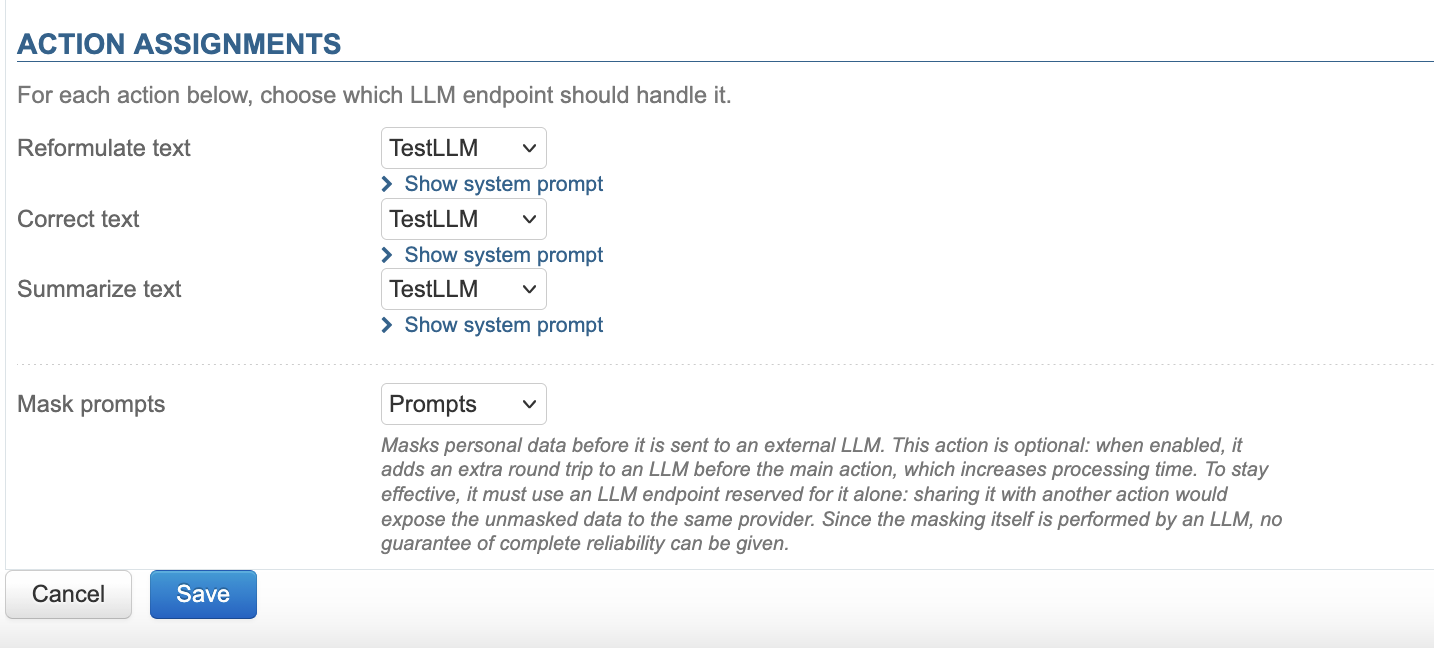
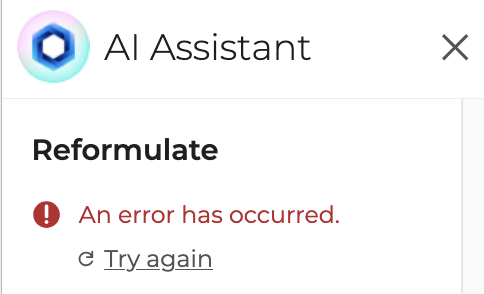
When no LLM is selected, the action remains visible to domain users but cannot be used.
When you click on the option, an error message appears:
For more details on the available actions, click on “View system prompt”.
The “Hide prompts” action is optional. This helps to preserve the privacy and security of data transmitted to a solution outside the organisation by masking personal data. It is therefore not necessary to enable it when the LLM is installed internally.
Enable AI
In order for users to be able to use it, the AI option must be enabled for the relevant domain and for the users.
Enable for the domain
To do this, go to the ‘General’ tab for the domain and tick the ‘AI’ box in the ‘Features’ section at the bottom of the page.
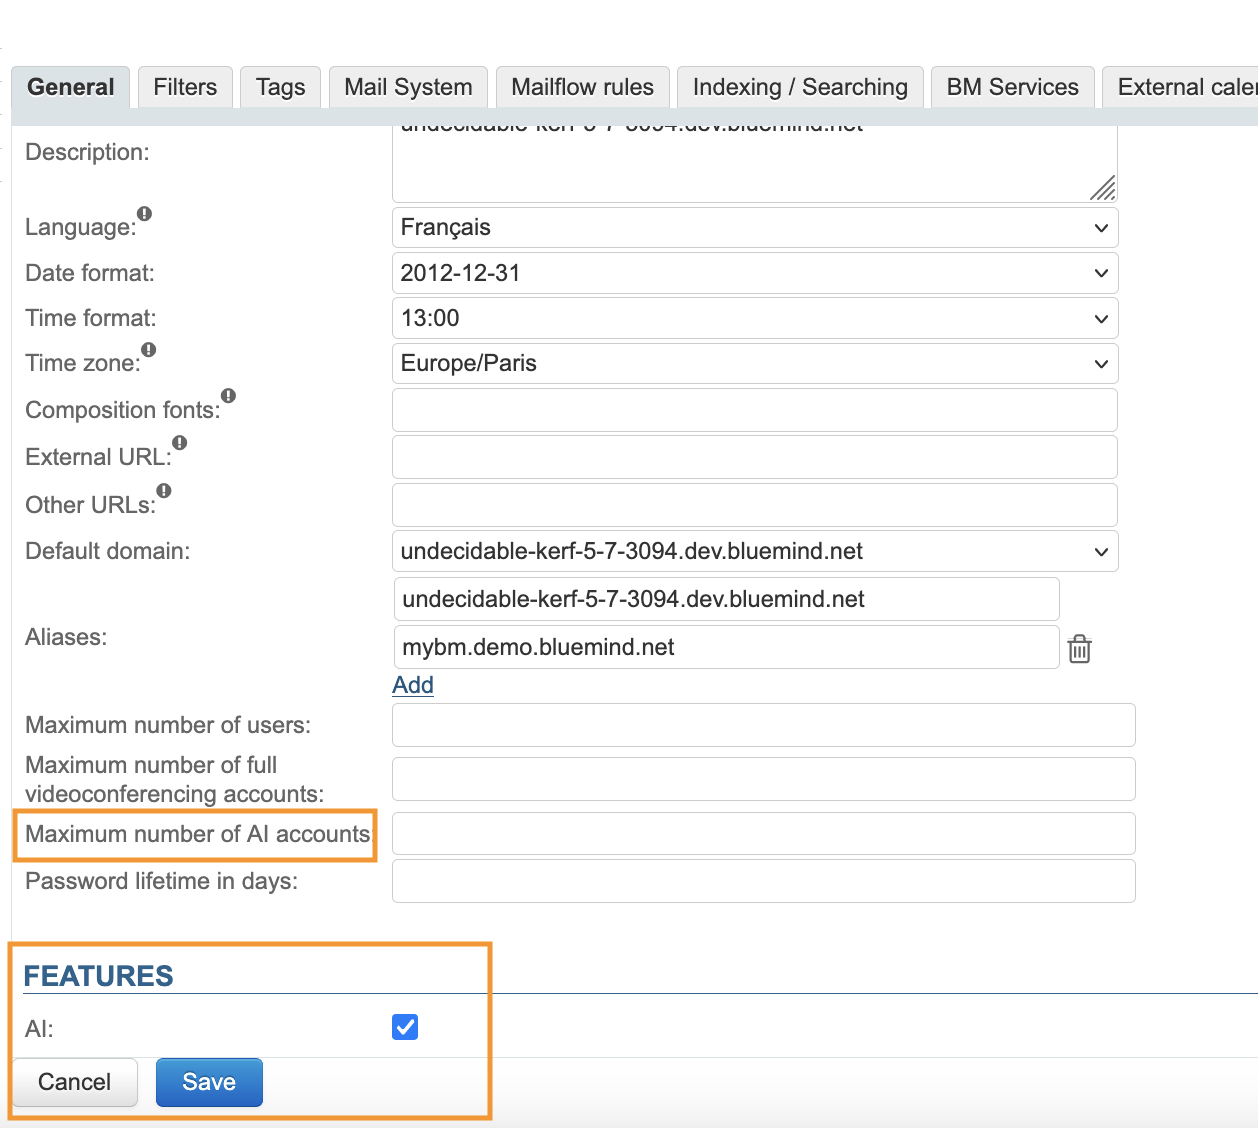
Please note that it is also possible to limit the number of domain users who can use this feature.
Enable for users
For a user
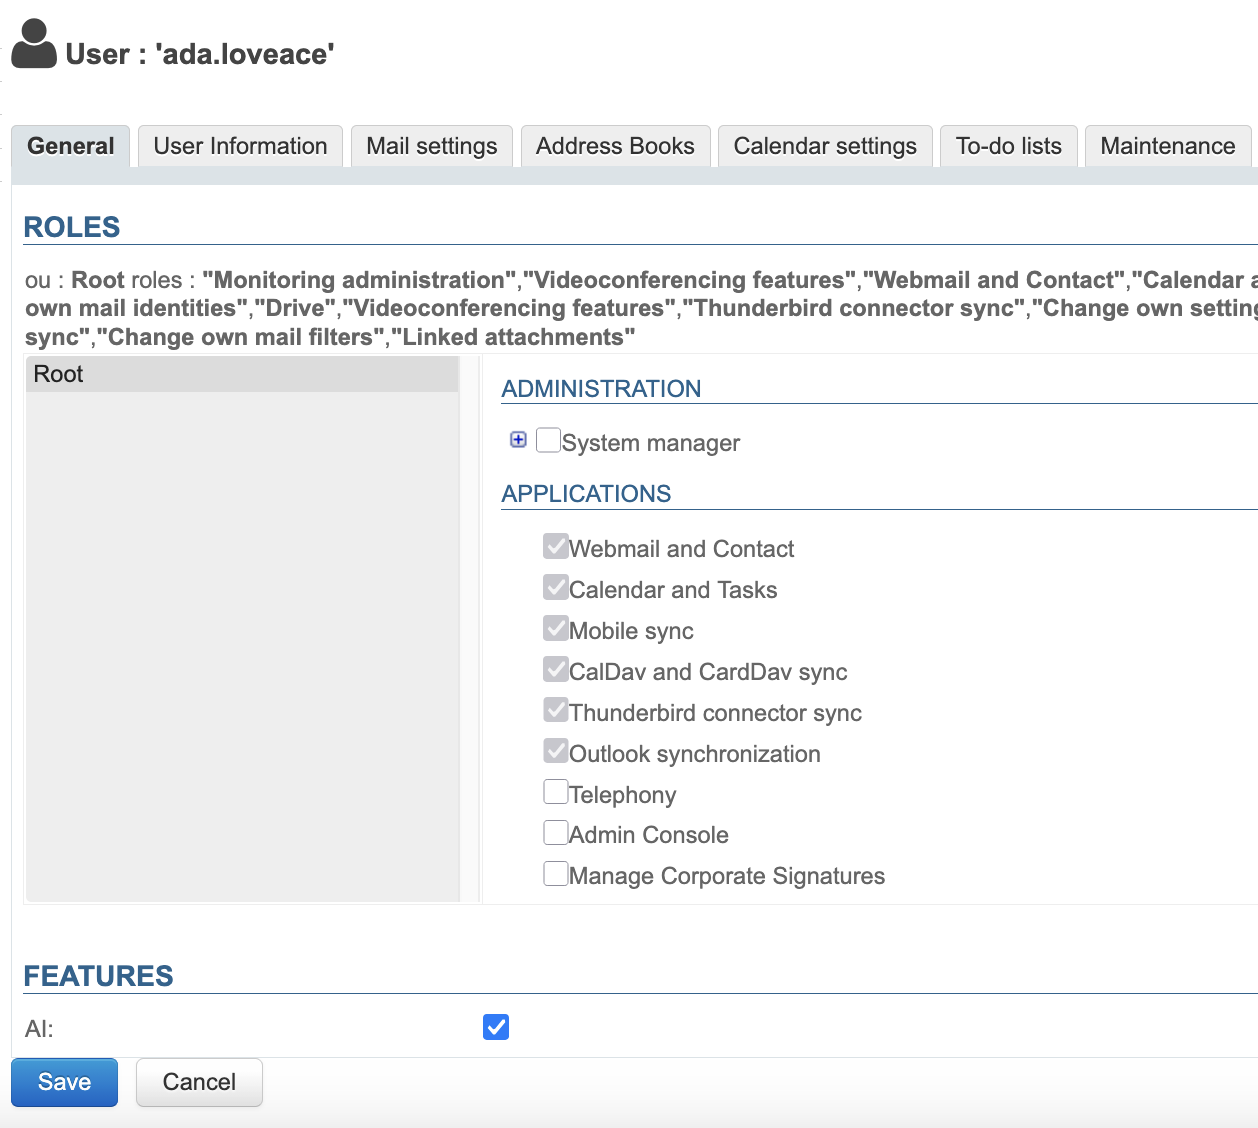
The feature is enabled in the directory. Open the relevant user’s profile and tick the “AI” box in the ‘Features’ section at the bottom of the page.
For members of a group or organizational unit
The feature is enabled for members of a group or organizational unit via a bm-cli command.
For members of a group, run the following command:
bm-cli group features --domain <domaine> (--name <nomGroupe> | --uid <uidGroupe>) --features AI
bm-cli ou features --domain <domaine> (--name <nomOU> | --uid <uidOU>) --features AI
bm-cli user features --domain <domaine> (--name <nomUtilisateur> | --uid <uidUtilisateur>) --features AI
For members of an organizational unit, run the following command:
bm-cli group features --domain <domaine> (--name <nomGroupe> | --uid <uidGroupe>) --remove
bm-cli ou features --domain <domaine> (--name <nomOU> | --uid <uidOU>) --remove
bm-cli user features --domain <domaine> (--name <nomUtilisateur> | --uid <uidUtilisateur>) --remove
The bm-cli commands enable the feature for users who are members of the group or organizational unit at the time the command is run, rather than for the group or organizational unit itself.