Videoconferences with Jitsi
BlueMind can be connected to a Jitsi server so that users can easily create videoconferences and link them to their calendar meetings.
Installation
To provision this new feature, you must install the related plugin by installing the packages below on the server and then restarting BlueMind:
- Debian/Ubuntu
- RedHat/CentOS
aptitude install bm-plugin-core-videoconferencing-jitsi
bm-plugin-admin-console-videoconferencing-jitsi
bmctl restart
yum install bm-plugin-core-videoconferencing-jitsi
bm-plugin-admin-console-videoconferencing-jitsi
bmctl restart
Administration
Configuring the server
In the Admin Console, go to System Management > System Management > Manage Domains > select the domain > Video Conferencing tab: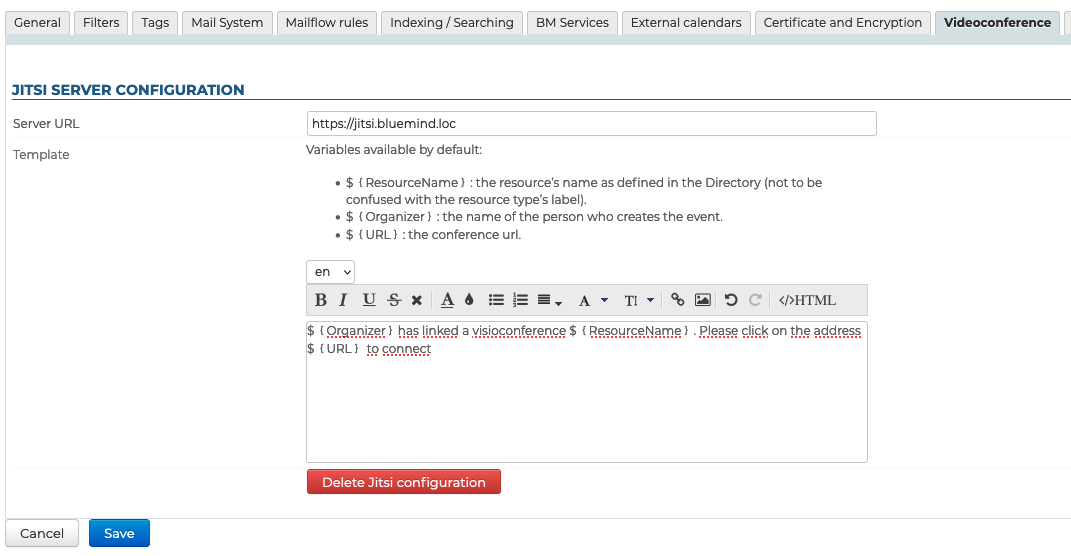
Complete the general server information:
- Server URL
- Template (optional): the content added here will be included with the videoconference link
- Click "Save"
=> a resource named "Jitsi" is created automatically and shown in the directory. This resource will let users create video-conferences automatically. To find out more, please refer to paragraph Access privileges.
By default, the resource is shared with a basic right to book, all users are allowed to link a videoconference.
Disconnecting a Jitsi videoconferencing installation
To disconnect Jitsi from the server:
In the Admin Console, go to System Management > Manage Domains > select the domain > Videoconference tab:
Empty "Server URL" field
Save
=> The videoconferencing resource is deleted automatically and share permissions are cleaned up. It is no longer shown in entities and users are no longer able to book it.
Content template
Videoconference links can come with a text. This text can be added using the content template:
Participants always receive a link to the videoconference, whether a template has been created or not.
select the content language in the drop-down menu
tipContent previously created in different languages is saved. You can switch between languages and create as many templates as there are languages in the interface.
:::info
When a user creates an event, the content is added based on the organizer's language.
:::
- complete the content:
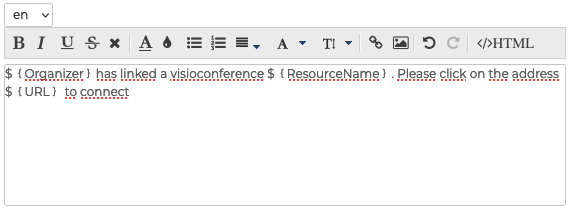
The template can contain variables which is filled in automatically by the system when the invitation is sent:- ${ResourceName}: the name of the resource as defined in the directory (by default "Jitsi")
- ${Organizer}: the name of the person who creates the event in the Calendar
- ${URL}: the conference's access URL
- Click Save
Deleting a language
To delete a template in one language:
- select the language in the drown-down menu
- empty the content field (select the text and delete)
- Click Save
Accessing the videoconference
Giving access privileges to users
This feature is accessed through the Jitsi resource created during server configuration: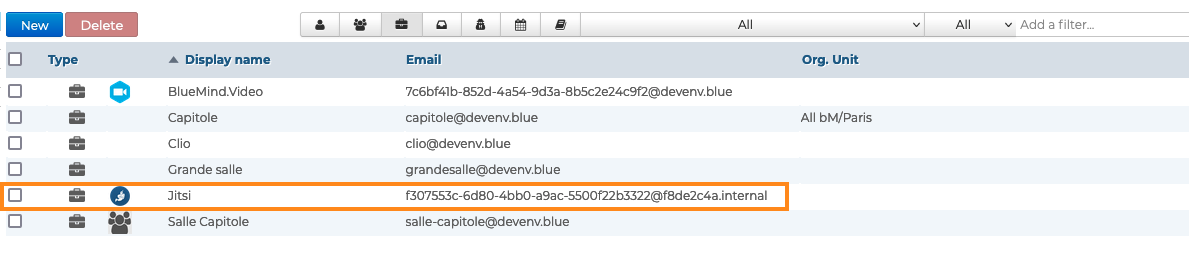
This resource is managed just like any other resource, you just need to grant the desired users or groups the right to book it so that they can create videoconferences for their events: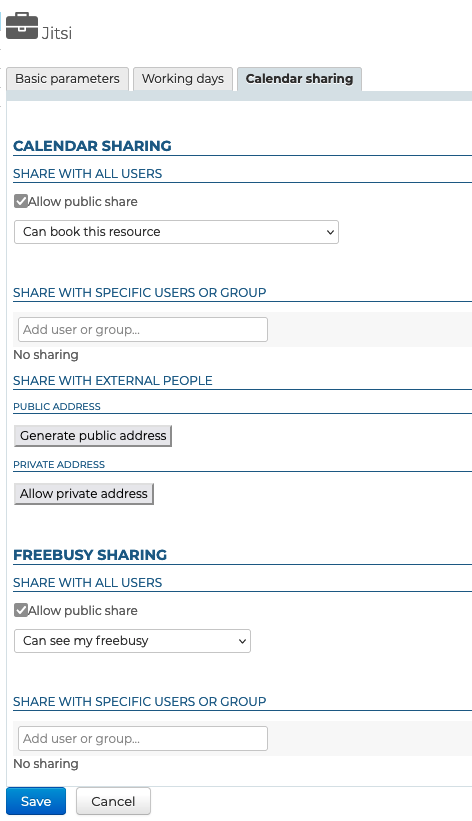
As a resource, Jitsi can be assigned working hours and a booking policy. The videoconferencing link created for the meeting being unique, these will not affect the videoconference which will be available regardless.
A button is then available in the event creation window for users who have been given the required privileges:
Using the resource
To find out more about how this feature works, please refer to our user's guide page: Organizing Meetings.
Mobile devices and third-party software
Third-party software such as Outlook or mobile applications do not show the "Add video conference" button, but users can still book a video-conference by inviting the resource to an event just like for any other resource.