Eclipse
Prerequisites
- Install Maven
- Retrieve BlueMind's sources as described in our page: Contributing to BlueMind
Installing Eclipse
Download and install Eclipse for RCP and RAP developers.
Setting up Eclipse
Adding an execution platform
The Eclipse execution platform must be completed with BlueMind dependencies:
- start and initialize a workspace using the version of Eclipse you want to develop with (e.g. Eclipse Mars, previously installed)
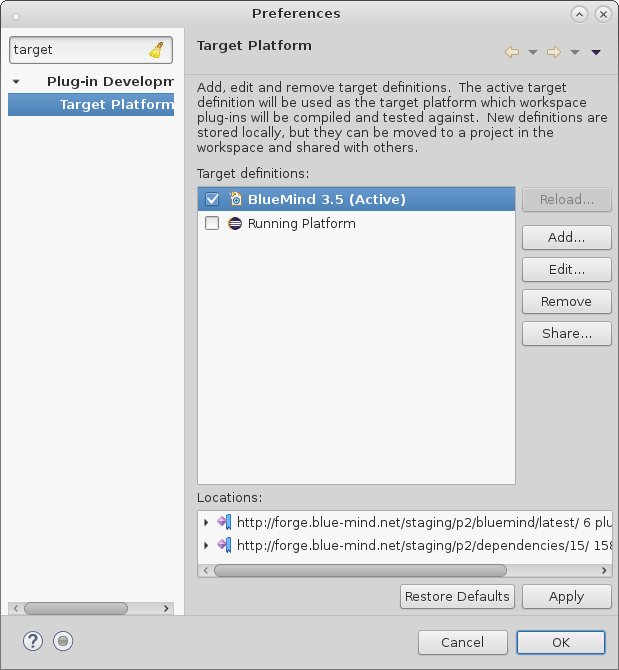
- go to Window->Preferences, search for Target
- click Target Platform
- click Add, choose Nothing, click Next
- type a name (e.g.: BlueMind 3.5)
- click Add, choose Software Site, then click Next
- in the "Work with" box, type http://forge.blue-mind.net/staging/p2/bluemind/latest
- at the bottom of the window uncheck "Group by category" and "Include required software"
- in the updated list, check Feature
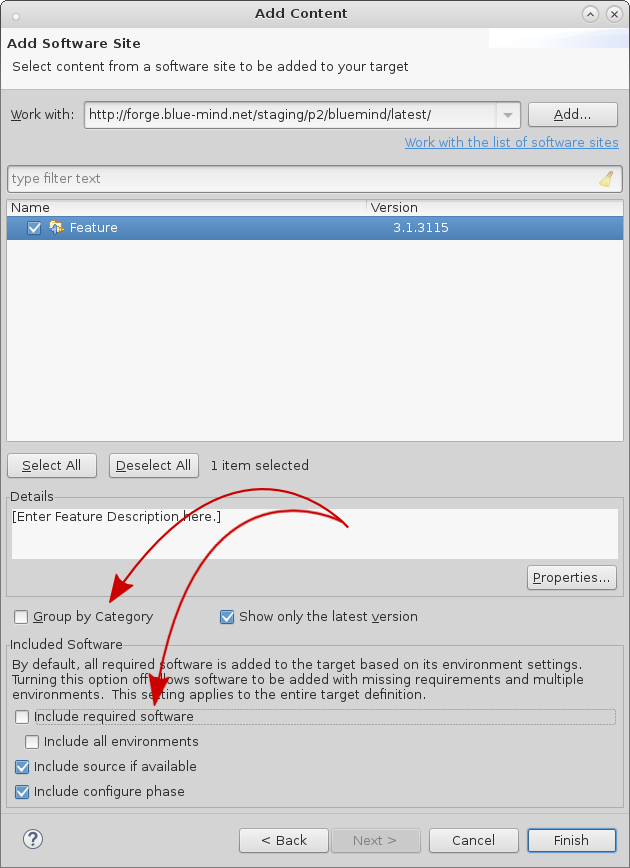
- click Finish
- click Add again, choose Software Site, then click Next
- in the "Work with" box, type http://forge.blue-mind.net/staging/p2/dependencies/current/
- at the bottom of the window, uncheck "Group by category" and "Include required software"
- in the updated list, check bm-eclipse-platform
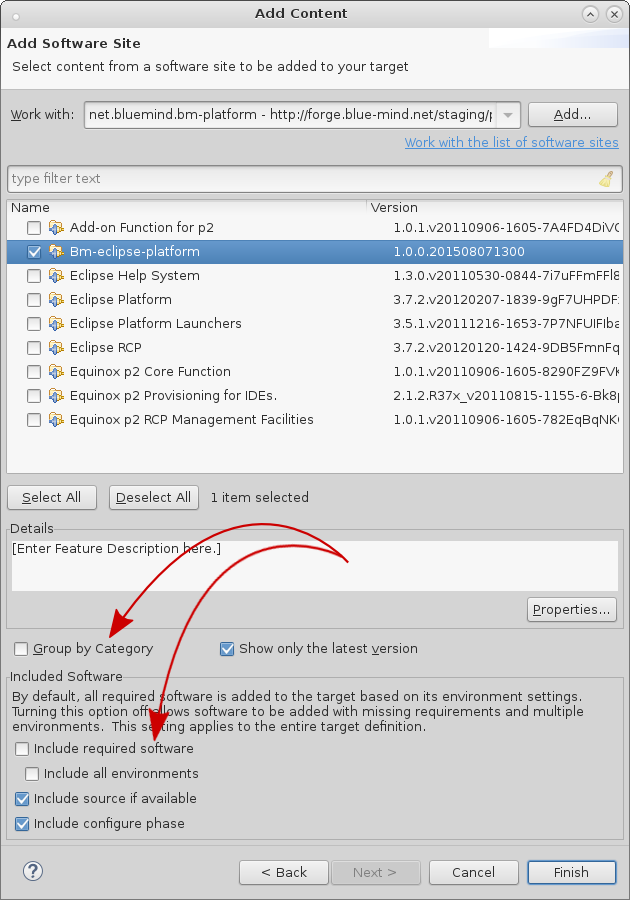
- click Finish
- click Finish again
- make sure that the new platform is selected and click Apply then OK to quit
Configuration
Formatting
To use uniform code formatting in Eclipse:
- go to Window, then Preference
- search for Save Actions, click Java->Editor->Save Actions
- check Perform the selected actions on save
- check Format source code, and select Format all lines
- check Organize imports
- click Apply, then OK
Headers
It is important that source file headers are compliant. In Eclipse:
- go to Window, then Preference
- search for Template, click Java->Code Style->Code Template
- open the Code menu and click New Java files
- click Edit
- in the Pattern section, add:
New Java file pattern
/\* BEGIN LICENSE
  \* Copyright © Blue Mind SAS, 2012-${year}
  \*
  \* This file is part of BlueMind. BlueMind is a messaging and collaborative
  \* solution.
  \*
  \* This program is free software; you can redistribute it and/or modify
  \* it under the terms of either the GNU Affero General Public License as
  \* published by the Free Software Foundation (version 3 of the License).
  \*
  \* This program is distributed in the hope that it will be useful,
  \* but WITHOUT ANY WARRANTY; without even the implied warranty of
  \* MERCHANTABILITY or FITNESS FOR A PARTICULAR PURPOSE.
  \*
  \* See LICENSE.txt
  \* END LICENSE
  \*/
${filecomment}
${package_declaration}

${typecomment}
${type_declaration}
- click OK
- click Apply, then OK
Initializing the Eclipse workspace
"Package explorer"
Before you import the plugins, you must make sure that you are using the "Package explorer" view to browse plugins (for performance reasons).
To open it:
- Go to Window / Show View
- If it doesn't appear here, click "Other" and you will find it in the "Java" category
- Close other plugin list views such as "Project Explorer" or "Plugins..."
Importing plugins
In Eclipse
- go to File, Import menu
- open General, select Existing projects into Workspace
- click Next
- check Select root directory, click Browse
- select the open folder in the BlueMind Git, and click OK
- if there is only one project in the Projects list, clean up the Git. Go to the BlueMind Git root directory and run: git clean -f -d -n -x, then start again from step 1
- otherwise, click Finish
- repeat this operation for the closed BlueMind Git directory
Adding a Maven build
You must add a Maven build:
- in a terminal, go to the open BlueMind Git directory
- run the command: mvn -Dmaven.test.skip=true clean install
- do the same in the directory open/ui/gwt-libs/
- in Eclipse, select all the packages and press F5 (Refresh)