Synchronizing with iOS
ActiveSync is the preferred synchronization mode as it allows you to synchronize messages as well as contacts and calendars while IMAP synchronization is restricted to email.
To find out more, please go to Synchronizing with mobile phones and tablets.
This guide is based on an iPad running iOS 15.6. Screens are generally identical on all Apple products, but may vary depending on version.
For more information on compatible templates and applications, as well as any known limitations, visit the Compatibility page
Configuring ActiveSync account
Being able to connect a smartphone to the BlueMind server depends on your administrator's authorizations policy. Make sure you check with them whether you are indeed authorized to connect with a smartphone. Some configurations require an administrator's manual authorization.
Please refer to the following page: Configuring the EAS server.
-
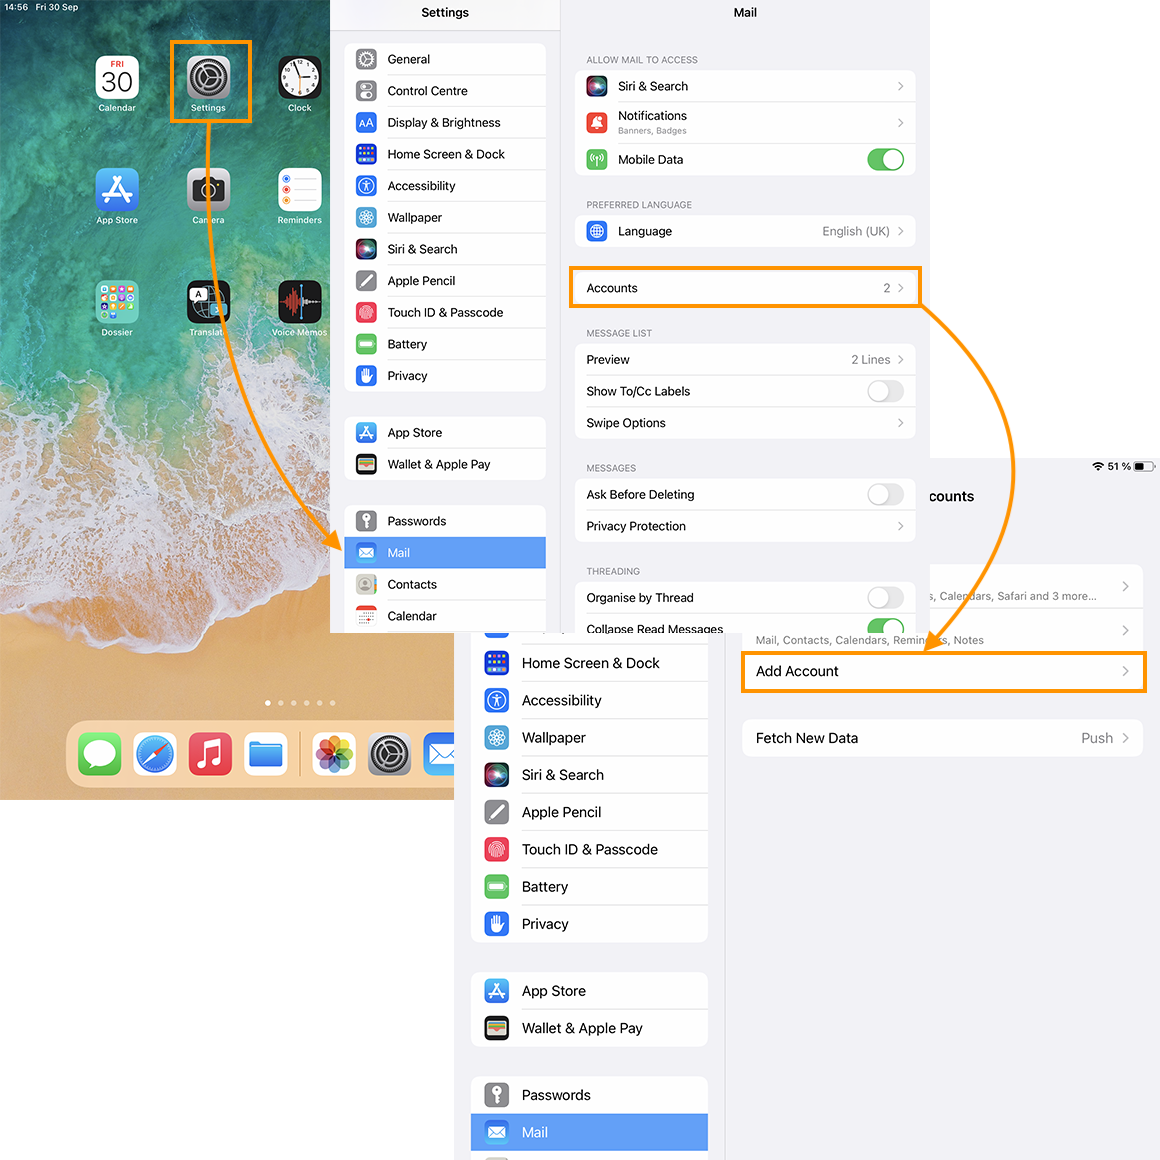
Go to Settings > Mail, click Accounts and tap "Add account":
-
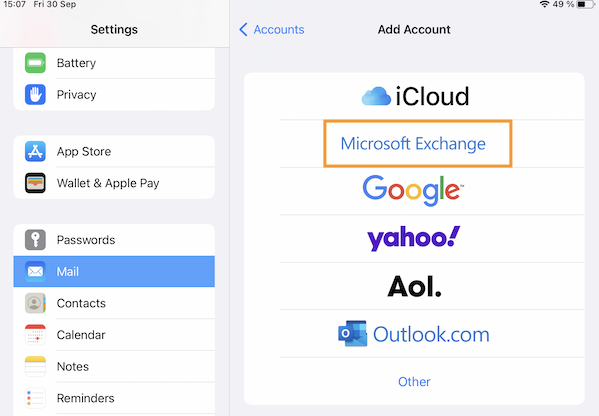
Choose to add an Exchange account:
-
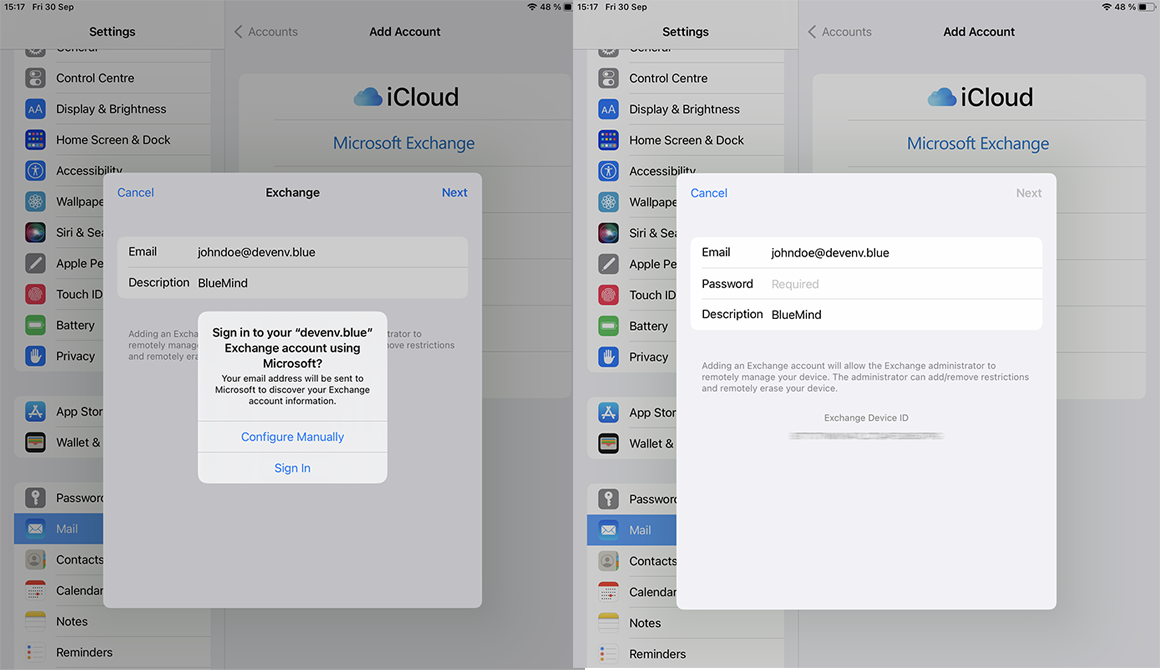
Enter the e-mail address and the description (optional) used to identify the account on the device,
press Connect,
enter the account's password
then click on Next in the top right-hand corner:
Detailed information
If necessary, enter the detailed server connection information:
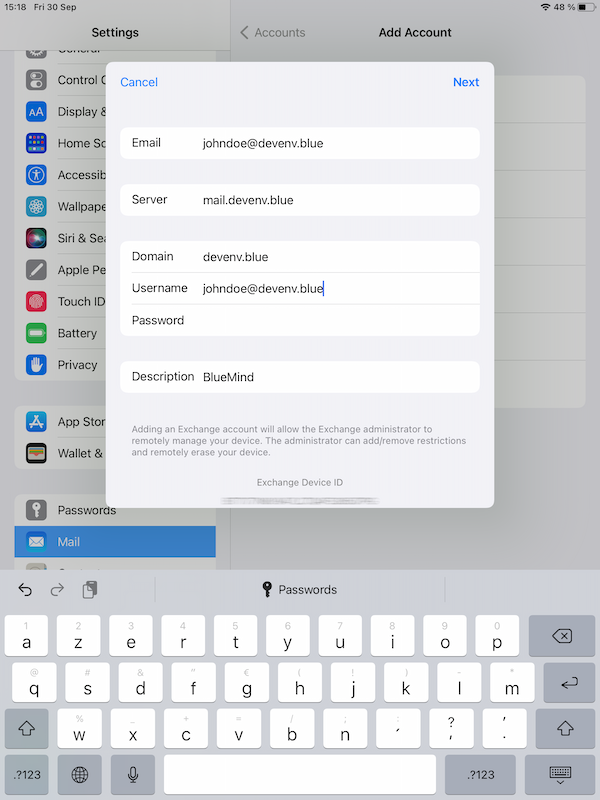
- Email: your email address
- Server: the address (URL) where your phone should access the Active Sync service. This is usually described as "external URL", and is identical to the address at which you access BlueMind (removing https://).
- Domain: your mail domain, usually the right-hand side of your e-mail address.
- Username and password: your BlueMind username and password the way they were given to you by your administrator. Usually, your username is your full email address including the domain name.
- Description: this is optional. It allows you to recognize the account in your list of accounts
Then tap Next
-
Select the applications to synchronize then press Save:
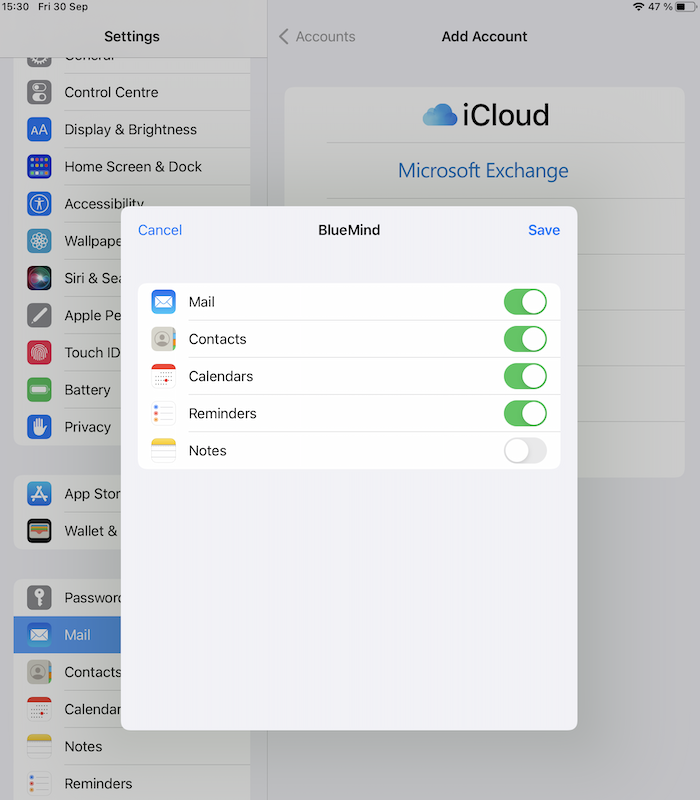
💡 The Notes application is not offered by BlueMind, so it is not necessary to activate synchronization.
-
Your account now appears in the device's account list:
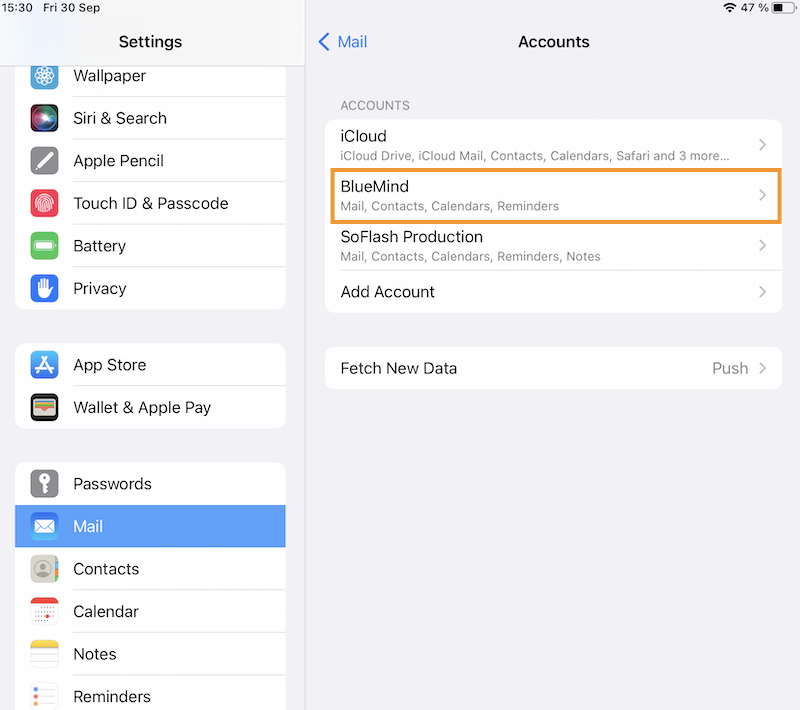
Congratulations! Your device is now synchronized with BlueMind!
Synchronization settings (applications and duration) can be changed at any time by logging on to the account.
Setting up an IMAP account
- Go to Settings > Mail, click Accounts and tap "Add account":

- Choose an account type Other:

- Choose Add a Mail account:

- Enter account information:

- Check and correct login information if necessary:

- the host name (here
mail.devenv.blue) is identical to the BlueMind access url (removinghttps://). For example, if you access BlueMind from your browser athttps://mail.devenv.bluethen you need to entermail.devenv.blue - username is identical to your e-mail address
- the host name (here
- Enable e-mail synchronization:
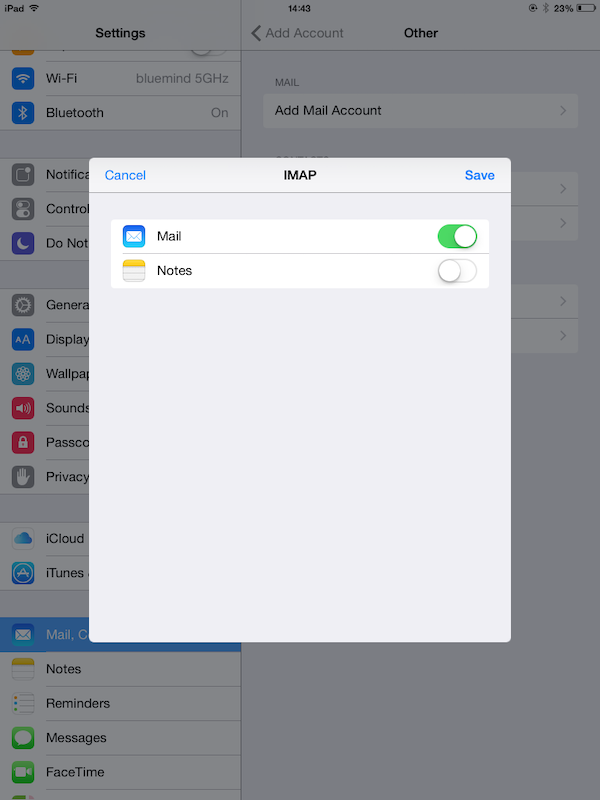
💡 The Notes application is not offered by BlueMind, so it is not necessary to activate synchronization.
Using iOS applications
Mail
iOS lets you synchronize your personal mailbox as well as shared folders and mailboxes in the Mail application.
Shared mailboxes and folders are accessible under "Public folders".
The "Synchronization" option must be enabled in the BlueMind preferences. For further information, see Synchronizing Mailboxes
Calendar
iOS lets you synchronize all your personal and shared calendars in the Calendar application.
The "Synchronize" calendar option must be enabled in the BlueMind preferences - see the dedicated page Synchronize calendars
To force calendar refresh, go to Calendar:
- Bring up the calendar window
- Drag content downwards:
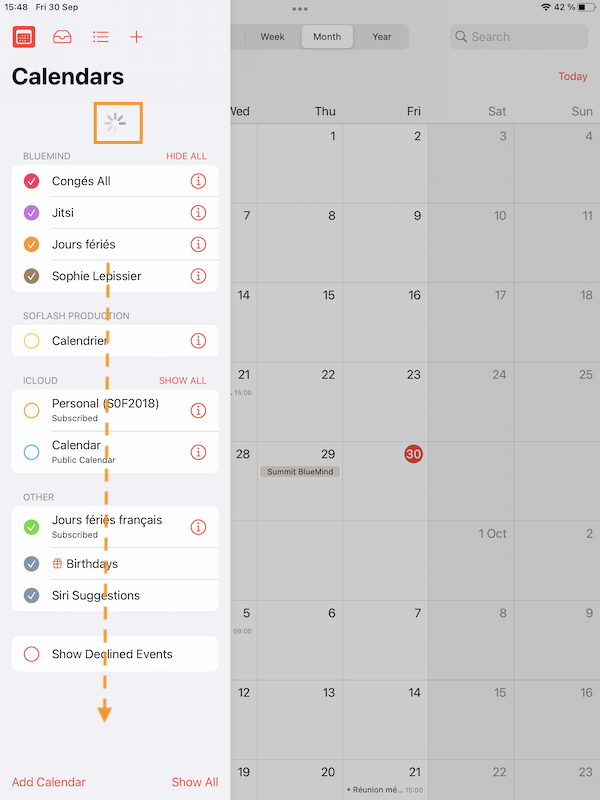
The upgrade wheel then appears, indicating that the device is in the process of synchronizing its calendars. When it disappears and the content returns, the refresh is complete.
Reminders
iOS lets you synchronize BlueMind tasks in the Reminders app.
The "Synchronize" to-do lists option must be enabled in the BlueMind preferences - see the dedicated page Synchronizing to-do lists
Once synchronization is enabled (see Configuring ActiveSync account), tasks are synchronized and visible in the application.
It is presented in 2 columns:

- the left-hand column lists tasks and accesses functions. From top to bottom :
- the field of research
- user task lists
- today's tasks ("Scheduled")
- actions on lists: add, modify
- the right-hand column shows the tasks in the currently selected list
All changes, new tasks, new task lists are immediately synchronized and visible in BlueMind:

Contacts
Synchronize BlueMind contacts on your iOS device
All the user's personal and subscribed address books can be accessed via Contacts.
The "Synchronize" address book option must be enabled in the BlueMind preferences for each address book - see the dedicated page Synchronizing address books
Synchronizing iOS device contacts in BlueMind
You can import contacts from your iOS device into BlueMind so that they are available on all devices synchronized with the account (smartphone, web, thick client). The operation consists in exporting/importing contacts:
- export contacts from device
- import contacts into BlueMind
- activate address book synchronization in BlueMind
A mail account is required on the device in order to send contacts to the BlueMind user. If you don't have a mail service other than BlueMind, you can create your own BlueMind account, either an EAS account or a simple IMAP account, which will have no negative impact on the procedure.
Details of the procedure to be carried out:
-
Export the contacts present on the iOS device in vCard format (.vcf): iOS alone is not capable of exporting the entire address book, an external application needs to be used, such as Backup Contacts + Share available on the App Store for example. This application lets you save the contacts of your choice in a vCard file and share it by e-mail. (For more information, please visit the publisher's website)
💡 Each contact can be exported individually
From the Contacts application, on each contact record to be exported, press "Share this record" then "Send by e-mail". A .vcf file is then attached to a new message to be sent to the user's address:

-
Once the file has been generated, send it by e-mail to the user's address
-
Connecting to BlueMind from a browser
-
Open the message(s) containing the files to be imported and save these files
-
Go to the BlueMind Contacts application and import the file
-
Make sure that contact synchronization is enabled on the iOS device (see Configuring the account)
-
Go to the iOS device's Contacts application: the BlueMind contacts appear, now containing contacts that were previously on the device only.
For more information on using iOS applications, visit Apple Support.