Videoconferences with Webex
BlueMind can be connected to the Webex conferencing system to enable users to easily create conferences and link them to their agenda meetings.
Installation
To make the new features available to users, install the plugin by installing the following packages on the server and restarting BlueMind:
- Debian/Ubuntu
- RedHat/CentOS
aptitude install bm-plugin-admin-console-videoconferencing-webex bm-plugin-core-videoconferencing-webex
bmctl restart
yum install bm-plugin-admin-console-videoconferencing-webex bm-plugin-core-videoconferencing-webex
bmctl restart
Administration
Configuring OpenID authentication
Go to System management in the administration console > Supervised domains > Choose the desired domain > OpenID tab :

Fill in the authentication data OpenID :
- OpenID Endpoint URL : https://webexapis.com/v1/authorize
- Application ID : provided by Webex
- Application secret : provided by Webex
- Token Endpoint URL : https://webexapis.com/v1/access_token
Integration saved with Cisco Webex requires the following OpenID "Scopes":
- meeting:schedules_read
- meeting:schedules_write
- meeting:preferences_read
- meeting:participants_read
- meeting:participants_write
The "Redirect URL" parameter must match the URL https://<external-url-bluemind>/bm-openid/auth/videoconferencing-webex.
Server Configuration
Go to the administration console in System management > Supervised domains > choose the desired domain > Videoconferencing tab:
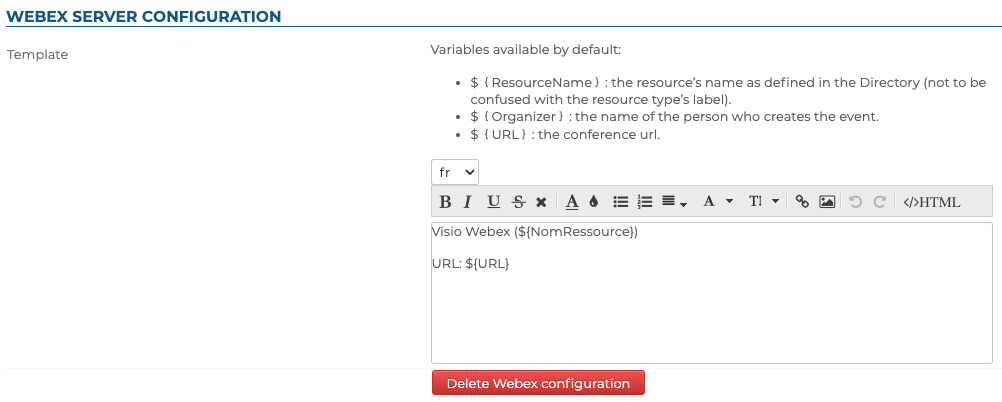
Enter the template of a videoconference invitation, for example :
${Organisateur} vous invite à une conférence.
Rejoindre : ${URL}
This template can be declined in several languages using the drop-down list.
⇒ Once the template has been saved, a resource named "Webex" is automatically created and displayed in the directory. This will enable users to create videoconferences automatically.
By default, the resource is not shared, users cannot link video conferences.
For users to have access, they must be assigned sharing rights to the resource. To learn more, refer to the following paragraph Grant access rights to users
Unlink a Webex installation
To disassociate a Webex server from the domain :
- go to System management > Supervised domains > choose the desired domain > Videoconferencing tab
- click on the "Delete Webex configuration" button
- validate the confirmation request
There's no need to click on the "Save" button at the bottom of the page, as your request is effective as soon as you've confirmed it.
⇒ The associated resource is automatically deleted, along with any shares granted to users; it no longer appears in entity management and users can no longer reserve it.
Content template
Content template configuration is carried out on the Webex server itself.
Accessing the videoconference
Grant access rights to users
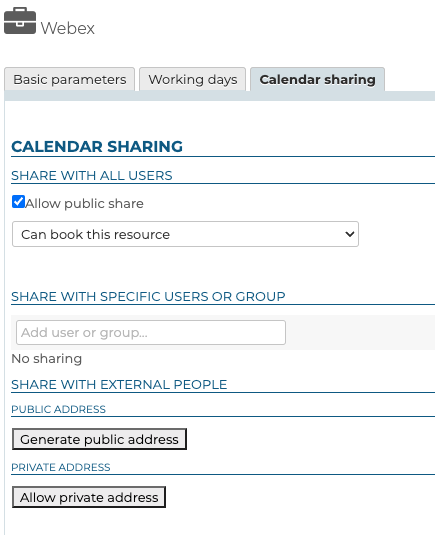
Access to the new functionality is done through the Webex resource created during the server configuration (see above) :

This resource is administered like any other resource, with share management opening up reservation rights and, de facto, the generation of videoconferencing links. Thus, reservation rights (share right "can reserve the resource" or higher) must be given to the desired users or groups so that they can create video conferences for their events :
As a resource, it can be assigned working hours or a reservation policy. However, as the link generated is unique, this will not affect the availability of the videoconference itself: the link will still be active and available outside these times.
Using the resource
As soon as users have reservation rights for the resource (see previous paragraph), a button is available in the event creation interface:
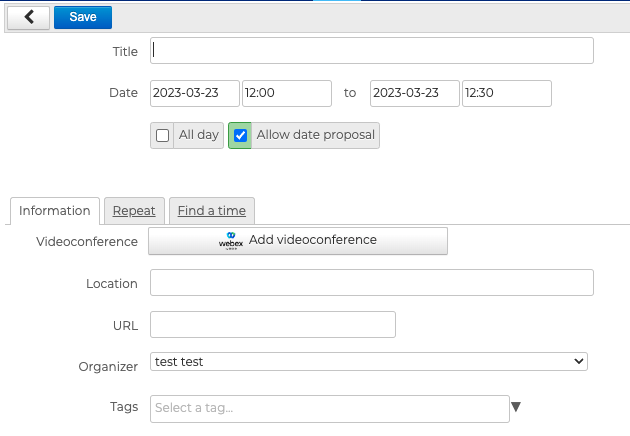
For more information on how this works, please refer to the documentation page of the user guide: Link a videoconference to an event.
Third-party applications such as Outlook or mobile apps don't display the button, but users can still reserve a videoconferencing resource by inviting it to an event in the same way as any other resource.